

Introduction: Control Structures Used in the Arduino Programming


We will provide information about the use and function of the control structure used in the Arduino programming.
More information : http://www.robimek.com/arduino-programlamada-kullanilan-kontrol-yapilari/
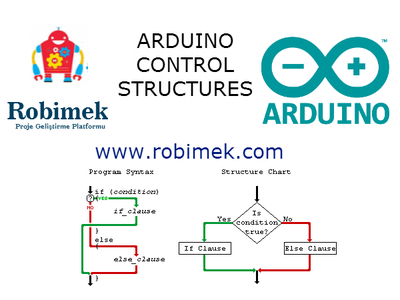
Step 1: ‘İf , Else If, Else’ Structure:
One of the foremost commonly used to compare operators.
Example:
if (x < 500)
{
digitalWrite(led, HIGH);
}
else if (x >= 1000)
{
digitalWrite(led, LOW);
}
else {
digitalWrite(led, HIGH);
delay(500);
digitalWrite(led, LOW);
}
This identification has the value of x is smaller than 500 open LED, the 1000 LED is a big turn off, and 500 greater than 500 ms in 1000 in a small LED will turn off.
Here 'if' and 'else if' same work, 'else' include statements other than statements identified the operator. So do not go into the definition range else operator.
Step 2: ‘for’ Structure:
Often used as counter increases or decreases.
After the final value fluctuates up or down to a value other than a value to operators completing the cycle.
Example:
for(int x = 1; x < 100; x = x+2)
{
println(x);
}
In this case we get a printout of all the values until the small increase to 100 by initiating more evil than 2 x value.
1,3,5,7,9,....97,99
Step 3: ‘switch Case’ Structure:
'switch' statement takes the value assigned to an object and sub phrase 'case' sends the operator.
This statement also compares the values and executes the corresponding statement. Each case statement at the end of the break command is located. This command cycle is finished. That expression written to CAS command is terminated only once working with a break statement. In this way conflicts are avoided algorithm. Finally identified in the case s algorithm is configured with the default command statements required to entering into this definition.
Example:
switch (var)
{
case ‘1’:
digitalWrite(led,HIGH);
break;
case ‘2’:
digitalWrite(led,LOW);
default:
Serial.println(“undefined phrase”); }
Step 4: ‘do While’ Structure:
Here 'while' operator, if the terms contained in the comparison statement sent to do the calculation compares the new value by building again.
Example:
do
{
delay(50);
x = readSensor();
}
while (x < 100);
In this example the value of x will be read as long as the data from the sensor under 100.
Step 5: ‘Continue’ Structure:
'Do', 'while' and 'for' we want to jump on a range of cycle we need to use this expression.
Örnek:
for (x = 0; x < 255; x ++)
{if (x > 30 && x < 110)
{
continue;
}
analogWrite(sensor, x);
delay(50);
}
In this example, the value of x is increased by a sensor that is burning from 255 to yazılmaktadır.fakat bypassing the sensor values between 30 and 110.
Step 6: ‘return’ Structure:
Finalizing the new value by calling a function returns a new function.
Example:
double constrain(double x, float a, float b)
{
if(x < a)
return a;
if(x> b)
return b;
return value;
}
Where x is a value smaller than the value to be assigned the value of x.
x b is greater than the value to be assigned the value of x.
Step 7: ‘goto’ Structure:
This structure provides a loop terminating switch to another expression.
Example:
for(val r = 0; r < 255; r++)
{
for(val g = 255; g > -1; g--)
{
for(val b = 0; b < 255; b++)
{
if (analogRead(0) > 250)
{
goto sensor;
}
}
}
}
sensor:
More information : http://www.robimek.com/arduino-programlamada-kullanilan-kontrol-yapilari/


