

Introduction: Controlling Your Arduino With HTML/Javascript the Easy Way


This tutorial shows you how to control an arduino with an ajax call back from an adafruit Huzzah using only javascript functions. Basically you can use javascript in the html page that will allow you to easily write html interfaces with simple javascript functions that utilize an ajax callback. To allow the ESP8266 to communicate with the arduino. Therefore, all of the pins can be set from a javascript function. Likewise, we can also read the value from any pin using a javascript function.
I hope that this helps to make it easier to be able to control an arduino from an html document. I figured that there are a lot of people out there who can write html. Most of whom don't want to bother trying to make a cell phone app with java or xcode or some other framework. This will make it very easy for people because all they need to do is use a javascript function to set and read values from pins. For instance, isnt it alot easier to write
<button onclick="SetPin(12, 1, 0);">Turn On</button>
In order to turn on a button. The beauty is that there is no other arduino programming involved besides to declare the pinMode(12, INPUT); In your set up function. As long as the pin is declared than javascript can be used for everything else.
<div id="return_json">
</div>
document.onload = {
GetJSON('A0', 1 'return_json')
}
This is all you need to do to get the value of analog pin 0 and return the result into the div. So this should be an easy way for people to be able to create html pages that control the arduino. As well as create an interface so that the arduino pins can be set and read with javascript.
Step 1: What You Will Need
I built this project for users who want to control their arduino with an html page on a ESP8266. The goal of this project is to create a simple method for setting the values of pins on your arduino with a javascript function. For examplate onclick="SetPin(12, 1, 0)" will set Pin 12 on your arduino to High.
For this tutorial you will need the following items in order to follow along exactly. However, I presume that it should work on most arduino and ESP8266 combinations. However, to follow along with exactly what I have here you will need the following components.
Arduino Uno - Should work with any arduino compatiable that has a serial Rx Tx
Adafruit Huzzah Breakout Board
USB To Serial Cable
4 low power LED's
Analog Turpidity testor - any analog sensor that provides analog output will do
Wire
Wifi Router
Cell Phone With Mobile Browser
Arduino Libraries.
Step 2: Preparing the Arduino ID
This project requires a new arduino libraries and some configuration and for the sake of time. I will not be putting in a sreenshot of every screen and I am just going to run through what you will need to configure this and get it running. I tried to make it as easy as possible for the user.
The code uses a number of libraries to get working. First we will focus on setting up the arduino for the ESP8266 I am using the Adafruit Huzzah in this example, because I find adafruit products to be the most reliable and have the best support. As long as you don't try to get support from the Adafruit Discord server. You will have much better luck getting help in the support forums.
Anyways, I am using the following libraries on the ESP8266
ESP8266WiFi
WiFiClient
ESP8266WebServer
ArduinoJSON
This is not a tutorial on how to download and install libraries however, these are the libraries used on the HUZZAH. So please find them and install them.
You will also need to install the board definitions for the HUZZAH so if you go to FILE> Preferences
In the box that says Additional Boards Manager URLs please add the following
http://arduino.esp8266.com/stable/package_esp8266c...
if you already have something in this field, than make sure that you add a comma in there to add an additional board url. Click ok that go
Tools>Board>Boards Manager
Than search for ESP8266 than install ESP8266 by ESP8266 Community.
Great now lets make sure we have everything we need to get the arduino code working. One the arduino Side the arduino itself only uses 2 libraries for this tutorial.
SoftwareSerial
ArduinoJSON
Which you should already have.
Step 3: Preparing the ESP8266

Now we are going to put the code onto the ESP8266 (Adafruit HUZZAH) and prepare it for connecting to the Arduino. Unzip the code for the HUZZAH and open up the sketch. On lines 11 and 12 change the ssid and password to that of your WIFI connection on your local network. You will notice that there are 2 files the sketch file and the index.h file. The index.h file is where the html is stored that will be displayed in your phone.
After you have set the correct SSID and password to your wifi you can compile the code and load it onto your ESP8266. On the HUZZAH you must hold down the Button labeled GPIO0 then click the rest button, than let go of the GPIO0 button to put the chip into bootloader mode. If the chip has been successfully put into bootloader mode a red light will turn on indicating the chip is in boot loader mode.
To connect to the ESP8266 you will need a serial cable or USB to Serial adapter, or FDTI chip . In this case I am using adafruit's cable as noted in the instructions. However, you can hook up to the chip several ways, using TTL on the Tx and Rx pins. Which I am hoping that the people viewing this know how to hook up to the chip to load the code on it. Anyhow go ahead and flash the chip with the code in the zip file that is attached to this step.
Attachments

Step 4: Preparing the Arduino
To load the code onto the arduino, change your board definition to the Arduino/Genuino Uno. Than unzip the file that is attached to this step. Than upload it onto the ardunio. Pretty simple really, all of the hard work has been done for you already. I've already gone through a trial an error process so all you have to do is upload the code.
Attachments
Step 5: Wiring Everything Together
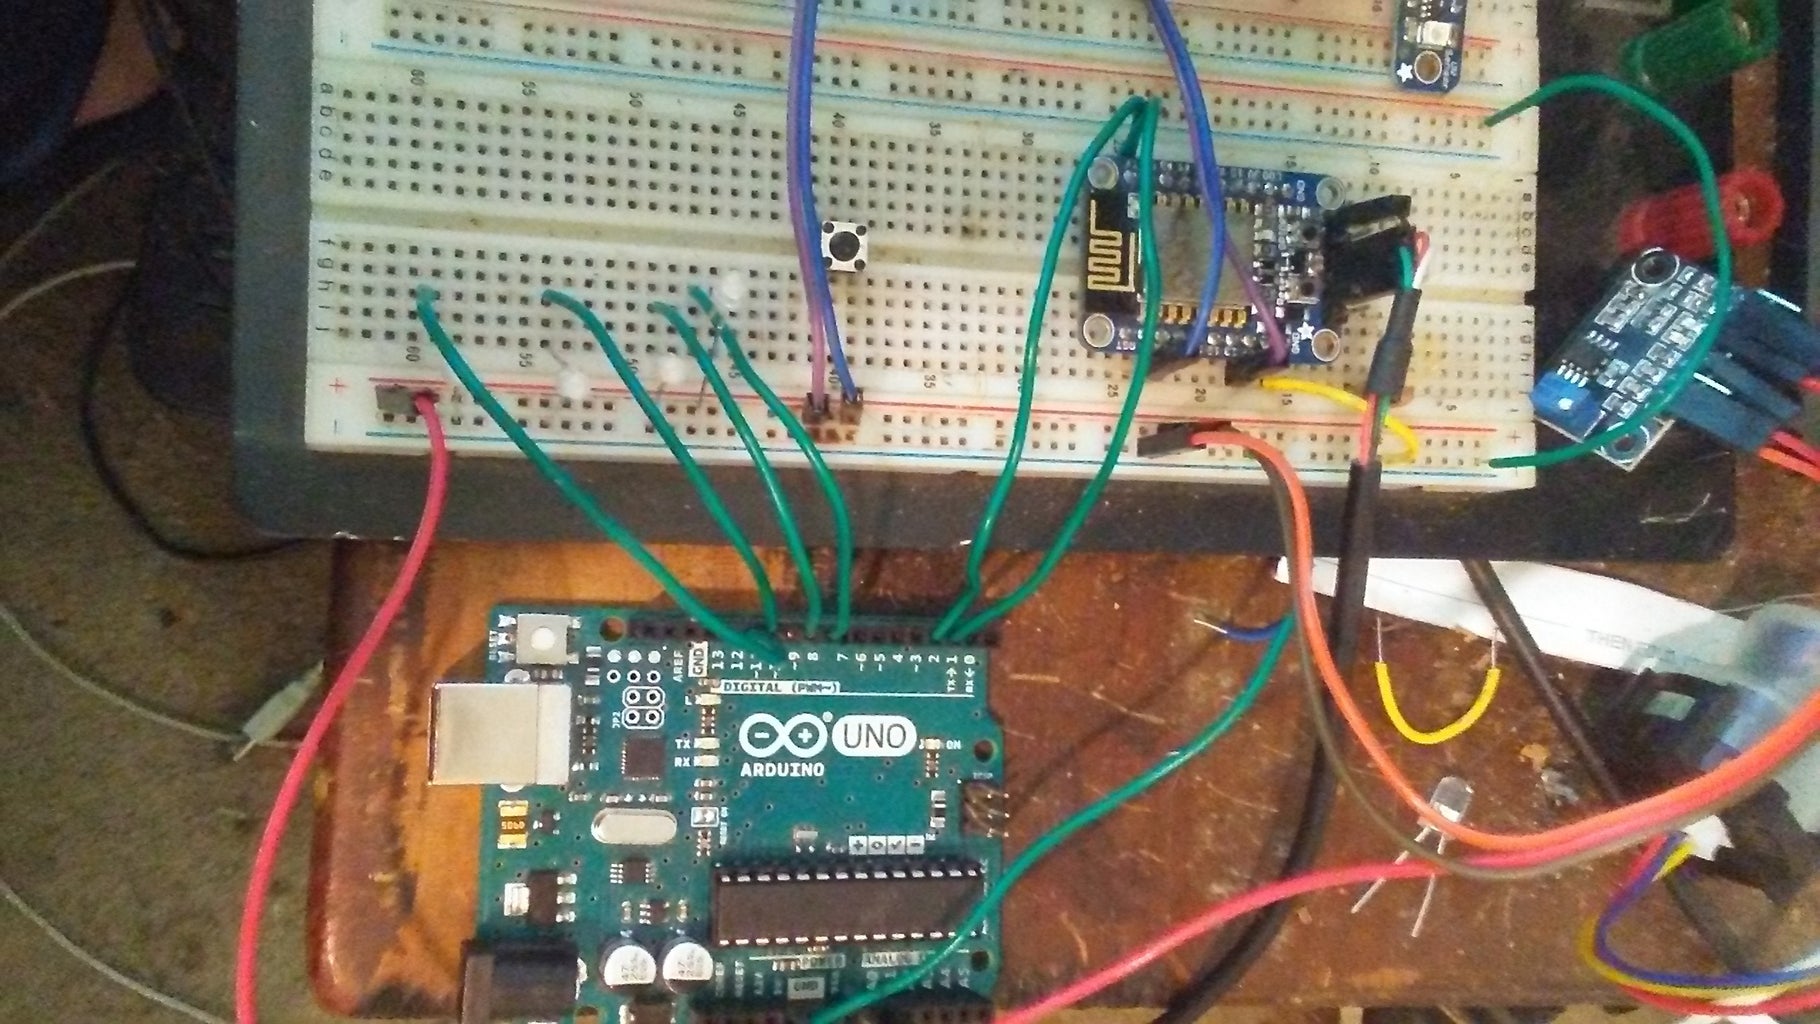
Ok so for the wiring I have a picture above of what I have here.
Connect Tx on the Huzzah to Pin 2 on the arduino.
Connect Rx on the Huzzah to Pin 3 on the arduino.
I created another serial socket on pins 2 and 3 on the arduino to free up the default Serial Console.
Connect the Pin V+ and En to 5v from the arduino. - The adafruit Huzzah has a built in voltage 3.3v regulator so plugging these pins in like this might not work with all ESP8266 modules. You may need to wire in your own voltage regulator. I recommend using the Huzzah if you just want to get the thing working easily.
Connect the GND to the GND of the arduino
On pins 12,11,9,8 on the arduino wire in your LEDs I used low powered LED's here because the ones that draw too much current may draw too much power for the sake of keeping this experiment simple.
Than on A0 analog Pin 0 on the arduino I have plugged in the output line of my Turpitity tester. However, you can plug in the output of basically any sensor that will give you an analog reading.
Thats all you need to do to wire this up.
Step 6: Accessing the Webpage
Now that you have the arduino wired up and you have everything loaded onto your boards you need to be able to view the html on your mobile phone. Now I want you to connect to the same wifi router that you set the SSID and password for in the code on the Huzzah. Than you need to figure out what IP address that your router has assigned to your device. Usually, if you log into your routers configuration there should be a client list. That shows the IP addresses of all of the devices connected to your Wifi connection.
However, if you cannot find this IP address than you can un plug it from the arduino and run it with the serial cable again. If you open up the serial console on the device it will print the IP address to the device in the serial console in case you cannot find it another way.
Anyways once you are connected to the same Wifi network with your cell phone. Than point your mobile web browser to the ip address of the Huzzah. Which probably looks something similar to this. http://192.168.0.107 or something very similar.
There I put in a basic page that will allow you to turn on and off the 4 Leds as well as read the value of the analog sensor.
Step 7: Using Javascipt
In the file called index.h in the ESP8266Code sketch it should come up as a seperate tab in the arduino editor. You can see the basic example that I made here. Basically the way it works is like this.
SetPin(12,1,0); SetPin({Pin Number}, {Value 1 High 0 Low}, {IsAnalog 1 Yes 0 No})
This will set the value of digital pin 12 to high
SetPin(4,0,0);
This will set the value of digital pin 4 to low
SetPin(A2, 439, 1)
This will set the value of Analog Pin 2 to 439
Likewise, the function GetJSON will return a requested value from a pin and place it into an html elemted with the specified div Id.
GetJSON('A0', 1, 'resp_i') GetJSON({Pin Number}, {IsAnalog 1 Yes 0 No}, {Id Of HTML Element to return result})
This will send a request to the arduino asking it for the value of analog pin 0 and to return the result into Div with ID resp_i
GetJSON(12, 0, 'mydiv');
This will ask the arduino to get the value of digital pin 0 and return the result into an html element with and Id of mydiv
Step 8: Support
I hope my script helps those of you who want to use it. I used a very basic html example here with the hope that other people will explore all the capabilities of it that I cannot. However, this should demonstrate how ajax can be used to control an arduino without html page loads and things of that nature.
If you have any comments please feel free to ask me I will do the best I can to answer. I would like to expand the functionality of this some more, but I ran out of time and money. However, I am working on a more robust implementation of this, that stores the files on a regular webserver rather than on the ESP8266.
Thank you for taking the time to see my code.
John Anderson
Email Me
Vermont Internet Design LLC


