

Introduction: Count and Measure Objects Using Arduino and Potentiometer or a Ultrasonic Sensor on a Production Conveyor


This instructable explains how to use a potentiometer and an ultrasonic sensor with arduino to count/measure/log different objects on a conveyor. There will also be some LED's which will flash with different speed and a different number of times.
The instrucable will cover the physical setup and the program in arduino.
There will NOT be any information about how to build the lasercutted conveyor powered by a stepper motor.
Step 1: Step 1: Partlist
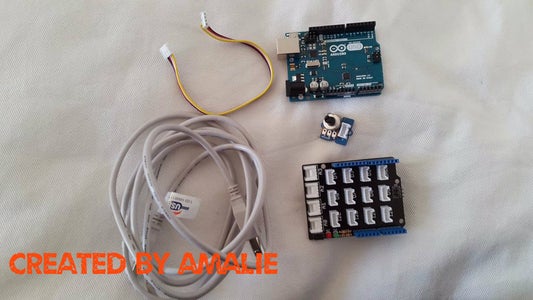

- Computer with Arduino IDE installed. (Here is the address for the program: https://www.arduino.cc/en/Main/Software)
- Arduino UNO board
- Base shield
- Potentiometer
- USB cable type A/B
- Universal 4 pin Grove Cable
- SR04 Ultrasonic Sensor
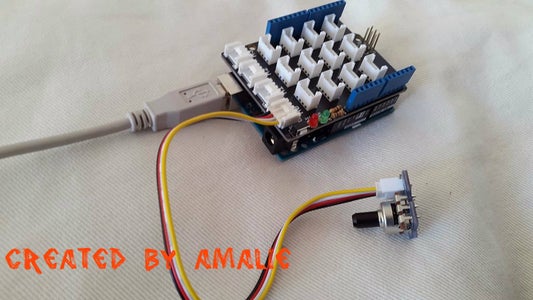
Step 2: Step 2: Connecting Base Shield and Potentiometer to Your Arduino Board
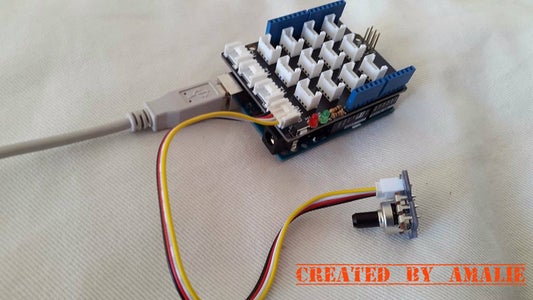
Connect your base shield to your arduino board, then use the Universal 4 pin grove cable to connect the potentiometer to your base shield in pin A0.
Use the USB A/B cable to connect the arduino board to your computer.
Step 3: Step 3: Write Your Code – or Download It From Here

When you have uploaded the code to your arduino you should see a screen similar to the pictuer, when opening the serial monitor and a LED on the arduino board will flash with different speed, depending one how much or little you turn the potentiometer.
Attachments

Step 4: Step 4: Connecting the Ultrasonic Sensor and the 4 LED's to Your Arduino Board

Use the Universal 4 pin grove cable to connect the ultrasonic sensor to your arduino board in pin D7, attach some resistances on your LED's, put LED's together and then connect them to your arduino board in respectively pin 8, 4, 10 and 13
Use the USB A/B cable to connect the arduino board to your computer.
The distance between the sensor and the floor is 128 mm.
Step 5: Step 5: Then Again Write Your Code – or Download It From Here.

When you have uploaded the code to your Arduino you should see a sceen similar to the picture, when opening the serial monitor. The LEDs will flash differently depending on which object pass the ultrasonic sensor.
You can edit the intervals in the if-statement to match the objects you want to count. In the example the height of the objects is 40 mm, 53 mm and 72 mm.
Due to an error at the conveyor belt in the video, I had to push the objects by hand, to exemplify the process.
//Best wishes Amalie Secher Rusbjerg


