

Introduction: Crystal Plate and Stained Glass Hanging


Do you have that crystal plate that you picked up at a thrift store, garage sale or was handed down to you? You don’t really have a use or place for it but it’s too beautiful to get rid of. Here’s a project that will help you appreciate that plate every day.
Supplies
- Glass or Crystal Plate or Bowl
- Stained Glass
- Glass Globs
- Rubbing Alcohol
- Copper Foil – Silver Backed- 7/32”
- Flux
- Solder - 60/40
- Bead Chain
- Wire - 18 Gauge
- Baking Powder
- Dish Soap
- Car Wax
- Chain
Tools:
- Glass Cutter
- Sharpie Black
- Running Pliers
- Grozing Pliers
- Glass Grinder
- Foiler (Optional)
- Popsicle stick
- Soldering Iron
- Flux Brush
- Push Pins
- Wire Cutters
- Pliers
Step 1: Make Pattern


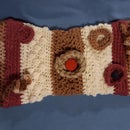
Trace around plate. I decided to use facets of the plate for creating the design on the outside of the plate. Since the plate repeated its design 8 times, I divided the circle into eighths and repeated my design also.
Step 2: Cut Glass


I chose a textured clear and translucent blue for my design, I can place the pattern under the glass and see the lines of the pieces through the glass to use as a guide for scoring with the glass cutter. I use the grozing pliers to break the glass apart.
Step 3: Grinding Glass


I’ll grind down the edges of the glass to remove shards and fit pieces closely together. This also helps the copper foil to adhere better. I also grind around edges of glass globs.
Step 4: Foil & Burnish


Wipe down each piece of glass, globs and plate with rubbing alcohol to clean so foil sticks better. I use a foiler for applying the copper foil or you can do it by hand. I'm using silver backed copper foil since I’m going to leave the solder silver and with the clear glass you will be able to see the backside of the copper foil through the glass. The foil then needs to be burnished down. I’ve tried special tools for this but found for myself, using a popsicle stick works the best. First burnish down edges and then burnish down the foil on each side of glass, being careful at corners to try to press down one side first and then press other side of corner over that. Plate and globs edges must be done by hand.
Step 5: Layout Design

I decided to place the textured side of the glass on the same side as the cut side of the plate, so I have to solder the backside first so that it lays flat. Place plate down and fit all pieces around it. Pin around the outer edge of design to hold pieces tightly together. I placed the globs in place for laying out design but I want the flat side even with bottom so I won’t solder them in place yet.
Step 6: Solder


Brush copper foil with flux to clean and spot solder to hold pieces together. Remove pins, I also removed globs. Flux copper foil thoroughly and solder making a nice rounded bead. I placed ball chain around the edges for decoration, flux and solder. I then placed some cardboard under the stained glass part to build it high enough for the flat side of the globs to be even with the backside. Solder globs in place. Flip the piece over, flux and solder this side Layer cardboard under edge till ball chain rests evenly on cardboard, flux and solder this side of bead chain.
Step 7: Hangers


You can use just one piece of wire or twist two pieces together to make the hangers more decorative. To twist, cut around 30” piece of wire, fold in half, put cut ends in vise and other end in drill. Run drill till happy with how twisted it is. Form circle around a round object such as dowel about 1/12 inches from end. Cut other side to about 1 1/2 inches. Adjust legs so they coincide with shape of solder lines. Make another hanger same way. Place over seams and solder in place.
Step 8: Clean & Wax


Sprinkle some baking soda on piece and rub into solder seams to neutralize flux. Rinse and then use scrub brush and dish soap to clean more thoroughly. Dry. Use car wax as directed.
Step 9: Attach Chain


Decide length of chain depending on where you will hang it. Open ends of chain with pliers to fit over the wire of hanger. Close ends back up.
Step 10: Hanging

I would recommend using a screw ring in frame of window to hang because of weight of crystal. The sun shining through the texture and cut crystal will be sure to brighten any day.

Participated in the
Trash to Treasure Contest


