

Introduction: Cyclops (X-Men) Dodocase VR Cardboard Mod


For this Build Night project, We've modified a Dodocase Virtual Reality Cardboard Toolkit to be a little snazzier. We spiffed it up to look like the classic visor worn by Cyclops from the X-Men. Should you be so inclined, you can do so as well. You'll need:
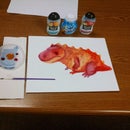
Materials
- Foam board
- Plastic sheet - you can use store-bought craft styrene, or use recycled plastic from all kinds of different things.
- Yellow or Gold paint.
- a Dodocase VR Cardboard Toolkit
Tools
- Glue (We used a hot glue gun, but other kinds of glue should work as well).
- Hobby knife
- Masking tape (optional)
Lets get started!
Step 1: Build the Frame


Using the fully assembled Dodocase, we traced the outline of the box and drew out the overall profile of finished piece. After that, we cut the pattern out and made a few copies and then did a test fit on the case. These helped shape the plastic, and supported the plastic after it was completed. While you could hot glue these into place now, we waited to do a test fit of everything.
Step 2: Cut and Shape the Plastic


For our plastic, we used some styrene from old retail store signage. You can get comparable quality from garage sale signs at the hardware store, or use recycled plastic from bottles, containers, packaging, or anything else.
The width was measured against the case itself, and then we bent it by hand along the contour to get the length. After cutting the plastic to size, we cut out the band that runs through the center of the visor.
With the plastic cut, it was centered on the Dodocase frame, and we used a heat gun to form the plastic to the contours. Once the initial arc was set, some masking tape held the sides in place so they could be formed too. When the plastic cooled, it held the new shape.
Step 3: Side Pieces


The classic Cyclops visor has round hubs on the temples that he taps to unleash his optic blasts. This is an iconic detail that can't be missed. We cut a few round pieces of plastic out with a hobby knife and hot glued them together. Some sanding afterword cleaned up the edges that were uneven from the cutting.
Step 4: Extend the Magnetic Slider


The Dodocase has a sliding magnet that is used to control the app, since your phone will be entombed in the case while you are using it. To allow access to this functionality, we had to extend the magnet by creating a plastic piece that fit in the hole in the center of the magnet. We created two interlocking pieces that, when assembled, fit nicely in the gap. A dowel of the correct diameter, or some pipe or tubing would also work.
Step 5: The Ruby Quartz Lens


The visor Cyclops uses is outfitted with a ruby quartz lens that restrains the awesome power of his optic blasts. Having no access to ruby quartz, we opted to simply 3D print a thin rectangle of translucent red filament to be fitted inside the visor. We have access to a 3D printer, but your certainly don't need one. Any red plastic you have will work fine. If you don't have any, you could always paint some plastic of another color. If you plan to go super fancy and build in some LED lights, go for translucent for cool effect.
Our rectangle was big enough that there was a lip on all sides to glue it into the visor. We heat formed it to match the inside contour of the plastic piece we shaped earlier. We did so using the curved cutouts from our supports. The holes they left in the foam board match the contour exactly, and we didn't have to worry about heating against another plastic piece that would then lose its shape. Those pieces effectively gave us the negative of the supports that were used as a positive.
Once the red plastic was successfully shaped, we glued it into place inside the visor.
Step 6: Painting


We chose to glue the red plastic, then mask it off with masking tape before painting. This was done to prevent cracking and scratching, which likely would have occurred if we had painted and then glued in the red piece. You could, however, paint then glue, if you so choose.
Here we masked off the red, and hit the whole visor, including the round temple pieces, with a few coats of yellow paint. We hand-painted with acrylic, because it's what we had in our space. If you have access to spray paint, you'll get a better result, with a smoother and more even coat. Also, you won't get the ugly brushstrokes. Just remember to do several light coats to avoid runs. Also, a paint designed specifically for plastics will help achieve a better result.
Step 7: Assemble!


When the paint dried, we pulled the masking tape off, did a test fit to make sure everything looked good, and then it was hot glue time.
We first glued the supports directly to the Dodocase. Our supports were cut as single pieces originally, but when glue time was upon us, we removed the front from the sides and glued each piece separately. Otherwise, the case wouldn't open. Once all the pieces were glued in place, we glued the visor to the supports. Notice the phone slot is still accessible.
Step 8: Finish the Magnet Extension.


As a cool coincidence, the magnet falls about where the temple piece should, so when you move it, you look like Cyclops unleashing the fury. For the side that has the magnet, we cut a hole to accommodate the magnet extension. We then glued the extension to the magnet, as well as the temple piece. At this point, with that in place, we matched the placement of the temple piece on the other side, and glued that one directly to the visor.
Step 9: Behold!


The finished product!
The functionality of the case isn't impaired, and looks a little more exciting now. As a cool bonus, using a flashlight app on the phone that was used with the case, we got a cool glow reminiscent of old Slim himself. Now we just need someone to make a first-person X-men VR game.
Thanks for checking o


