

Introduction: DIY Autorange Arduino Ohmmeter


This is a simple auto ranging ohmmeter using arduino. The measured resistance is displayed using a 16×2 LCD display. The device is sufficiently accurate and uses minimum number of external components .
Step 1: Building Device


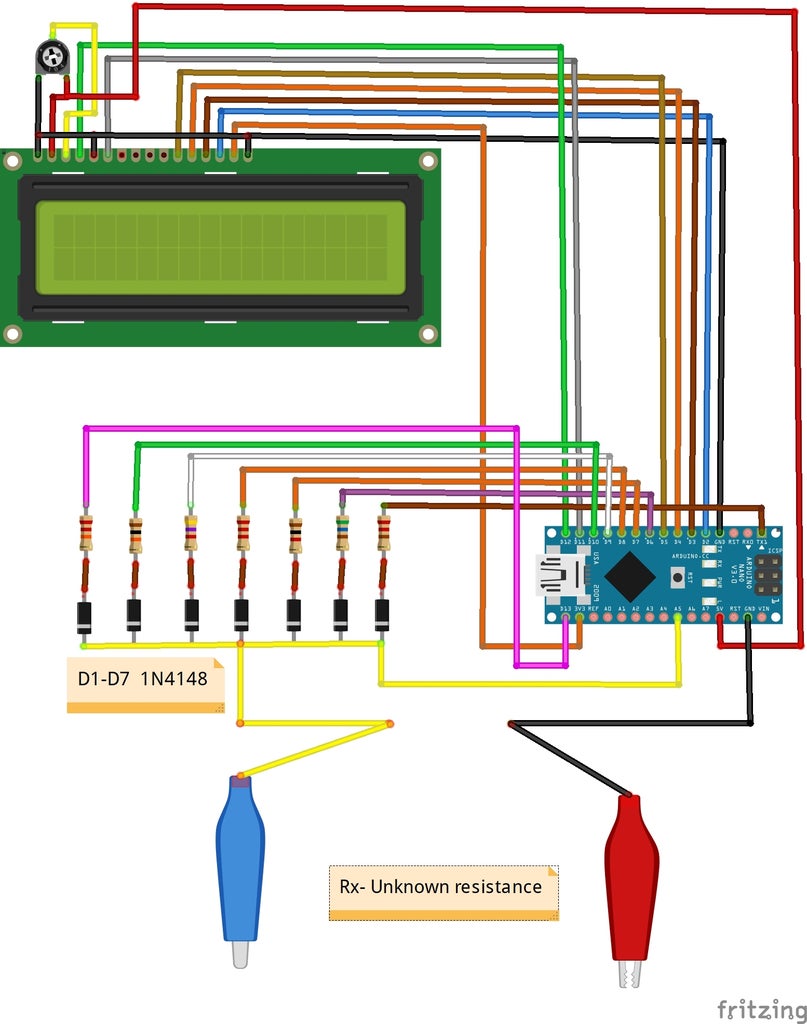
Easy way to measure an unknown resistance is to use a voltage divider. You apply a known voltage across two series resistors, one known, one unknown, and measure the voltage at the junction. The current through two resistors will be equal.The voltage across the unknown resistance is measured using the ADC of the arduino(A5) . With Ohm's law we can easy calculate value of unknown resistor.
Step 2: Autoranging

The idea for the project as well as the code are taken from the circuitstoday website, where there are more detailed explanations about the operation and mathematical calculations.
What we need here is a scheme for estimating the value of Rx roughly and then putting a matching resistor in place of R1 and this method is called auto ranging. The circuit given demonstrates auto ranging.
Step 3: Schematic and Code
The accuracy of the instrument is the largest in the range from 10 Ohm to 100 KOhms and is about +/- 5% which is a good result, considering that the device is relatively simple to build. It is desirable to supply the instrument from a stable source for maximum accuracy.


Participated in the
Arduino Contest 2020


