

Introduction: DIY Headboard From Reclaimed Door


Would you believe that you could make something beautiful from someone's trash? That’s right. I found this solid door on my way home from work one day on the side of the road being discarded. At the time I didn’t know what I was going to do with it. But I’ve watched enough DIY on YouTube, seen all the episodes of Fixer Upper, and I am quite familiar with Jay Bates’ “trash to treasure” series. With supreme salvage ninja skills, I threw it in the back of my truck, squealed off and took it to my shop. And there it sat in the workshop for a few weeks collecting dust…
Well, you see my girls are getting older and we coaxed them into giving up their playroom and converting it into a proper guest room. Bingo. Time to turn this old door into something beautiful.
We bought a bed and decided that we’d use the door for the headboard. I
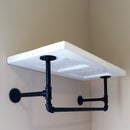
measured the new bed and decided to cut the door down to size to fit the bed. This cutoff provided the needed material to build this shelf to finish out the feng shui.
Step 1: Cut Door to Size.

I chose 56 3/4” for a full size bed. I based this off the size of the bed vs the symmetry of the door panels and tried to center the door knob hole in the middle. I tried to leave equal amounts of spacing on either side of the four panels. The Kreg Rip Cuts jig made cutting the door easy.
Step 2: Wash Door.

Wash door with soap and water and let it dry.
Step 3: Attach 1x4, Molding and Caulk.

Glue and pin nail a piece of 1x4 to top of the headboard. I cut this
one to 60 ¼” to leave equal amounts of overhang on each side.
Glue and pin nail a piece of trim or chair-rail molding that you like. I bought this piece at the local big box store.
Caulk the spaces between the 1x4, trim, and headboard.
Step 4: Fill Holes and Sand Everything.

Fill all holes and voids with your choice of filler (caulk, wood filler, or drywall spackling). I tried all three and my favorite was the drywall spackling. It is easily sanded and painted over. Sand everything up to 220 grit.
Step 5: Paint Desired Color.

I started with spray primer. Let it dry. Then I used two coats of latex paint. Make sure that you use a bonding primer. I had trouble with the latex paint sticking to the door. The bonding primer will stick to anything (speaking from experience). You can also apply some kind of polyurethane or lacquer to protect it. Smarter people recommend specific times between sanding and coats. I winged it :).
Step 6: Hang on the Wall.


You could use any sort of wall anchor. I have used DIY plywood French cleats on previous projects, but decided I wanted there to be minimal space between the wall and the headboard. Therefore, I bought this French cleat system from Amazon. Recommend having help with hanging the door.
Step 7: Sit Back, Relax and Enjoy Your Hard Work.

Thanks for reading. If you have any questions, feel free to contact me.

Participated in the
Trash to Treasure Challenge

Participated in the
DIY Summer Camp Challenge


