

Introduction: DIY Photo Frame With Arduino


Dear friends welcome to another Instructable! This is Nick from educ8s.tv and today we are going to build this small but impressive digital photo frame using an Arduino.
I am using the 1.8" color ST7735 TFT display a lot. The reason for that is that this display is very easy to use, it costs less than $5 and it offers color! At the back, the display has an SD card slot, so I thought that we have to learn how to use that as well. As it turned out, it is really easy to use the SD card slot on the display! That makes this display even better.
The project that we are going to build today is this. A simple photo frame which loads images from the SD card. I have placed some .bmp images on the SD card and the project loads them and displays them at the display in full color! As you can see the speed of the project is very high if we take into consideration that the brains of this project are the old and slow Arduino Nano. In my opinion, this is really impressive. But let’s now see how to build this project.
Step 1: Get All the Parts

The parts needed in order to build this project are these:
- An Arduino Nano ▶ http://educ8s.tv/part/ArduinoNano
- A 1.8” ST7735 Display ▶ http://educ8s.tv/part/7735
- A small breadboard ▶ http://educ8s.tv/part/SmallBreadboard
- Some wires ▶ http://educ8s.tv/part/JumperWires
- An SD card
Optional Parts:
Powerbank ▶ http://educ8s.tv/part/Powerbank
The cost of the project is around $15 but I am sure you already have some of these parts available so you can build this project with even less money. You can find a link to all the parts in the description of the video. Let’s see how to build this project.
Step 2: The 1.8" ST7735 Color TFT

First of all the ST7735 Color TFT display is a very inexpensive display. It costs around $5, and it has a great library support. I have used it many of my projects, and I think it is great!
Furthermore, the display offers a resolution of 160×128 pixels, and it can display 65.000 colors. It uses the SPI interface to communicate with the Arduino boards. In addition to that, it works well with all the available Arduino boards, like the Arduino Uno, the Arduino Mega, and the Arduino Due. It also works fine with ESP8266 based boards, like the Wemos D1 and the Wemos D1 mini board.
Also, the power consumption of the board is around 50mA of current which is not bad in my opinion. We can easily use this board to build battery-powered projects that don’t need to be on all the time. In conclusion, this is one of the best Arduino displays if you need color and low cost.
I have prepared a detailed tutorial about the 1.8″ ST7735 Color TFT display. I have attached the video on to this step.
Step 3:


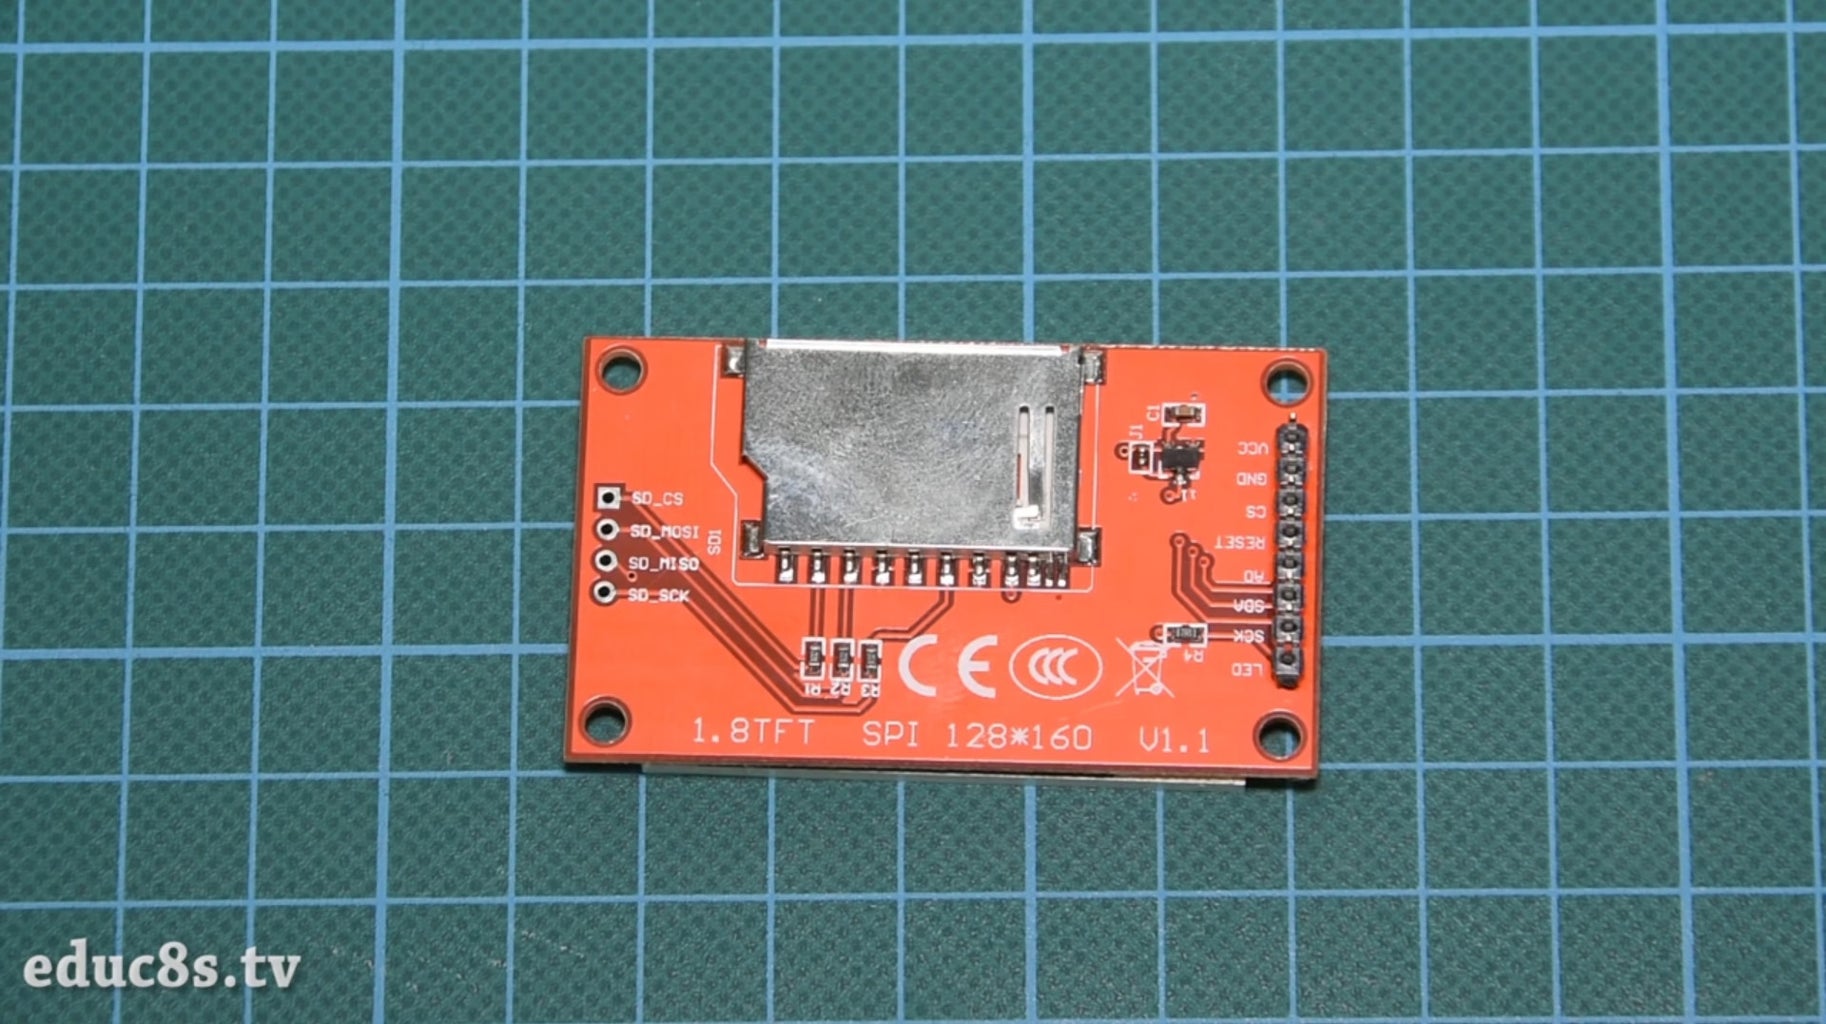
In order to use the SD card slot with Arduino, we need to connect the 4 top pins of the display with Arduino.
I have soldered some female header pins to them and we are ready to connect them. The SD card module uses the SPI protocol in order to communicate with Arduino. So we have to use the hardware SPI pin of the Arduino Nano.
Display SD Card Pins - Arduino pins
SD_CS ▶ Digital Pin 4
SD_MOSI ▶ Digital Pin 11
SD_MISO ▶ Digital Pin 12
SD_SCK ▶ Digital Pin 13
Now we are ready to connect the bottom pins of the display. In order to see how to connect the display check the video tutorial, I have attached to the previous step. Both the display and the SD card module are use the SPI pins so on some Arduino SPI pins we have connected two wires!
Display Bottom Pins - Arduino pins
Arduino LED ▶ 3.3V
CSK ▶ D13
SDA ▶ D11
A0 ▶ D9
RESET ▶ D8
CS ▶ D10
GND ▶ GND
VCC ▶ 5V
OK, now we are ready to power up the project. As you can see, everything is working as expected and the images are displayed on the screen one after another.
Step 4:


Let’s now see the software side of the project.
In order to achieve this result, we have to use Adafruit’s libraries for the ST7735 display. We also need the Adafruit GFX library. Adafruit has made an amazing job with the library for the ST7735.
ST7735 Library: https://github.com/adafruit/Adafruit-ST7735-Library
GFX Library: https://github.com/adafruit/Adafruit-GFX-Library
The spitftbitmap example loads an image from the SD card and displays it on the display. I slightly modified that code in order to loop forever, load more images and use the landscape orientation of the display.
void loop() {
bmpDraw("logo.bmp", 0, 0); delay(3000); bmpDraw("mezapos.bmp",0,0); delay(3000); bmpDraw("sparti.bmp",0,0); delay(3000); bmpDraw("mani.bmp",0,0); delay(3000); bmpDraw("lisbon.bmp",0,0); delay(3000);
}
As always you can find the code of the project attached to this step.
With the bmpDraw function that the example offers we can easily load and display bitmap graphics in our projects! You have to be sure though, that your bitmaps have the correct format.
In order to convert the images to correct format for this project, I used the Paint.net free software for windows. I loaded my images and then I resized in the correct resolution for the display which is 160x128 pixels. Then I saved the images as .bmp files with a bit depth of 24bits. That’s it, all we have to do now is to save them to the SD card and call the command bmpDraw with the name of the file.
Step 5:

As you can see, we very quickly build exciting projects using Arduino. This display has become my favorite because it is so easy to use and offers so much for such a low price. Its library support is excellent, so I am going to use it even more shortly. I am going to prepare another tutorial about this display soon, to see how to load graphics, and how to draw simple shapes.
I would love to hear your opinion about this display. Do you use it in your projects? If so, do you have any tricks to share with us? Please post your comments in the comments section below. Thanks!


