

Introduction: DIY Vending Machine Using Arduino & 1Sheeld
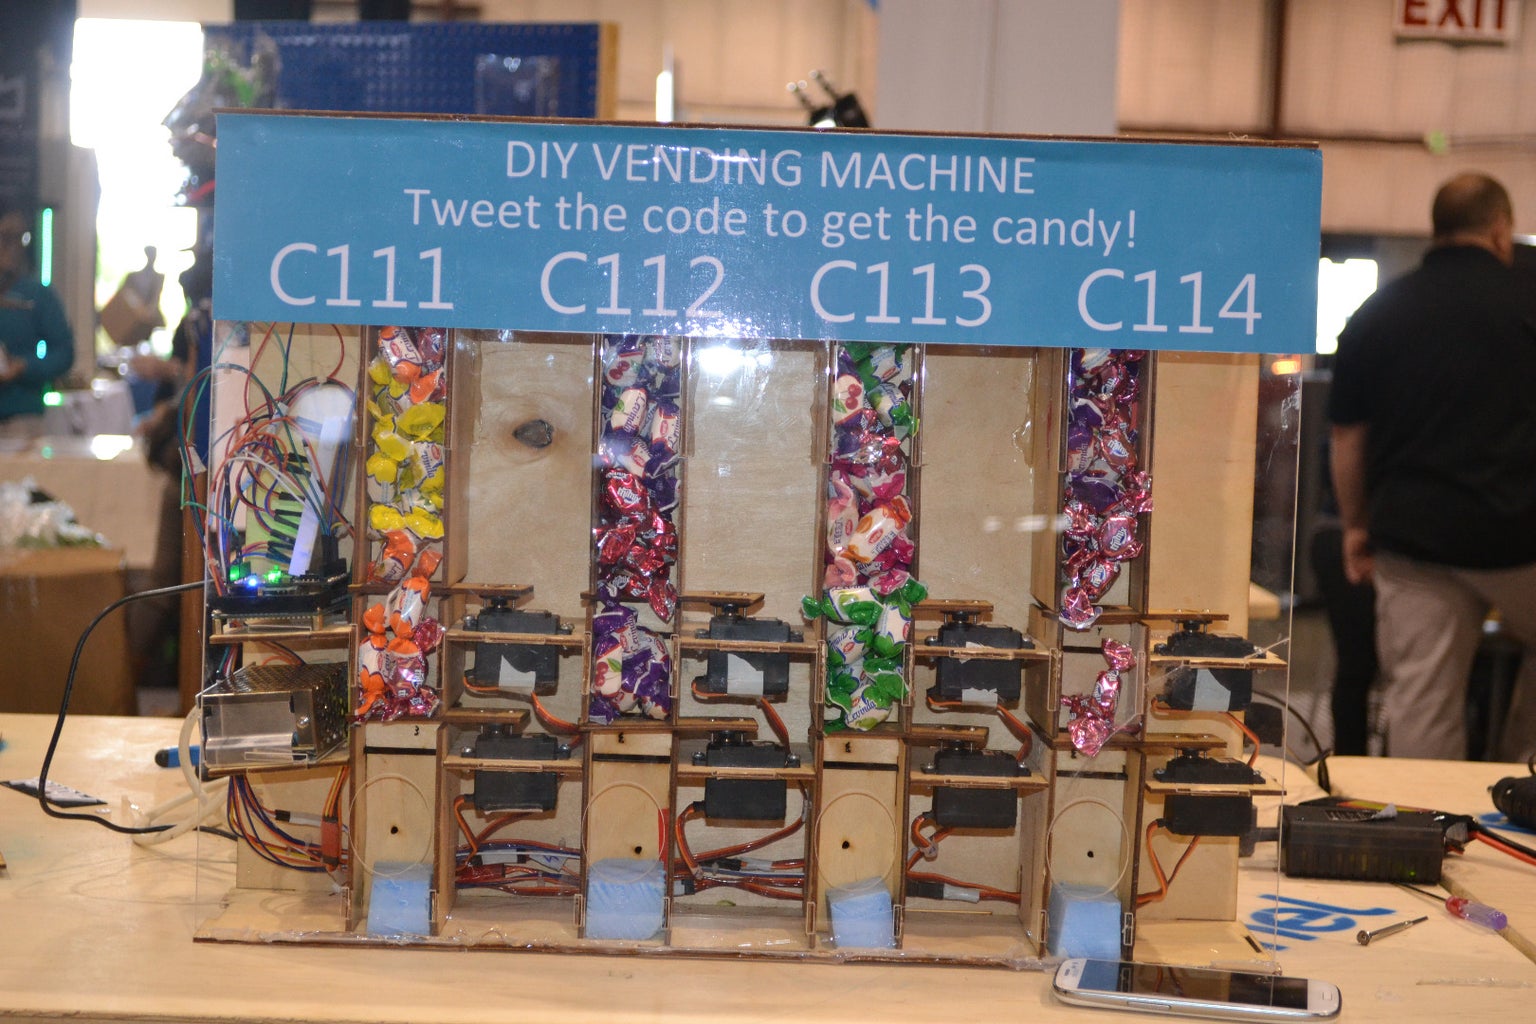


Simply the machine has four types of candies and each type has it's special code, you should tweet with this special code to get your candy.
Actually we participated with this project at Bay Area Maker Faire last week and I intend to continue my last journey to inspire kids to use modern technologies to create their own toys instead of wasting a lot of time in playing with smart phones or PCs.
Return back to the machine,
If you would like to get a candy from the first flavor you should write C111 between your tweet.
If you would like to get a candy from the second flavor you should write C112 between your tweet.
If you would like to get a candy from the third flavor you should write C113 between your tweet.
If you would like to get a candy from the fourth flavor you should write C114 between your tweet.
That's all :)
Step 1: What Will You Need!

So here is the list of things you need for this project.
Tools:
1. Screwdrivers
2. Pliers
3. Flush cutter
4. Digital Multimeter
5. Double Sided Glue Tape.
6. Copper Spacers (6mm Male - Female)
7. Duct Tape
Materials:
1. Acrylic Sheets 3mm
2. Plywood Sheets 3mm
3. Screws & Nuts
Mechanism components:
1. 8 x Standard Metal Servo Motor (7.5 kg.cm)
2. Bolt M4 x 10mm
Electronics components:
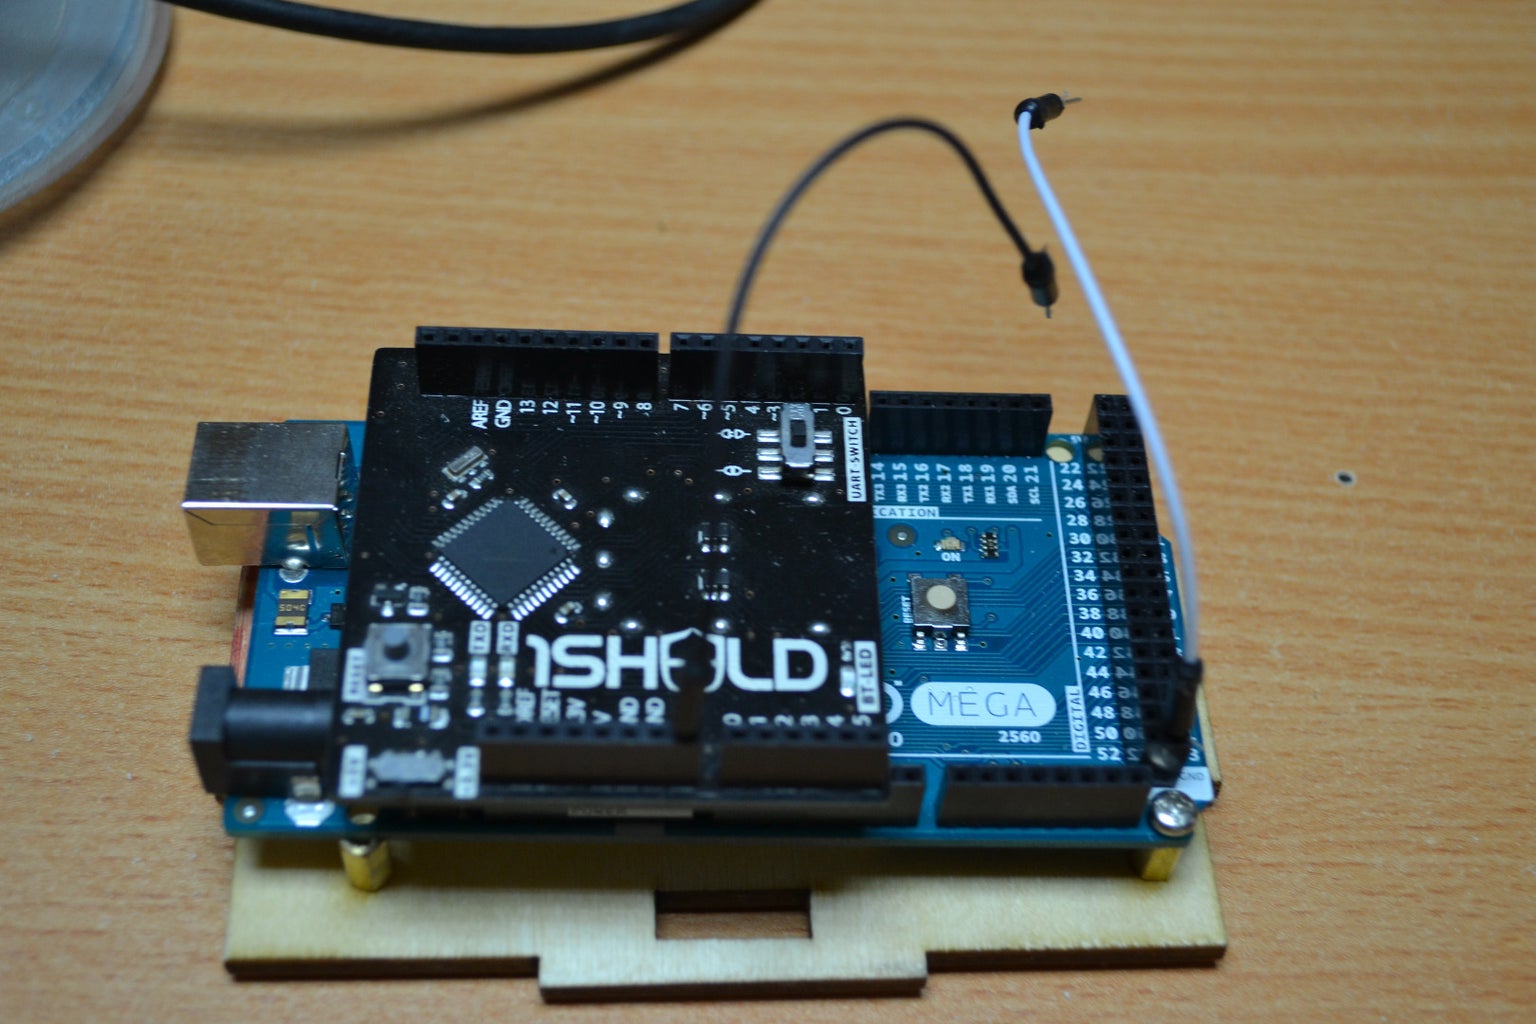
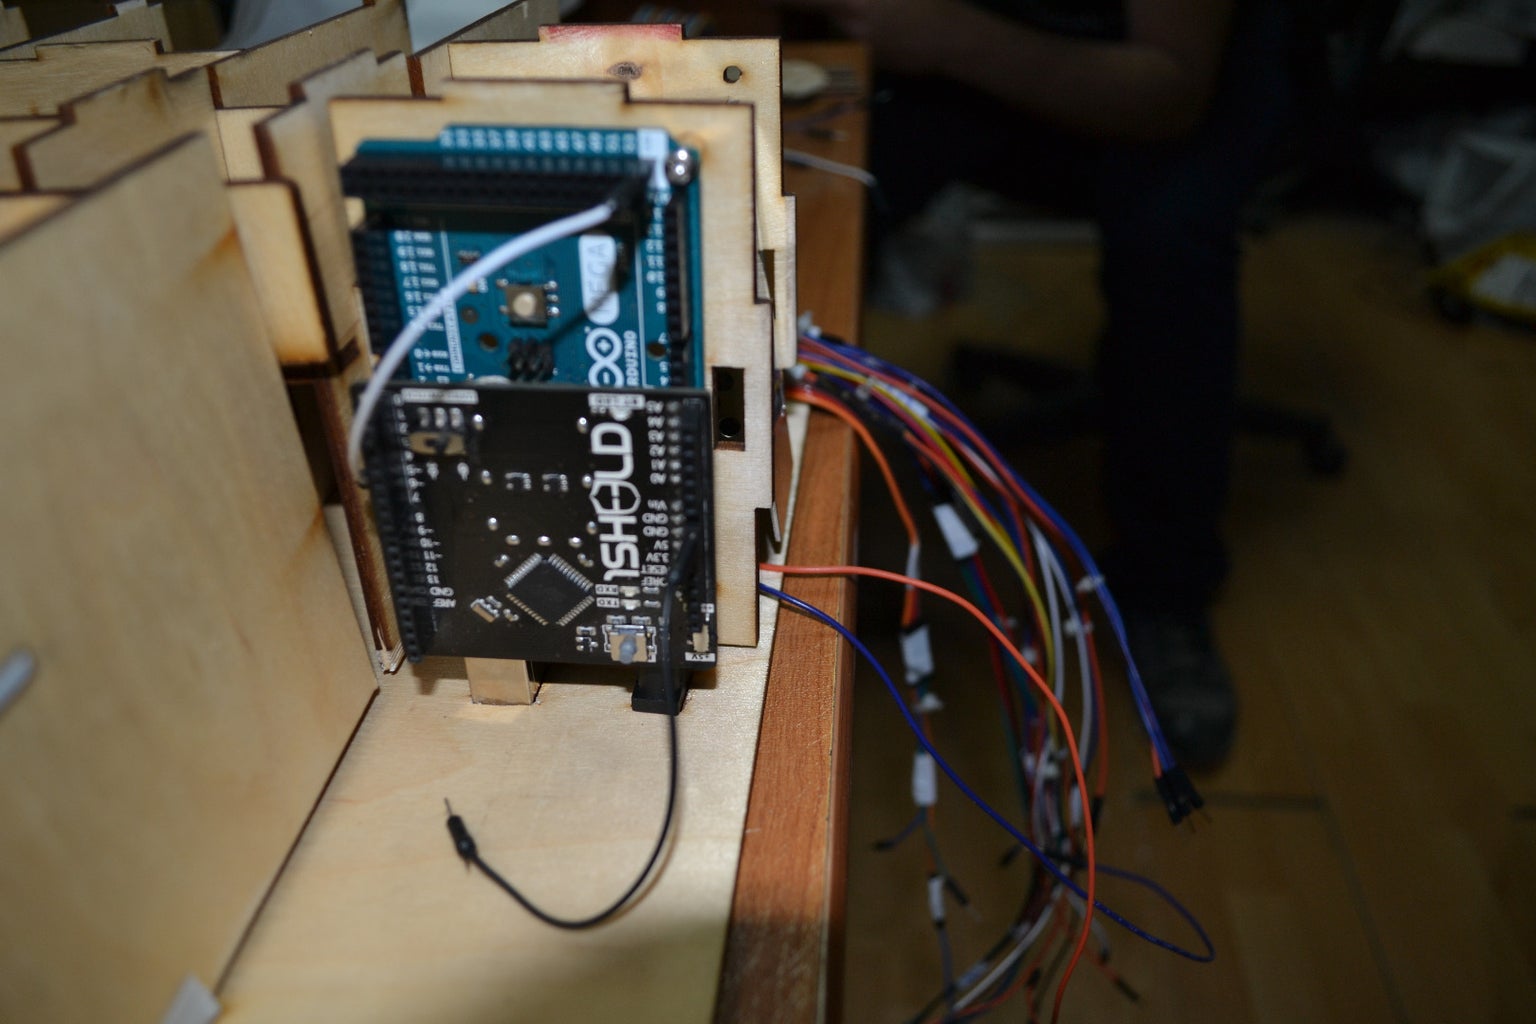
1. Arduino MEGA 2560
2. 1Sheeld
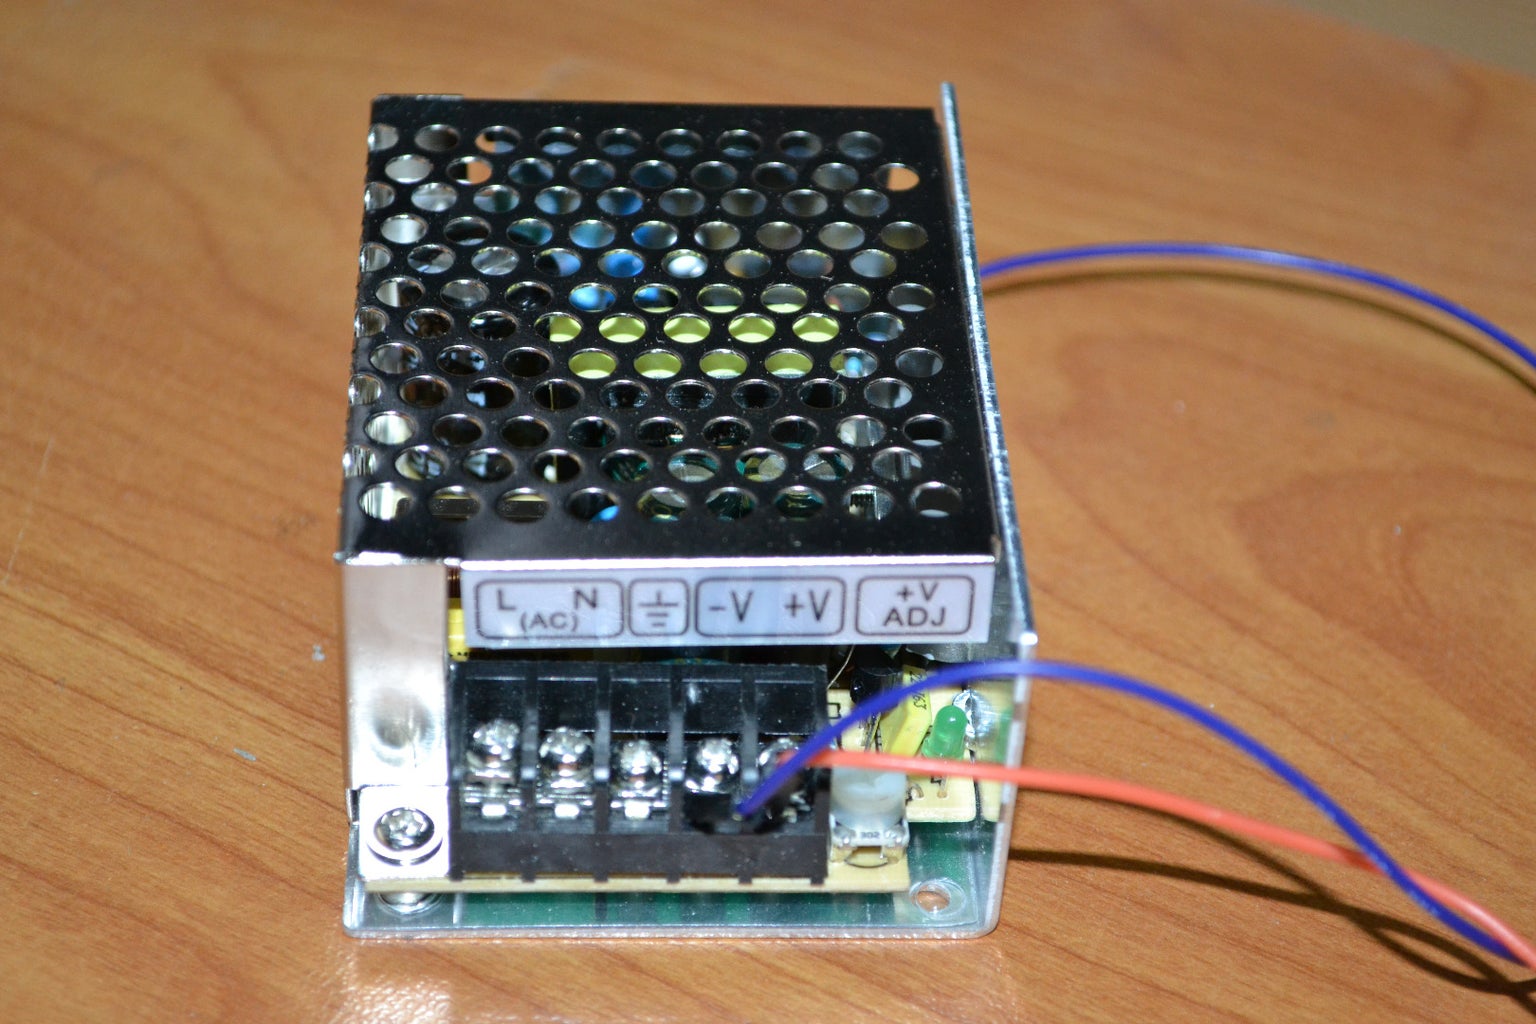
3. SMPS (5V - 5A)
4. Small Breadboard
5. Jumper Wires (Male - Male)
6. Jumper Wires (Male - Female)
Step 2: Mechanism & Frame Design


It all started with a proper design, in my case a few sketches to get a
good feeling for the dimensions and shape. Quickly after the sketching phase came the CAD model. I created my model in SolidWorks. After all the parts were modeled, technical drawings were made. I used these drawings to machine all of the custom parts on the laser cutter.
Since I intend to take this machine with me in a lot of events around the world i designed it to be easy to be disassembled and installed so i used screws and nuts, Martise and Tenon to fix all it's parts.
Step 3: Mechanism & Frame (Fabrication and Assembly)


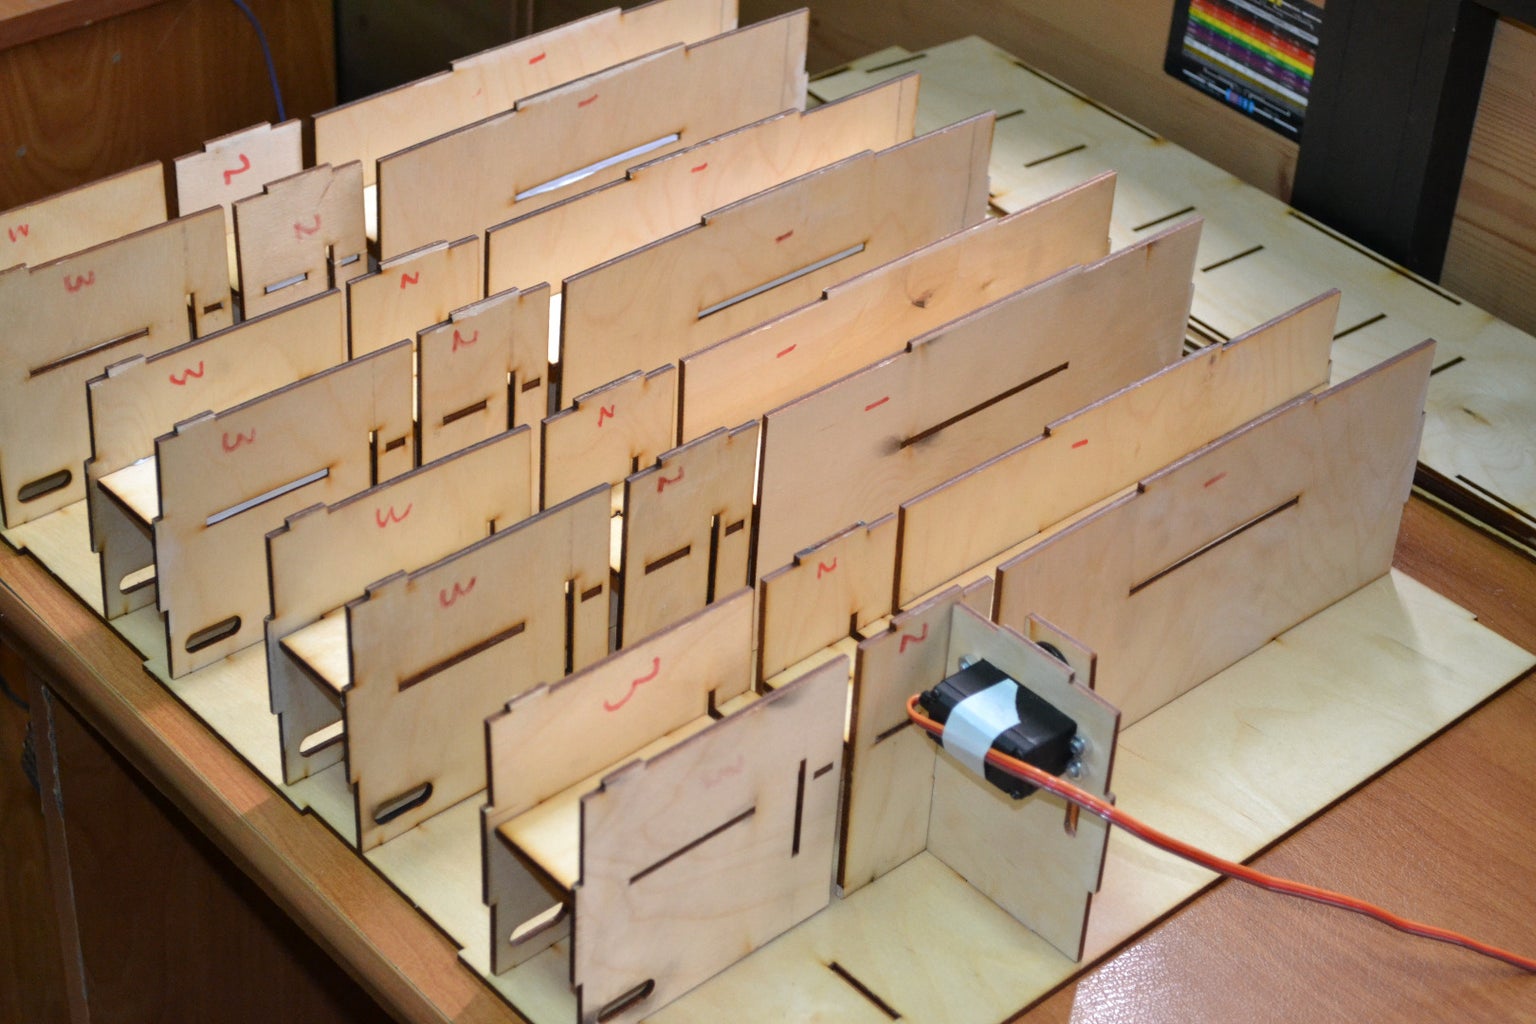

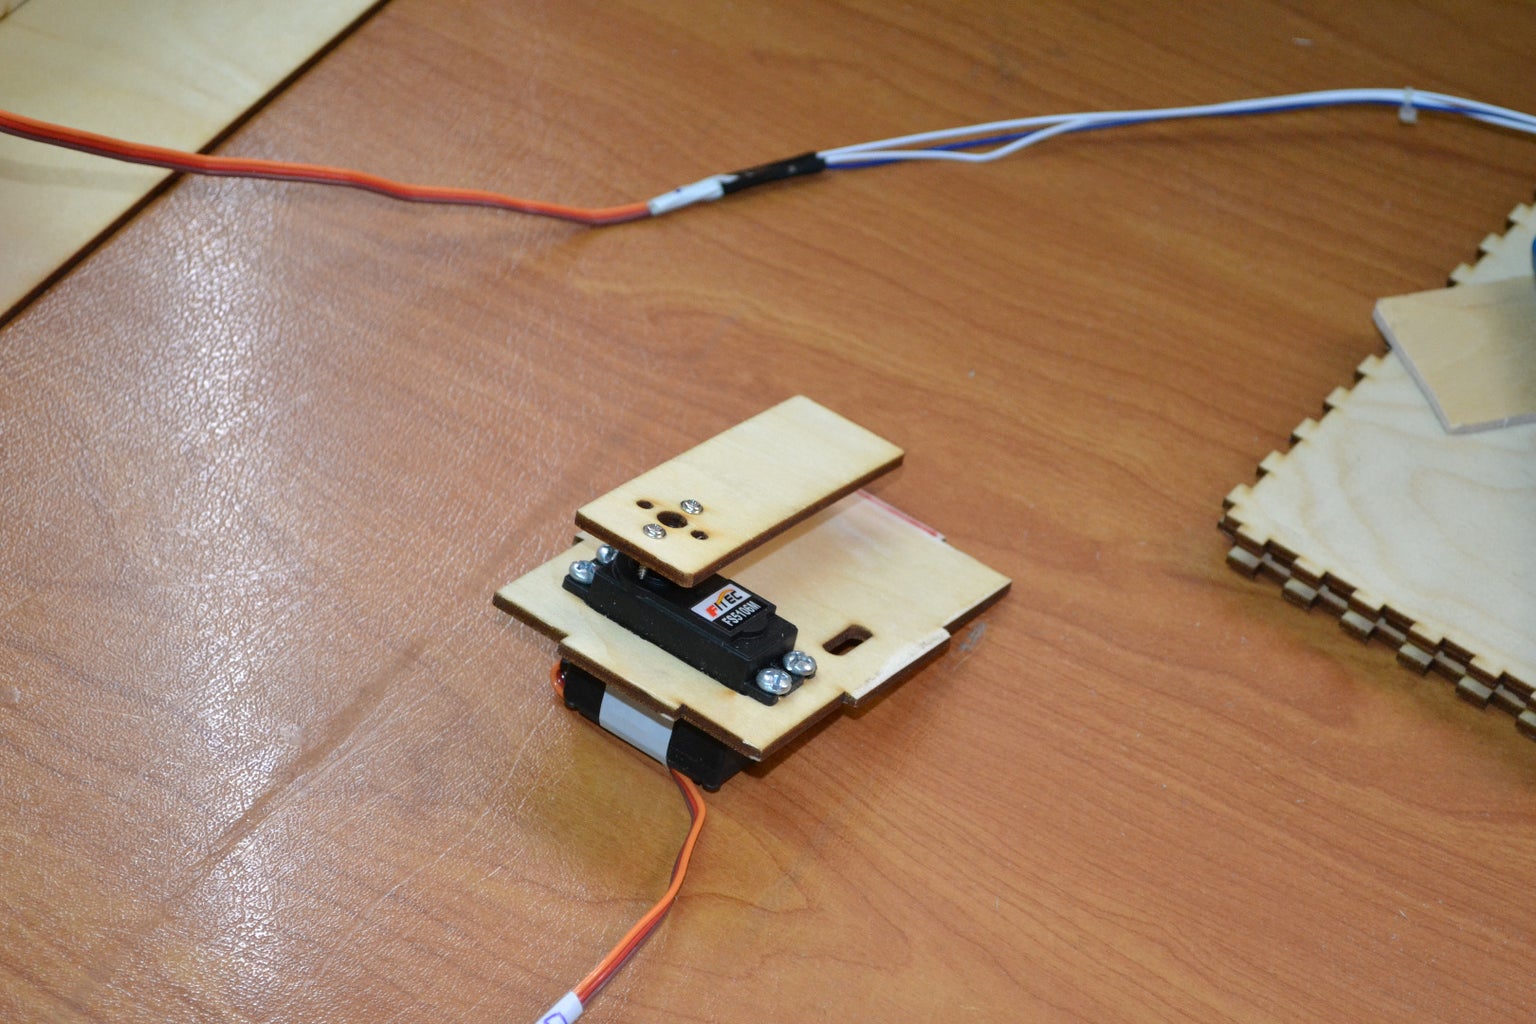


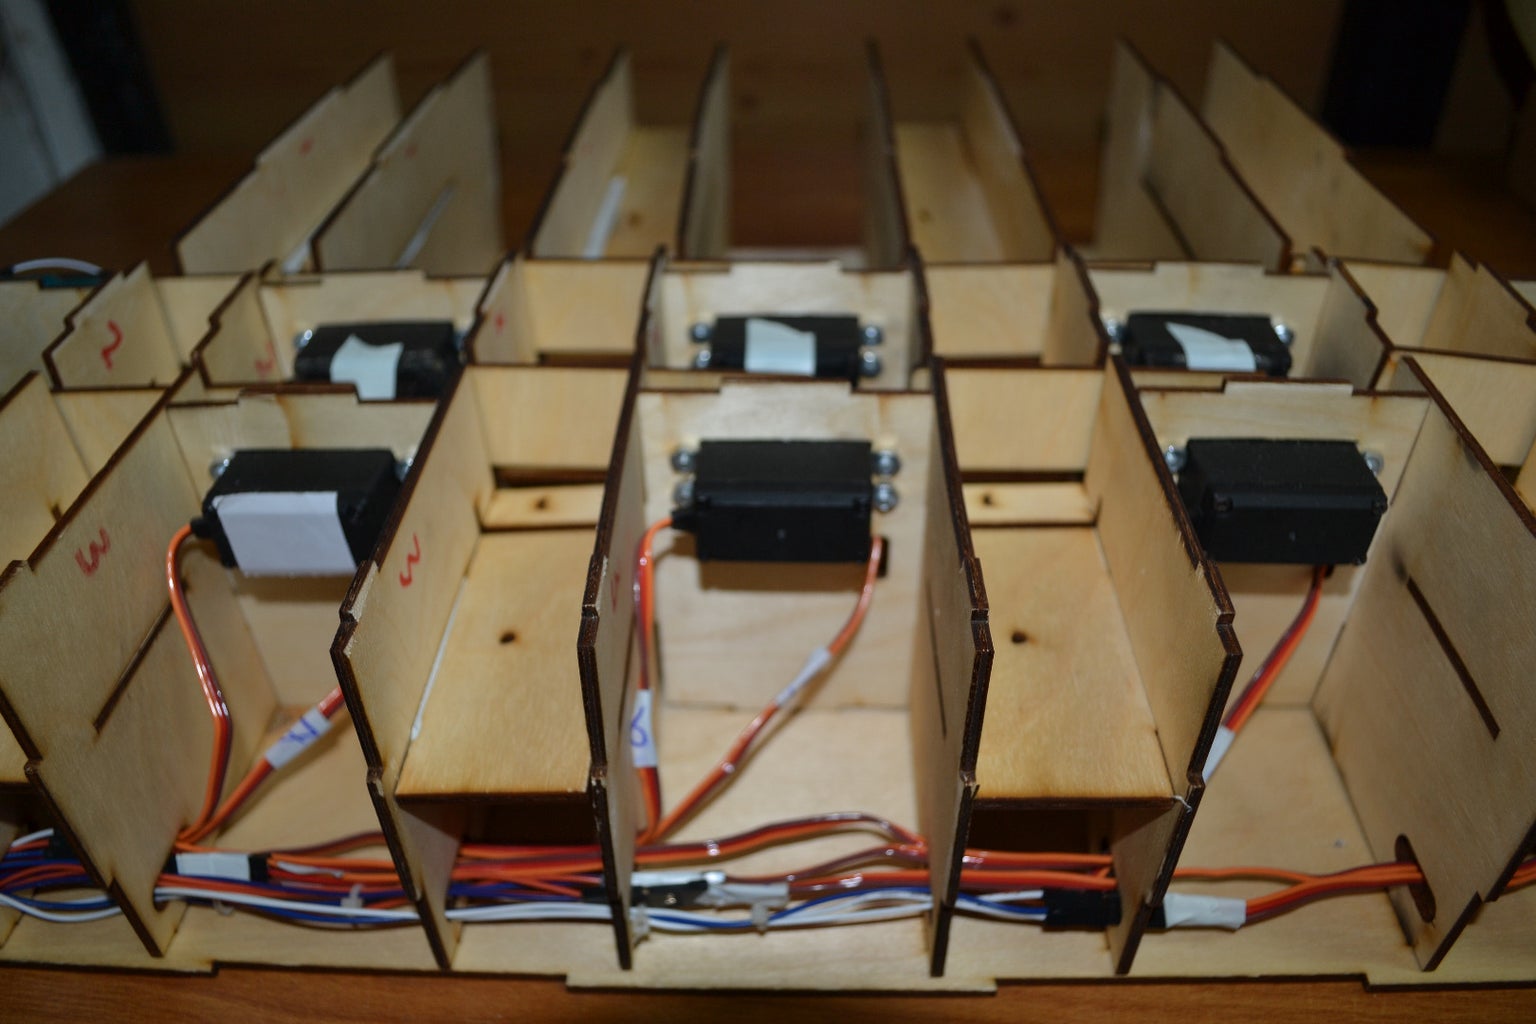


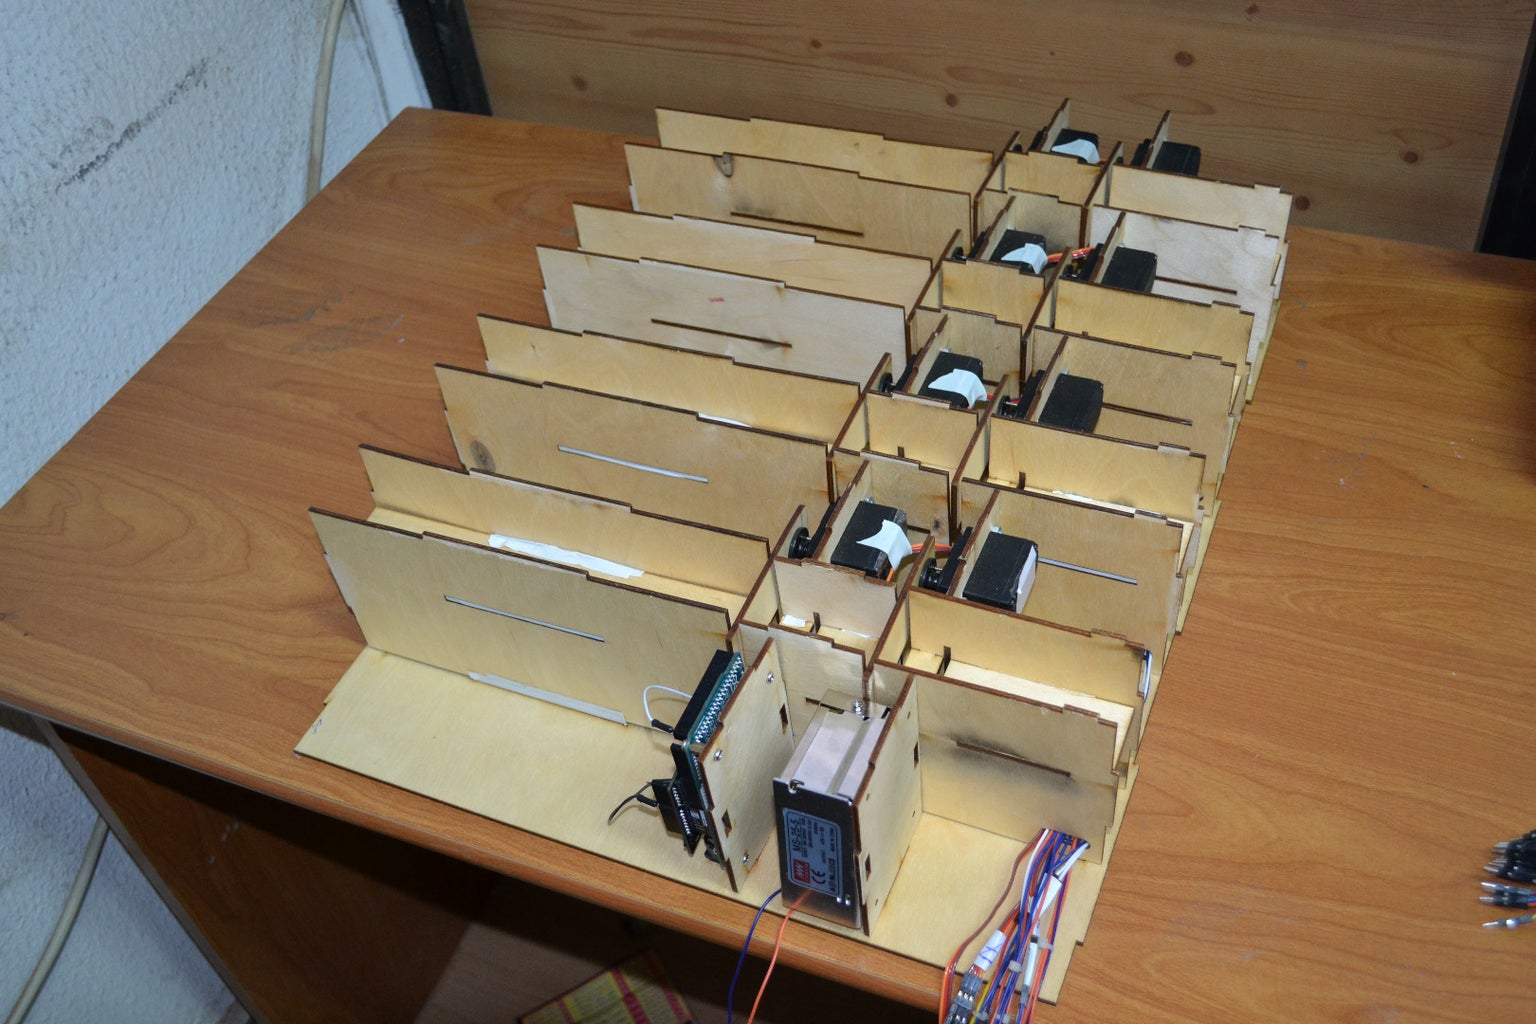


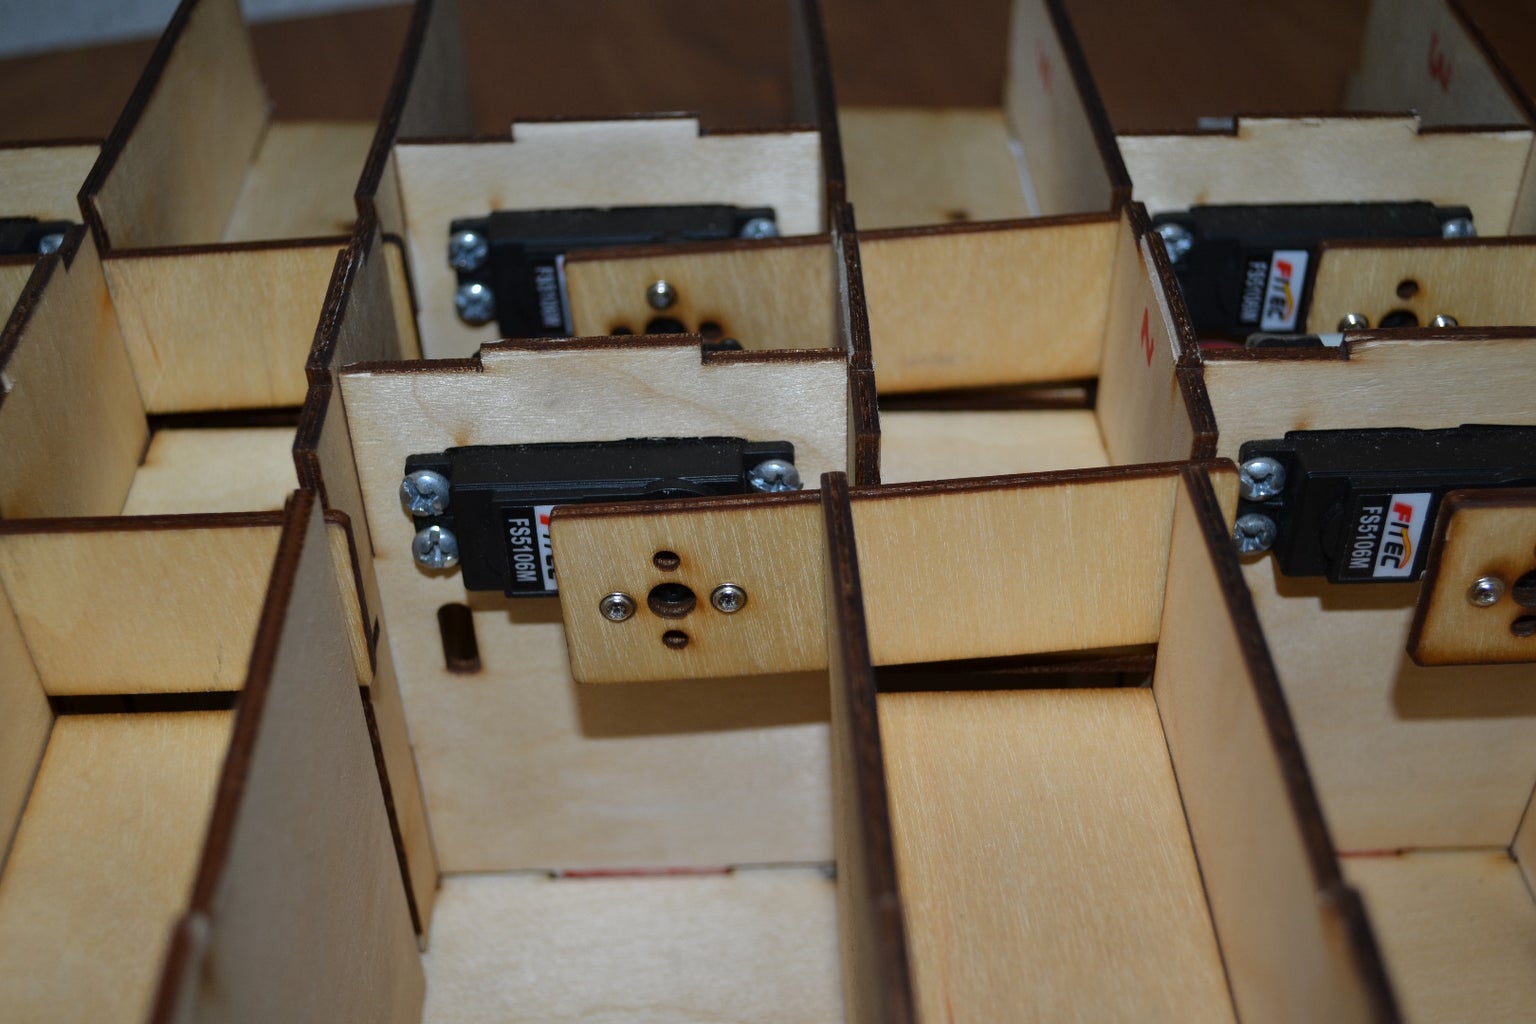

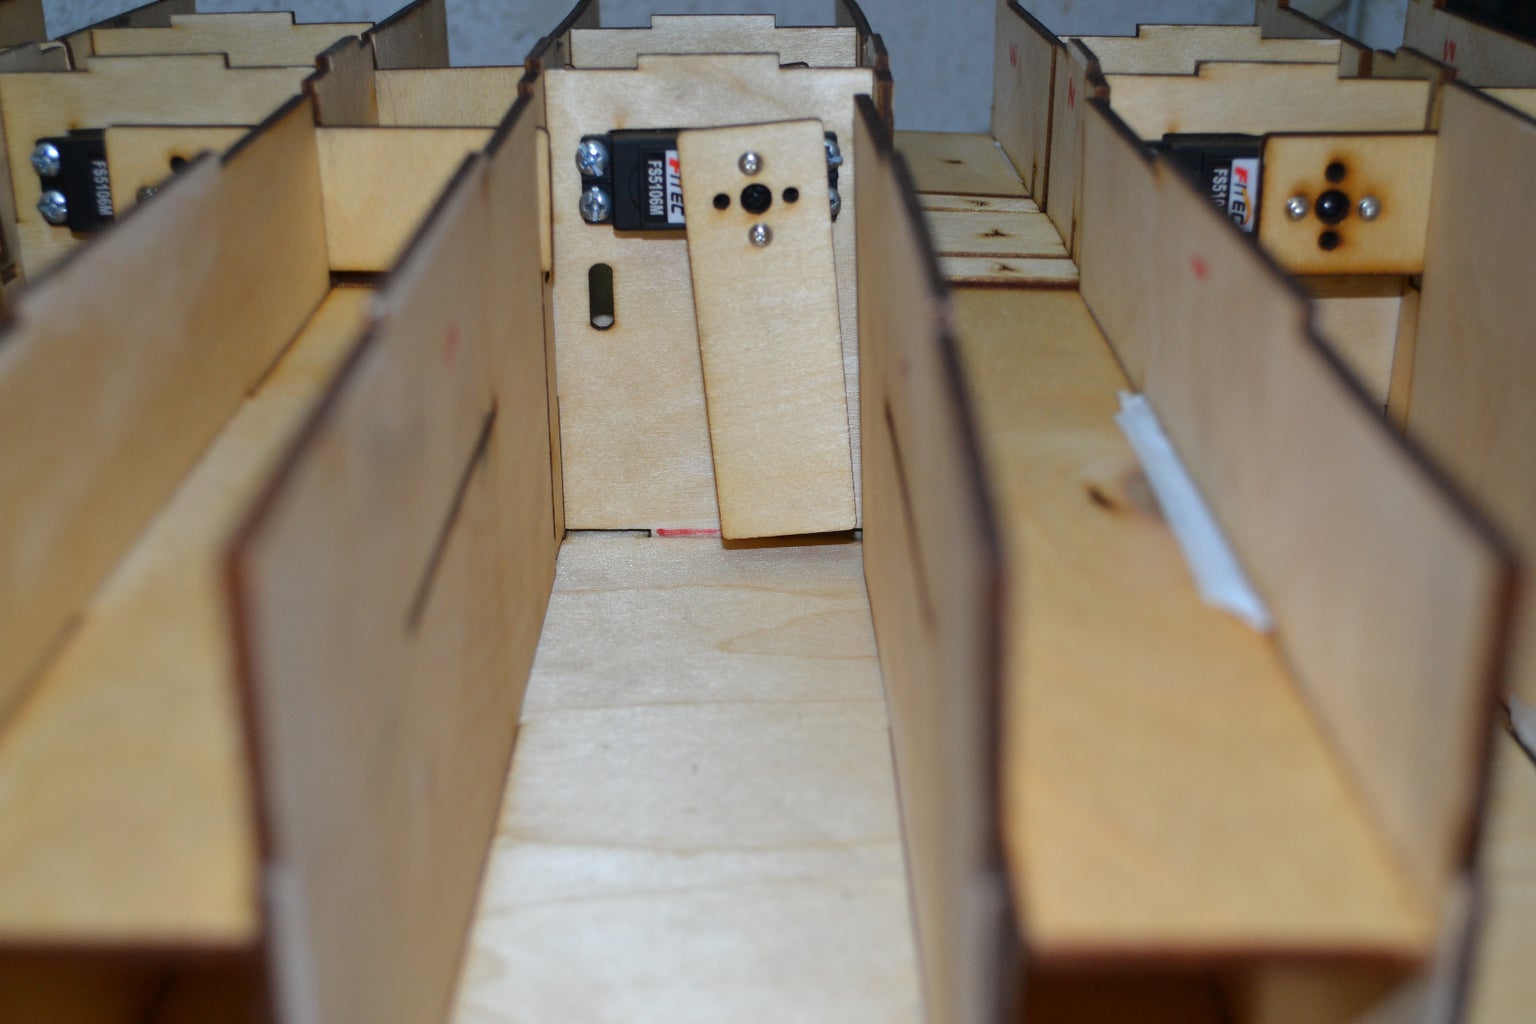


I used laser cutter machine to cut the machine parts from the plywood and acrylic sheets. Then i used M4*10mm Bolts to fix the servo motors to their carriers.
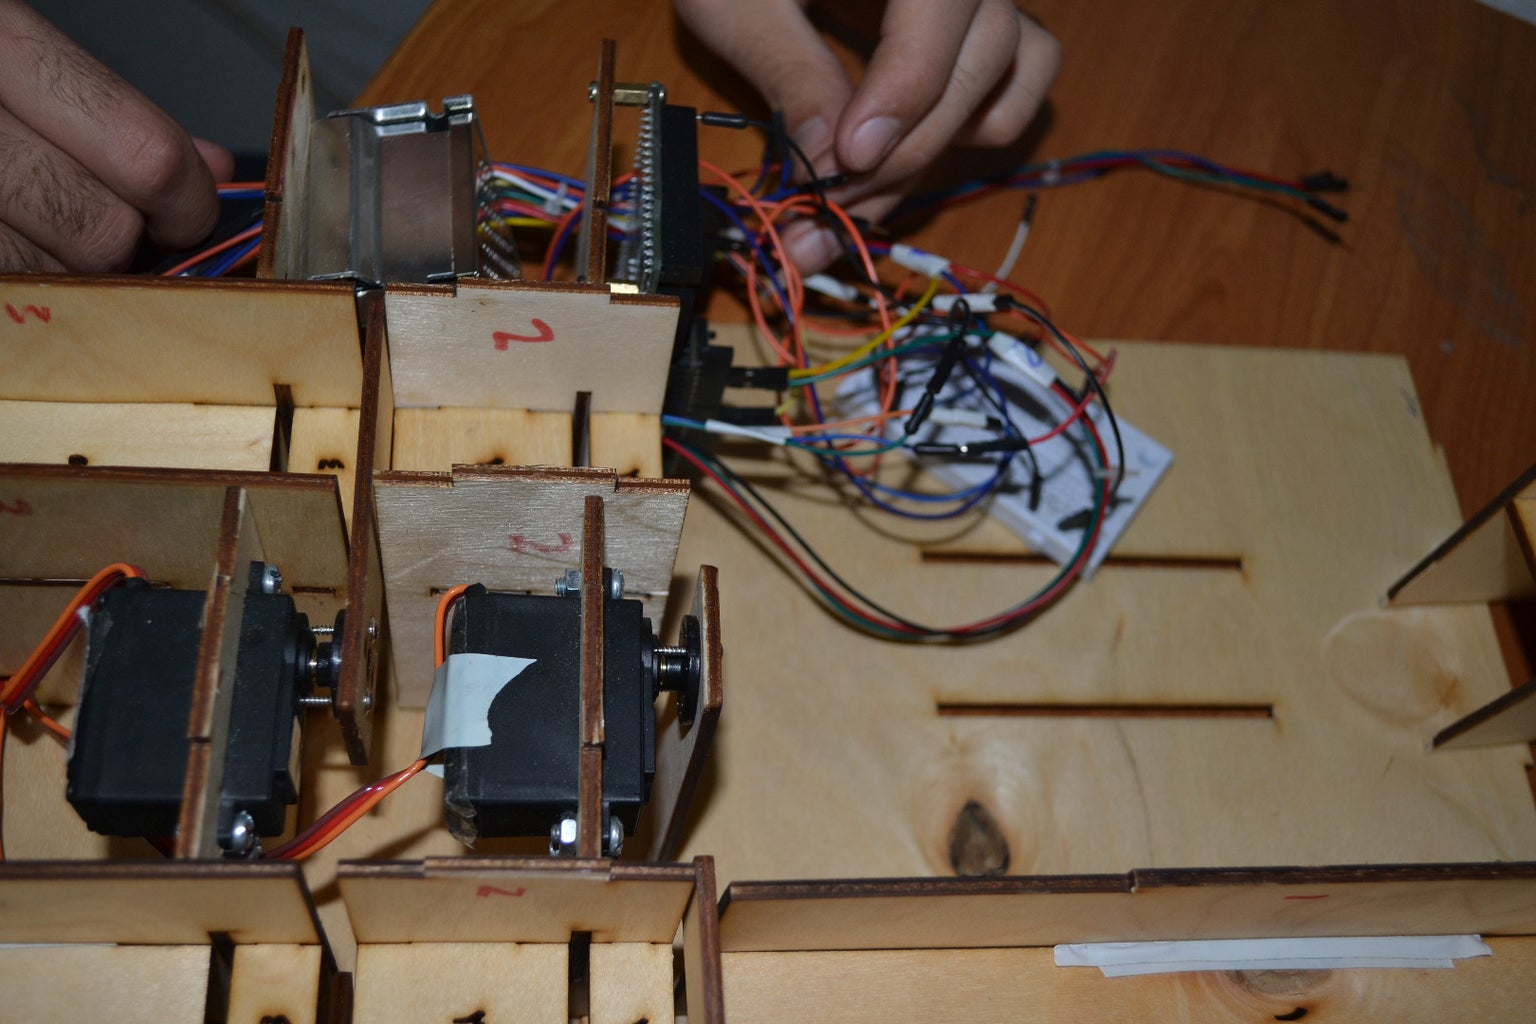
After fixing the servo motors, fix the Arduino Mega & 1sheeld using the copper spacers to their carrier then fix the power supply, Now you can gather all the machine parts together.
Step 4: Electronics & Arduino Code
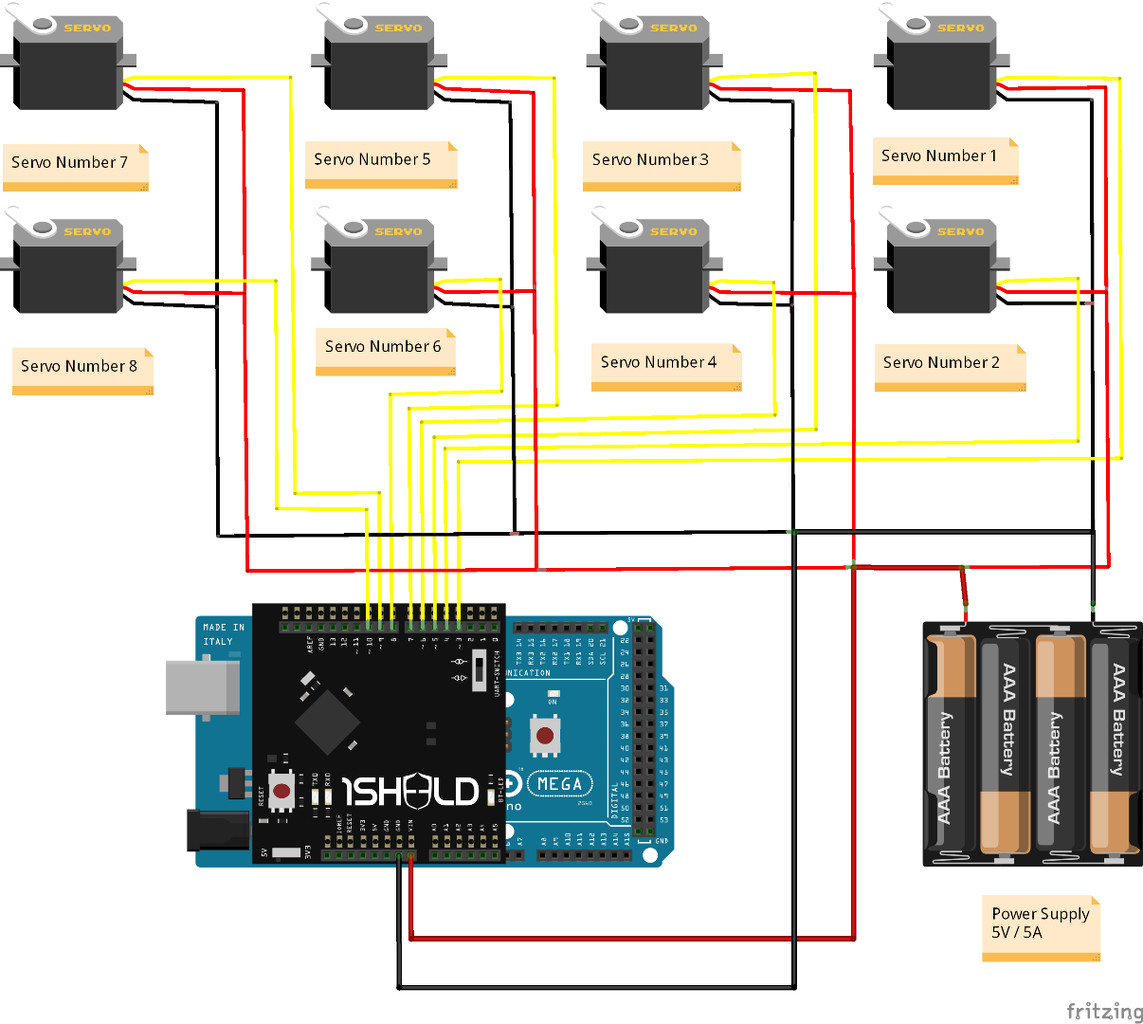


The most important part here is powering the servo motors, you should power the servo motors from the power supply directly to avoid resting the Arduino board.
Don't forget to connect all the grounds with each other
After connecting the motors with Arduino & 1Sheeld and power them from the power supply, you should follow these steps:
Step 1: Place your 1Sheeld on your Arduino board then plug the Arduino to your laptop or PC.
Step 2: Download 1Sheeld Application onto your smart phone. The app is available on the Google play store at http://1sheeld.com/app
Step 3: Download 1Sheeld library
Download OneSheeld library to your computer through this link
Step 4: Extract the folder, copy it, and paste it in your Arduino libraries directory.
Step 5: Open my Arduino Sketch ( you will find it in the attached files
Step 6: Upload your sketch Hesre comes the most important part of the whole tutorial, switch 1Sheeld to the Uploading-mode (this is the switch labeled UART Switch on the board) before you upload your sketch to the Arduino board to avoid serial conflicts between 1Sheeld and Arduino, then press the Upload button in the IDE.
Upload mode is turned on when the UART switch is pushed away from the 1Sheeld logo.
Once you have completed your upload you need to switch 1Sheeld back to the operating mode. Don’t forget! If you don’t switch the UART Switch back to the operating mode your project will not work properly as you will have no communication between 1Sheeld and the Arduino board.
Operating mode is turned on when the UART switch is pushed closest to the 1Sheeld logo.
Step 7: Use 1Sheeld Application
Open 1Sheeld application on your Android smart phone. The application will first scan over bluetooth for your 1Sheeld, it will take a few seconds and the phone will find it. Once it appears on your screen as 1Sheeld #xxxx, you will be required to enter the pairing code (the default pairing code is 1234) and connect to 1Sheeld via bluetooth.
NOTE: If you are having trouble please make sure the bluetooth is turned on for your Android phone and that the Android phone is close to your 1Sheeld.
Step 8 : Access Twitter and Terminal Shields
Select Twitter Shield and Terminal Shield from the shields list and press on the multiple shields icon at the top right of the app.

Step 5: Share Your Thoughts, Feedback and Opnions With Me!

I will be happy if you shared your kindly feedback with me to enhance this machine :)
Thanks..


