

Introduction: DSLR Photography 101


So you want to take good looking pictures? All you need is a camera and something to take a picture of (which shouldn't be too hard to find). I'm going to be going over using a DSLR (Digital Single Lens Reflex) camera specifically, though some of what I'm going to be teaching apply as basic fundamentals to shooting with any kind of decent camera, meaning, not a toy camera... I'm by no means a professional photographer, but I do have a few tips and tricks that I've picked up that I'd like to share with others.
So if you have a camera and you want to start taking pictures, let's get started, shall we?
(The photos of the camera are slightly lower quality, because I'm using a phone camera, and I can't very well use my nice camera to take pictures of itself, can I?)
Step 1: Lens, Zoom & Focus

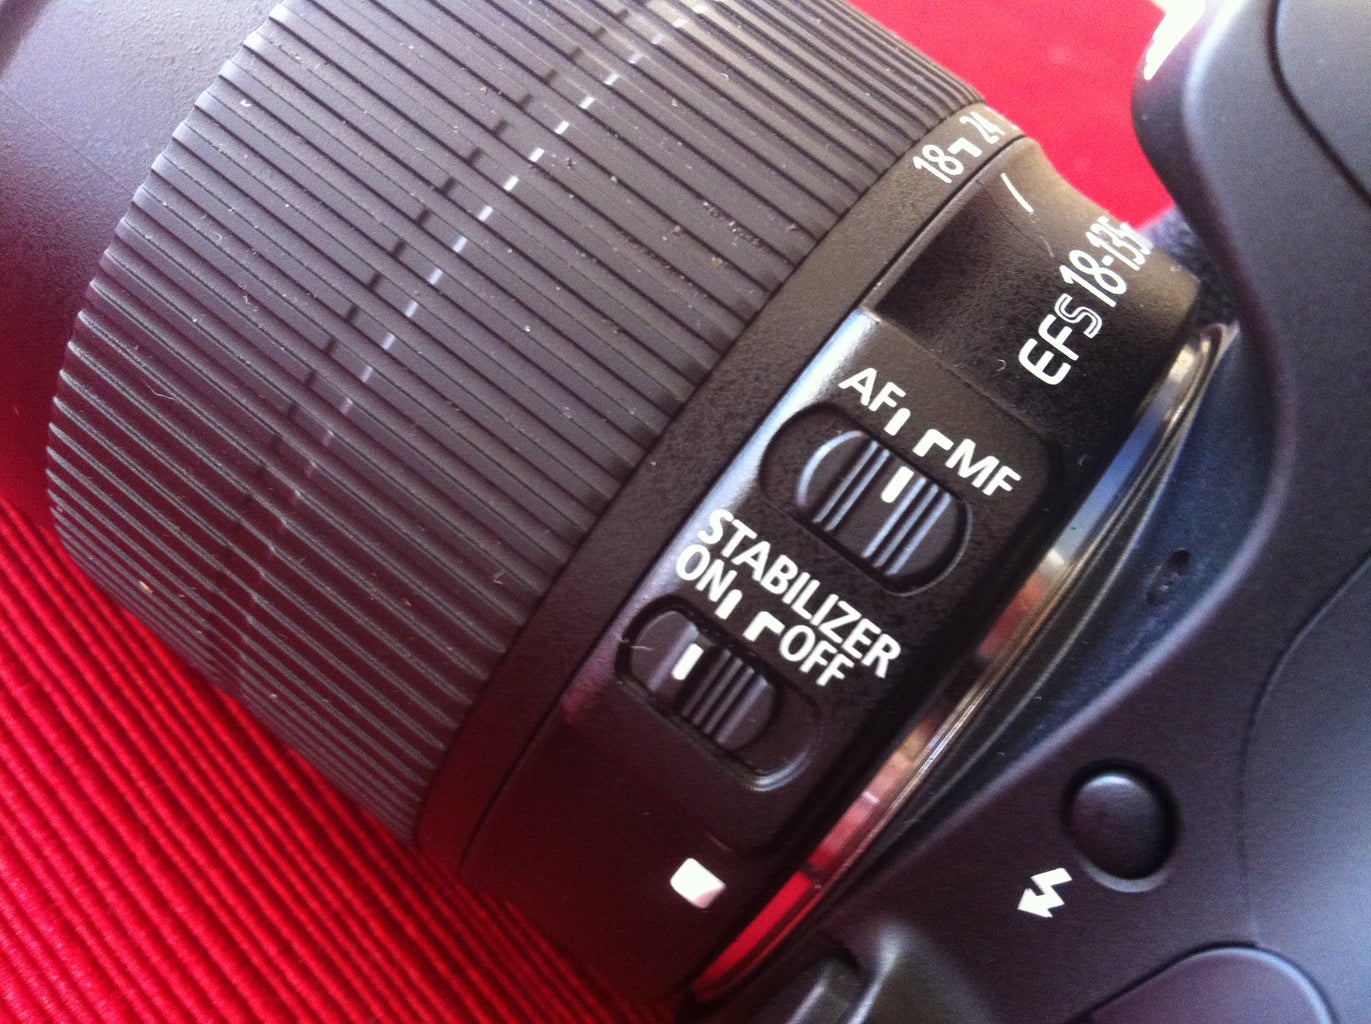
One of the first things you'll notice on your SLR or DSLR camera, is the big lens attached to the front of the camera. This is the first part of the camera that sees the image. Your light travels through the lens and then to the sensor, which is then projected as an image, either to the viewfinder, or the screen... or both.
Your lens should have a small, rotatable ring around it near the end of the camera (at least that's where it is on mine). This is the focus adjustment. You adjust this to tell your lens how close or far away you want it to focus on. If the focus is not adjusted properly, the image will come out more or less blurry depending on where it is set. Some of the newer lenses come with an autofocus feature, which does a pretty good job of guessing what you're trying to take a picture of, then focusing on it automatically. If you don't have one of these, you may just have to focus manually. It takes some time, but after a while you'll get pretty good at getting the right amount of focus.
Now if you have a zoom lens rather than a fixed lens, somewhere in the middle, there should be a wide ring that wraps around it. This is the zoom adjustment. Adjust this to zoom in or zoom out of your subject, making the camera look closer or farther. Now, this is not the same as moving your camera. Zooming in will only enlarge the image that you already have, whereas moving the camera will make the image larger, plus give you a different perspective of the objects surrounding your subject.
So if you like the perspective you have, don't move your camera, but if you need something a little different, try either moving your camera, or a mix of both moving and zooming.
Another thing on zooming: There are two kinds of zooming, "optical zoom" and "digital zoom". Optical zoom is an actual lens rotating and moving to zoom in on an object, while losing none-at-all to a very minimal amount of quality in the process. Digital zoom is completely digital and has nothing to do with moving a lens. Basically, all it does is crop the image, causing you to lose a lot of quality depending on how much you "zoom".
I would not recommend using digital zoom at all, unless you have no other option. Pretty much anything that you would need digital zoom for can be done by cropping the image later on a computer. If it is already cropped though, you lose all of the image outside of the crop area, and you don't have any freedom to fix it if you decide that you need more of the image later. So, digital zoom? Bad.
Step 2: ISO
The ISO is how sensitive your image sensor is to light. The higher the ISO, the more sensitive the sensor will be, and the brighter the image will be. The lower the ISO, the less light it's going to bring in, and the darker the image is going to be. If you're shooting in low-light, you will want to boost your ISO so that the image will be brighter. If you're shooting in a bright, sunny place, you'll want to lower your ISO, or the image will be overly-bright.
But be careful, because the higher the ISO, the more grainy the picture will be. A good max ISO is 1600. If it gets above that, it may be too grainy. You may like the graininess though; it can be used as a kind of artistic effect. Just use your judgement on this. If the image looks bad, try playing around with the ISO and see if you can fix it.
I don't have anything to show for this, but I just though I'd mention it, because it's really important.
Step 3: Composition


Composition is definitely one of THE most important things when taking a picture. This is how your entire photograph is made up. This is the part that makes or breaks your picture. You can have a great camera, but not-so-great composition, or a not-so-great camera, and great composition. In the end, the one with great composition is going to be a more successful photographer.
One of the most important rules of composition is the rule of thirds. Draw imaginary lines on your camera's screen or viewfinder and create nine equal sections. Your eyes will tend to go to the intersections first, so it's best to place your subject one one of those.
Another technique used in composing an image is to use leading lines. These are lines that draw one's attention to the subject in the photo. Because your eyes are naturally drawn to one of the intersections in the rule of thirds grid, leading lines can be used if you have reason to draw someone's attention elsewhere. So if you have reason to frame your subject somewhere such as the center of the picture, you may want to see if you can incorporate some sort of leading lines to lead your viewer's eyes to your subject. This doesn't mean to draw a big arrow pointing at your subject, but to use objects already there to do it for you. These can be anything like the painted lines on a road, or a train track leading up to your subject, or anything else that achieves the same effect. This is a very useful technique that can be used to create great pictures.
And the last technique I'm going to mention is creating a frame that is a part of the picture itself. If you have a cool subject with a cool background, that can be cool. But sometimes you don't have these things, and you just have a boring subject with a plain background. So how do we fix this? We try to make a frame with objects surrounding the subject. This can be something like a doorway framing your subject in a room, or maybe a few trees that act as a frame to your subject. Whatever can achieve this effect and make your photo look more interesting will help.
There are a lot more rules and techniques you can follow to create stunning images, but these are some of the most common.
Also, you don't have to follow just one of these rules. Try to experiment and see what you can come up with using a mixture of these. Or... You don't have to follow any of these at all... These are just basic guidelines to follow when taking pictures, but they're not always the answer to great photos. You can still create great pictures, while breaking these rules, but make sure you have a good reason to do it. Don't just break the rules for the sake of breaking them. But if you think that you can make your picture look better by NOT following these, then go for it!
Step 4: Depth of Field


Depth of field (DOF) is probably my favorite technique to use in photography. It is a relatively simple technique that achieves a relatively awesome effect. It creates a photograph with only the subject in focus, while the rest of the image is blurry, or out of focus. To achieve this effect, you have to do three things. Move your camera away from the subject, zoom in on the subject, and focus on the subject. The farther away you are and the more zoomed in you are, the tighter the depth of field will be, meaning everything else will become even more blurry. This is a pretty cool effect, that can be used in any number of situations. Try to experiment with this, and just have fun with it!
Step 5: Conclusion
So hopefully you've learned a little bit more about photography. There are lots more things that I haven't covered in this, you could do several Instructables on each of the topics I've mentioned. Some of you probably know everything I talked about and more, but some of you may be new to these ideas and have questions. Those of you with questions on any of this, or maybe something else I haven't covered, please feel free to post your question below, and I will do the best I can to answer you. Have fun with this!

Participated in the
The Photography Contest


