

Introduction: Design IoT Solutions Using Python and Zerynth


Do you prefer to code in python? If so, Zerynth is a suite of professional development tools that supports Python or hybrid C/Python firmware development for 32-bit micro-controllers and the most common prototyping boards: Arduino DUE, ST Nucleo, Particle Photon and Electron, Flip&Click, ESP32, ESP8266, and more. In this guide we will explore Python code development within the Zerynth Studio and how to visualize your results using the simplicity of Ubidots data visualization.
Zerynth is not just another programming library for Arduino associated sensor kits. Zerynth is a set of professional development tools developed from scratch to allow you access to the embedded world in just a few clicks. Zerynth reaches beyond professional embedded developers to also offer web programmers, product designers, and IoT system integrators a complete set of high-quality development tools to program microcontrollers and develop IoT solutions.
Zerynth is multi-board compatible and allows rapid integration with sensors, actuators and cloud services, reducing product development time and efforts.
In the following guide we will introduce you to the Zerynth platform using a ESP32 DevKitC connected to the Ubidots cloud. When finished with this guide you will be able to visualize your board's sensor data in Ubidots and control a LED using a sample code provided.
Step 1: Requirements
Step 2: Zerynth Setup
1.Download and install the Zerynth Studio using the installation guide for additional assistance if required.
2. Next, continue with the the Getting Started guide paying close attention to the "Connect, Register and Virtualize your Device" section. Once your device is properly virtualized in the Zerynth you're ready to continue with this guide.
FAQs and Troubleshooting: For Windows and Mac user, if you receive errors creating the Virtual Machine verify the latest drivers are installed. For Linux users, allow access to serial ports adding the user to the group and giving the required read/write access:
- Ubuntu distribution –> dialout group
- Arch Linux distribution –> uucp group
Step 3: Posting Values to Ubidots
1. Create a new Zerynth Project. To do this, press Browser Project > New Project then assign the project title and the project folder. To finish, press "Create".
2. Next, your new Zerynth Project will automatically open to the "main.py" file. This main.py is where the principal Zerynth code will be written in Python or hybrid C/Python. Here is where we're going to develop the logic of any script.
3. Once the project is properly created, copy and paste the sample code provided below into the "main.py" file. After pasting the code, assign your Ubidots TOKEN, and WiFi credentials where is indicated in the code.
If you don't how to find your Ubidots TOKEN, please reference Ubidots Help Center.
DEPLOYMENT NOTE: In this sample code the device label is set as "ESP32" and the variable label as "temperature". This means that your request will be sent with these parameters to Ubidots. If you wish to alter this sample code, please do so as needed. Reference to this guide to obtain the code.
This sample script makes a POST HTTP request to the Ubidots cloud. Posting one variable that contains the reading of the analog pin(A0) of the ESP32 DevKitC. To send more values using your device reference Ubidots REST API to learn how to build your own HTTP Requests.
4. With the code pasted and updated with your credentials you must next verify. To verify, press the "check-mark".
5. Once the script is properly verified, it's time to Uplink the script into the ESP32DevKitC. To uplink the script, press the "up arrow" icon. Wait a couple seconds until the the script is uplinked into the board. Once the uplink finishes, you will receive the message "Uplink done" in the terminal log of the Zerynth Studio.
6. Open the console to debug the status of the request; press the "terminal" icon to open the console. At first, your console will report the connection status. Then you are going to start receiving the status of the HTTP request to Ubidots.
FAQs and Troubleshooting: If you open the console and you're not able to visualize the debug messages, please press the reset button from the ESP32 DevKitC to start receiving messages.
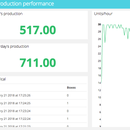
7. Go to the Device section of your Ubidots for Business account to verify the message is received:
Step 4: Controlling Your Device With Ubidots


1. Go to the Device section of your Ubidots account and open to the device called "ESP32" created in the previously steps.
2. Create a new Default Variable called "control" by pressing "Add Variable"
3. Follow the on-screen point-and-click application builder to populate your new variables. Once the variable is created you device dashboard should look as above.
4. Go to your main Ubidots Dashboard and create a control widget. Click the yellow plus(+) icon and follow the on screen options to deploy new dashboard widgets. Select Control > Switch > ESP32 > control(variable just created) > Finish. After constructing your new widget, the Dashboard will reload and be populated with your new widget. The "Switch" widget will send it status to the ESP32DevKitC to control the status of a led.
5. Following the same steps provided in the previously step (Posting values to Ubidots), setup a new project in Zerynth and title the project to your preference. Then, copy and paste the script below in the "main.py" file assigning your Ubidots TOKEN, and WiFi credentials along the way. Reference to this guide to obtain the code.
6. Once the parameters are modified, verify and uplink the script into the ESP32DevKitC.
7. When the uplink finishes, open the console. At first once the console is opened, you will receive the connection status, then you are going to start receiving the status of the HTTP request to Ubidots and the status of the LED.
FAQs and Troubleshooting: If you open the console and you're not able to visualize the debug messages, please press the reset button from the ESP32 DevKitC to start receiving the messages.
8. Changing the status of the "Switch" widget from your Ubidots Dashboard will result in the LED status change in the console and in real life.
Step 5: Result
In just a few minutes you've made an HTTP request to the Ubidots cloud using Python code uploaded with Zerynth to a ESP32 DevKitC. Also, using the samples codes with any 32-bit micro-controllers supported by Zerynth, you can simply assign the right WiFi driver based in your microcontroller for rapid prototyping and deployments. For additional information on Zerynth's Python firmware platform, check out Zerynth's Documentation.
Now it is time to reengineer these code to deploy your own applications. Control and manage your environments with Zerynth, 32-bit micro-controllers, and Ubidots. To learn more about creating Ubidots widgets and events, check out these video tutorials.
Happy hacking :)


