

Introduction: Dimensioning Lumber


Wood as a working material is inherently dimensionally unstable. This has to do with moisture content. When the wood is green (freshly cut) it has a very high moisture content. The time when the wood drys out from being cut will be when the most warping will occur. This is why for most woodworking applications, the wood is allowed to season (dry naturally) or is kiln dried before you use it. Even then, the wood will continue to move as the relative humidity changes.
When you are selecting wood for your project, you should sight along the edges for signs of warping. The four major types of warping are bows, crooks, cupping, and twists. A bow is when the wood is curved on the face plane (the edge that is perpendicular to the wood grain and is usually the long and widest side of the wood). A crook is when the wood is warped along the edge plane (the side that is cut with the wood grain and is usually the long, but narrow side). Cupping is when the wood is warped across the face edge. A twist is when the two ends are not in the same plane with each other. Twisting is the most difficult warp to correct and you should try to avoid them when you are purchasing your lumber.
Dimensioning lumber is all about correcting warps in your lumber prior to making your project. It makes sure that the wood you are working with is straight, the sides are parallel, and have an even thickness. It's much easier to work with wood that has been dimensioned and the end product will fit together better as well as look better. Because wood is constantly moving, it's important to only dimension your wood just prior to using it in your project. Dimensioning lumber requires a jointer, thickness planer, and table saw. Either that or a set of wood planes, a marking gauge, a pencil, and far more patience than I have (I'll leave that for someone else to write about).
First of all, I will rarely dimension the a board longer than six feet unless that's what is required for the project. Managing a board this length is awkward and can even be dangerous. There is also more opportunity for the board to curve the longer it is, making the process take much longer and leaving you with a much smaller piece of wood to work with when you finish. Therefore, I will either first cut the boards to length in the case of the longer pieces, or dimension an entire cutoff for the smaller pieces and trim them from the cutoff. If the piece is fairly long and has an angled cut at one or both ends, I will cut it just a little long before dimensioning and then cut it to it's final length afterwards.
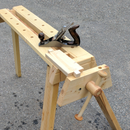
Step 1: Edge Jointing

The first thing to do is to get one edge flat. If the wood has a crook, it's best to joint the concave (curved inward) edge of the board. This is because both the front and the back edge of the board will make contact with the jointer and keep it from pivoting. If you were to use the convex side, the board may pivot around on you, making it difficult to get the edge flat and even when you do, you may discover that one end of the board is noticeably thinner than the other and therefore give you less usable wood.
Before you turn on your jointer it helps to put the edge of the board on the jointer and try to rock it forward and back (this is another reason why shorter boards are easier to work with). If it rocks, try flipping the board to the other edge and try again. Sometimes, though rarely, the board is convex on both edges and you'll just have to make do, but if you get one edge that doesn't rock, you should joint that edge. You should also verify that your fence is set to 90 degrees and that the depth of cut is 1/32 of an inch.
At this point, you can turn on your jointer and feed the board in the direction of the through and a slow, steady rate with light passes. Ideally, you should also feed the board so that the grain of the wood on the face plane is pointing toward the jointer, but I haven't found that this matters too much. If your board is thin, you should use a push stick to help you feed the wood. In general with woodworking or pretty much anything else, you want to give a good margin of error between your body parts and the rapidly spinning blades. If a voice in the back of your head is warning you that an operation is dangerous, it's best to listen to that voice.
You can pretty much tell when your board is done by listening. If the jointer is making a constant noise as you feed the wood, then it's hitting the entire length of the board. If the joiner is relatively silent as part of the wood is fed over it, then the wood isn't getting planed there and a few more passes will be required.
Step 2: Face Jointing

Now that you have an edge that is flat, your goal is to get one of the faces of the board exactly perpendicular (at a 90 degree angle) to that straight edge. You will again use your jointer and run your newly flattend edge against the jointer fence. On the face of a board, you need to be less concerned with whether the board is bowed from end to end (although severe bowing may mean you should use that board for smaller pieces of your project rather than large ones), and more concerned if the board is cupped. When feeding the board, have the convex edge pointing up like an umbrella to allow both of the edges to touch the jointer bed.
Again feed your board slow and steady. Make sure that your jointed edge is running along the fence. Just as with jointing the edge, your ears should give you an idea of where you are in the process, but you will need to visually inspect the wood now to make sure that you are jointing all the way across the face. If the lumber remains cupped, the thickness planer will simply push the board flat, and then it will spring back into its cupped state. I've had enough practice that I can usually just eye the wood, but a good way to get started is to use a pencil to draw a wavy line across the face of the board. When the wavy line disappears after jointing it a few times, you will know your face edge is flat.
Step 3: Planing

Now you should have two flat edges that are perpendicular to each other. The next steps are to get the two edges that you haven't worked on both flat and parallel to your good edges. Although you could probably reverse the order of these last two steps, I usually go to the thickness planer first.
Although my thickness planer has a spring loaded thickness gauge, I rarely use it. In fact, I've noticed that the newer models seem to have dispensed with it. If I'm using wood that was previously dimensioned, I will usually set my planer to the supposed actual thickness of the wood before I ran it through the jointer. The thickness should be 1/2" inch thinner than the nominal thickness, with the exception of "one by" stock which is 3/4 of an inch. If it's rough stock, that's even easier because the nominal and the actual thickness should be the same (although they'll write it in fractions of quarters, i.e, one inch would be written as 4/4). Since I've jointed the wood, it should now be a little thinner than it started, so this thickness ought to give the wood clearance. I will lower the jointer blade by 1/32 of an inch until the jointer makes contact with the wood and then I will proceed by lowering the blade by 1/64 of an inch for each pass thereafter. I will usually plane the wood to 1/8 of an inch thinner than its starting thickness.
Step 4: Make the Edges Parallel

The last step is to make the last edge parallel to the first edge you worked on. To do this, I run the board through the table saw with a rip blade and a fence installed putting the jointed edge against the fence. As with the thickness planer, I will usually trim it to 1/8 of an inch narrower than it started unless I specifically need it thinner for my project.
That's it. Now your boards are ready to use in your project.


