

Introduction: Drone Made Easy


This is all the components you will need in order to build your quadcopter. More information can be found here: https://www.youtube.com/user/RcLifeOnSimon/videos
- Frame -12.55$
- Motors -13x4=52$
- Speed controllers -13x4=52$
- Propellers -3.5x2=7$
- Flight controller -20$
- Male to male servo connectors -4.75$
- Transmitter and receiver -26$
- Battery -14$
- Charger -15$
Total: 202$ + shipping
You can use the components multiple times! I still have the same motors, speed controllers and flight controller I bought 2 years ago. Buy frames online, or build one yourself and simply transfer the system to the new frame.
Tools and knowledge:
- Basic soldering skills
- Phillip screwdriver
- Hex screwdriver
- Shrink tube
- Zip ties
- Heat gun
In each and every step I will recommend the components you will need to build your own, make sure you don't miss anything!
Step 1: Frames


The frame is the key component depending on what you want to do with your quadcopter. If you want long flight time, you better choose a light frame, preferably made of carbon fiber. If you want a quadcopter that flies fast and is acrobatic, you might want to consider a 250 racing quadcopter. More about FPV racing quadcopters here: http://blog.oscarliang.net/250-mini-quad-part-lis...
The Q450 V3 frame has an integrated PCB board for direct soldering and eliminates the standard external distribution board. It's perfect for beginners due the cheap material, ease of assembly and strong arms. It can be found here: http://www.hobbyking.com/hobbyking/store/__49725_...
Step 2: Motors, Speed Controllers and Propellers


There is numbers, different sizes and unlimited brands of electric motors and speed controllers. Therefore it can be a struggle to even know what to look for. The most crucial to know is that an electric speed controller (ESC) and an electric brushless motor has to work together. If you motor is too powerful (drawing too much amperage), the speed controller will overheat. I use 20A AfroESC's, and my electric motor has a top current of 15.8A (100% throttle), this makes a 20A speed controller suitable for my electric motor. Never use a motor with higher amperage than the electric speed controller can handle!
I wish to recommend the Turnigy Air motors, they are really inexpensive but still fairly good quality. Perfect for someone who just started in the hobby, but still gives a good punch when you want to fly fast. They can be found here: http://www.hobbyking.com/hobbyking/store/__14738_...
The Afro electric speed controllers are too very inexpensive but also high quality and reliable. I use them on basically all my builds! Found here: http://www.hobbyking.com/hobbyking/store/__43709_...
Quadcopters need 2 types of propellers in order to fly, since it uses the motors difference in rpm to control tilt, roll and yaw. You will need two normal propellers and two reversed propellers. Found here: https://www.hobbyking.com/hobbyking/store/__34509... and https://www.hobbyking.com/hobbyking/store/__34508_...
You can also order two green packs of propellers if you wish to have two greens in the front and two black propellers in the back for easier orientation.
Step 3: Flight Controller

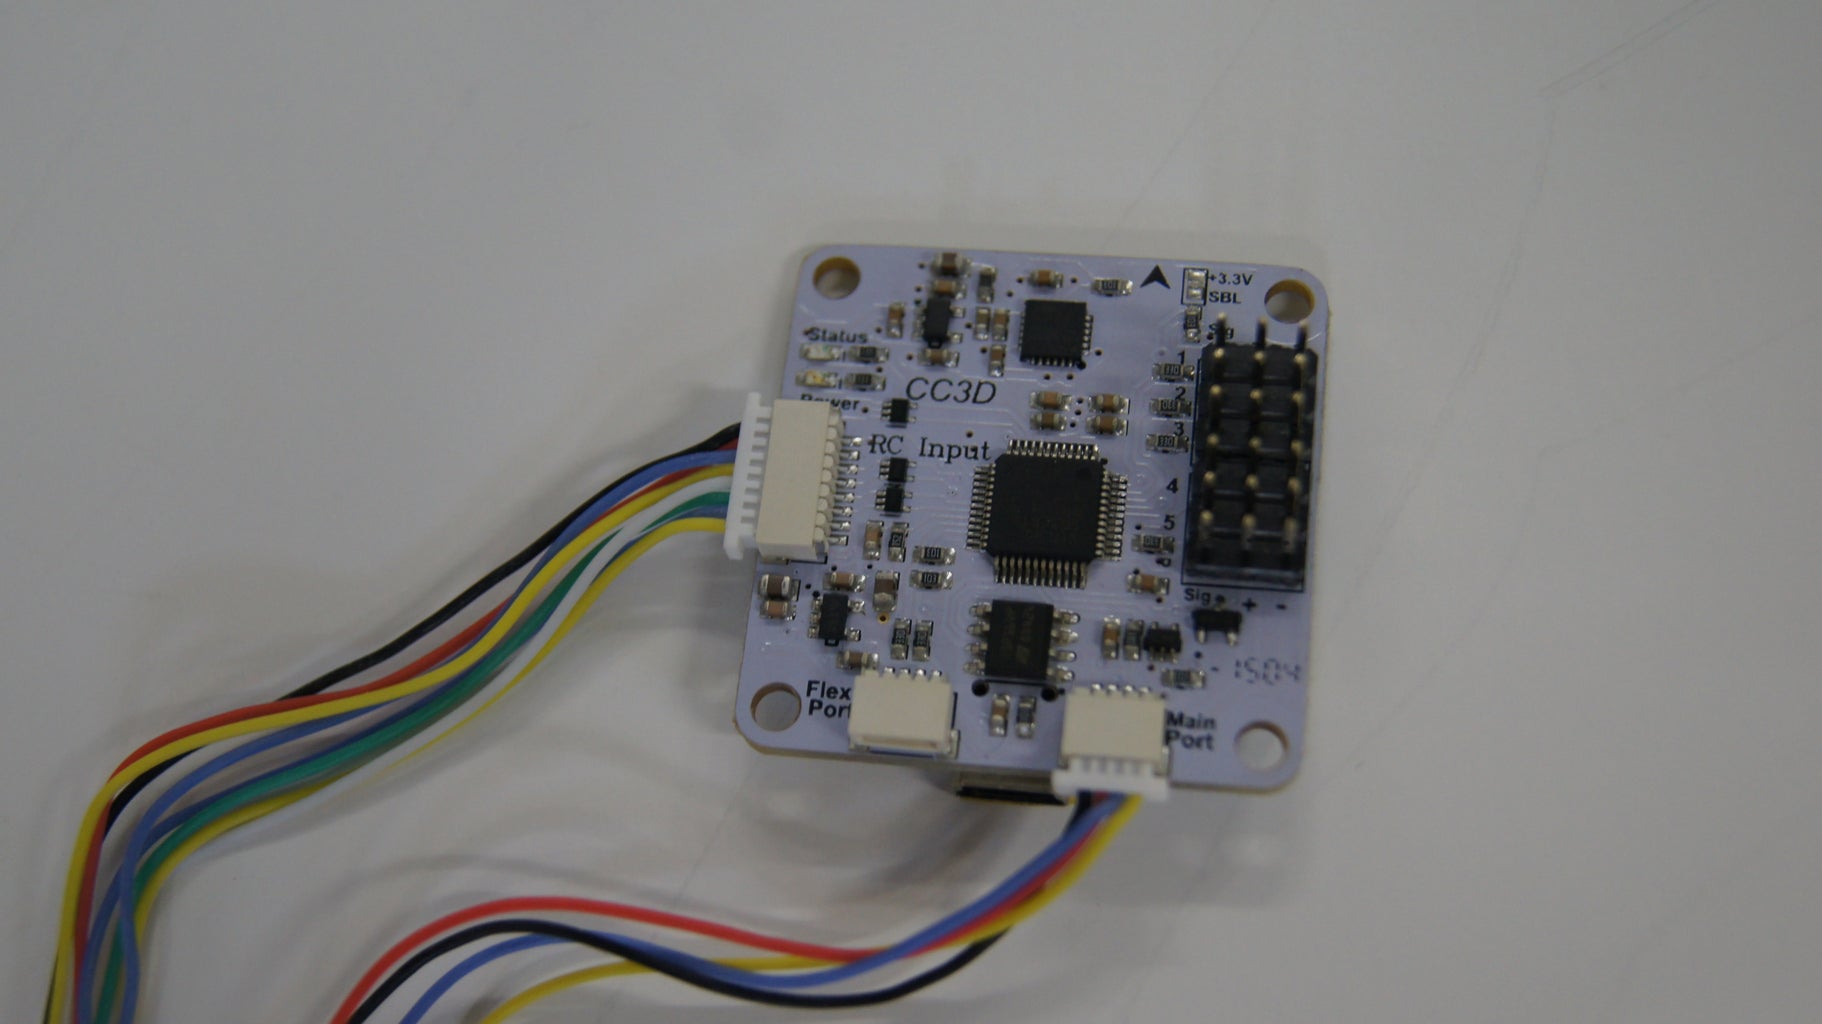


The flight controller, also called FC, is the brain in the quadcopter and uses gyros to keep the aircraft stable. CC3D (white board) is a fight controller used mostly by the FPV racing quadcopter pilots, since it's really light and powerful. The KK2.15 FC (green board) is well-known for the easy programming, simply press a few buttons and you're done! Most other flight controllers will require a computer in order to be programmed.
It also features auto-level, which means, by using a switch on your transmitter you can toggle between a "stable mode" and "acro mode". From my experience, I know a lot of beginners like the auto-level, since it makes the quadcopter more predictable. The KK2.15 flight controller can be found here: http://www.hobbyking.com/hobbyking/store/__54299__...
You will also need 5 male to male servo connections in order to connect the flight controller with the receiver. Found here: http://www.hobbyking.com/hobbyking/store/__21758_...
Step 4: Transmitter and Receiver


Based on your budget and how you might move forward in the hobby, you want a transmitter that will be suited just for you! If you are a beginner with no experience and want to explore the hobby, but still not spend too much money, you can purchase one of the most inexpensive (cheap) transmitter: http://www.hobbyking.com/hobbyking/store/__9042__... Eventually you will have to buy a transmitter with more functions and more reliability!
If you want a transmitter that you will be able to grow with (but still not break the bank), this would be the one I recommend the Turnigy 9X: http://www.hobbyking.com/hobbyking/store/__8992__...
Step 5: Battery and Charger


The battery is an important part of the quadcopter as it gives power to the quadcopter, but just like the motors and speed controllers, you DO NOT want to use the wrong battery. It's important to chose it wisely and the most crucial is not to draw more amperage than the battery can deliver. You can read more about it here: http://www.rcpowers.com/community/threads/how-to-...
If you go with the recommended motors, you can use this battery (10min flight time): http://www.hobbyking.com/hobbyking/store/__38083_...
I've been in the hobby for almost 5 years, and I still use these cheap chargers: http://www.hobbyking.com/hobbyking/store/__30032_...
Step 6: Advanced (FPV and Gimbal)


When you have mastered the basic flying you may want to upgrade you quadcopter with FPV (first-person view), and that basically means you have a camera, video transmitter, video receiver and goggles/monitor to have a live video feed down to the ground. More information here:
If you have a GoPro Hero 3 or a Hero 4, you can use this gimbal: http://hobbyking.com/hobbyking/store/__55238__Quan... More information about the Tarot 2D gimbal here:
Step 7: Final Product
Let's see if it flies....
It does! Go to https://www.youtube.com/channel/UC873OURVczg_utAk8... and subscribe!

Runner Up in the
Things That Fly Challenge


