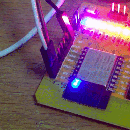
Introduction: ESP8266 ESP-12(Standalone)+ Blynk 101
Hello everyone.. This is my first instructable! I am new to Arduino. I want to share some of my experiences as a newbie.
I got an ESP8266 board. more info here :http://benlo.com/esp8266/esp8266QuickStart.html
I want to use the board as standalone and use the Arduino IDE to program it.
Hardware:
1. ESP8266 board
2. USB-TTL/FDTI adapter 3.3V
2. Smartphone (IOS/Android)
3. Dupont wires
4. LED
5. Breadboard
6. Power Source 3.3V.. Note: separate power source required for ESP board
Step 1: The Software: Arduino IDE
1.Download the latest IDE which comes with ESP8266 compatibiliy.
http://www.arduino.cc/en/Main/Software
2.After installing, add ESP support to the IDE
Go to File - Preferences - in Preferences window go to "additional boards manager URL's" where you need to paste the following link: https://adafruit.github.io/arduino-board-index/pa... adafruit link down(thx FrankHerrmann)
use this instead http://arduino.esp8266.com/package_esp8266com_inde...
- Click OK button.- Go to Tools - Boards - > Boards manager, in the Boards manager window select "contributed" from the TYPE drop - Select ESP8266 by ESP8266 community forum.
Press Install.
Before programming always remember to change board as ESP8266.
3. Also, I recommend adding the following libraries:
ESP8266 Arduino add-on by Sandeep mistry; follow instructions here https://github.com/sandeepmistry/esp8266-Arduino/b...
Add the blynk library https://github.com/blynkkk/blynk-library
If you do not know how to add library, go here https://www.arduino.cc/en/guide/libraries
Step 2: The Blynk App
1.Download the app corresponding to your samartphone platform
Apple IOS https://itunes.apple.com/us/app/blynk-control-ardu...
Google Android https://play.google.com/store/apps/details?id=cc.b...
2. Instructions on how to setup the App
-Open Blynk app. Add widgets. You can hold and drag them to reposition. Tap once to get to Widget Settings. The main thing you need to set is PIN you want to control
-Paste Auth Token to your sketch and upload it to hardware. Press PLAY in the app.
3. Remember to select ESP8266 as board in Blynk app
Step 3: Flash/Power an LED With Blynk
Setup hardware as shown in pic...
Connect the USB-TTL to pc and upload sketch to ESP-12
Note: GPIO0 should be LOW and CH_PD and RST should be HIGH for first time flashing the board
GPIO0 should be LOW when uploading sketches
Remember use a 3.3V USB-TTL
connect RX of board to TX of usb and TX of board to RX
SKETCH:
edit auth code, ssid and pass
Attachments
Step 4: Results
Enjoy...
Credits to
Tracker J https://www.instructables.com/member/TrackerJ/
Blynk.cc
Sandeep Mistry


