

Introduction: Easy & Customizable Mini Robot


This is my first tutorial! :D
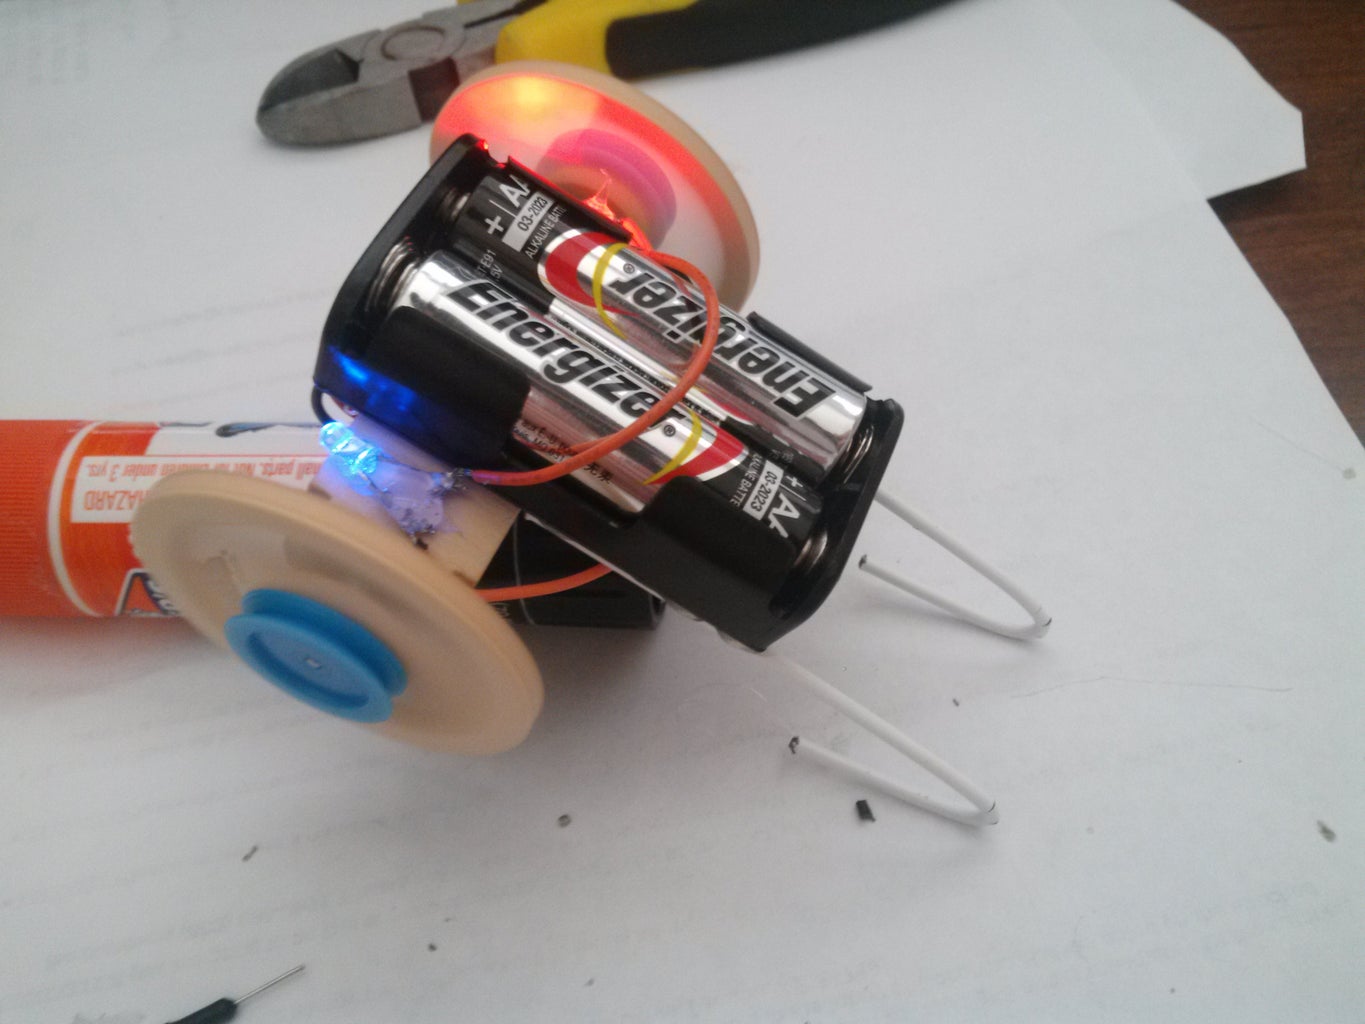
Anyways, this is an easy to follow tutorial on how to build the small robot pictured. This is not meant for experienced builders, but anyone can use the design. It's very customizable, you can turn it into a combat robot or a sumo bot or have it tug around a wagon. It's all up to you and what you decide to do with it. If you have any questions or comments, don't be afraid to leave them below and I will try to help you out!
To build this robot, you have to have some sort of soldering and small electronics knowledge. It's an extremely simple bot, and something to build if you want to get into robotics, but don't know where to start.
Step 1: Materials and Tools


Parts required:
- AA battery holder
- Two small DC Motors
- An on/off switch
- Wire coat hanger
- Some different color lengths of wire (Please have at least 3 different colors!)
- Small rectangle of wood or stiff cardboard
- Large wheels for small cars
- LEDs (optional)
Tools required
- Wire cutters
- Soldering iron
- Solder
- Hot glue gun
- Hot glue
EXTREMELY IMPORTANT: ALWAYS test your electronics before glueing or soldering!
Step 2: Building the Base


(I forgot to take pictures of this step, but it's very simple, so it doesn't matter)
- Measure out a length of wood or cardboard aprox. the length of your motors back to back not including the axles.
- Place a large dot of hot glue on the end wood to glue the motor on with the contacts facing up. Do so on the other side.
- Hot glue the motor assembly onto the backside of the battery holder on the end closest to the wires.
- Hot glue the switch on the other end, be sure to remember which contact is which!
- Test your electronics!
Step 3: Electronics Pt. 1


ALWAYS Test your electronics before soldering!!
- The ground wire on the battery pack (The black wire) goes to the top right contact on the motors if the motors are facing you.
- The positive wire on the battery pack (The red wire) goes to the input contact on the switch. This is usually the middle contact.
- Cut a small length of wire to go from the top left contact on the motors to go to the bottom right contact. Again, this is if the motors are facing you, as in the first picture. This is the yellow wire in the picture.
- The last wire goes from the output on the switch to the last open contact on the motors. This is the green wire in the picture.
- Make sure your motors are turning the way you want them to before you solder them!
- If your motors turn the wrong way, just switch where the positive and negative wires go on each motor, it should spin the other way.
How to test an on/off switch to determine terminals
The middle contact is generally the input wire on a switch. To see which is the output, touch the positive wire from the battery pack to the middle contact on the switch, then touch the ground wire from the batteries to a contact on a motor. Then touch a wire to the other contact on the motor and one of the outside contacts on the switch and flick it on. If the motor doesn't work, try the other contact on the switch. Hopefully this helped!
Step 4: Electronics Pt. 2 (Optional)


AGAIN: ALWAYS Test your electronics!
If you want to add LEDs:
- Use a length of wire to connect the ground contacts on the LEDs. The negative leg on an LED is usually shorter than the positive leg. Also, it's on the flat side of the light. Make sure the solder connection is strong!
- Solder a wire to the positive leg of an LED, and another wire to the other positive leg on the other LED.
- Lastly, solder a wire to one of the negative legs to ground the circuit
Connecting the LEDs to the bot:
- Test that your circuit is working by touching the positive wires to the output on the switch, then touch the ground wire to the ground contact on the motors and flick the switch on. The lights should light up and the motors should spin.
- Hot glue your lights into place, I put mine on the wood over each motor. Then, cover the connections with hot glue to prevent them from coming loose.
- Solder the negative wire from the LEDs to the negative contact on the motors. Make sure the negative wire that's already there doesn't come loose!
- Solder the positive wires from the LEDS to the output contact on the switch.
- Turn the switch to ON and make sure everything is working fine!
- If you are worried about the connections on the switch coming loose, cover the connections with hot glue.
Step 5: Finishing Touches


To keep the little robot from dragging around, I added runners made out of a segment from a wire coat hanger, but you could also add a wheel, a ramp, or whatever you think may work.You could also glue the LEDs onto the front to make it look like headlights. It's up to you, whatever works. Add your wheels and turn on your bot. Hopefully you don't encounter any problems, if you do, tell me below and I'll try to help you!

Participated in the
Maker Olympics Contest 2016


