

Introduction: Easy Motorcycle Windscreen Toll Road Transponder Quick Mount (EZ-PASS, IPASS Etc.)


Motivation: Toll Road transponders (Ez-Pass, iPass, etc.) are very convenient for motorcyclist as they eliminate fumbling with toll ticket and cash - especially advantageous in raining weather. However, while transponders easily mount to the inside of auto windshields, not so on motorcycle windscreens due their greater curvature.
Design Goals: [1] Not interfere with transponder RF communication at toll booths, [2] allow easy swapping of transponder between bike and car, [3] not require adhesive strips to be stuck to motocycle windscreen or damage the windscreen during use, [4] secure, weather resistant and very fast on/off attachment to motorcycle windscreen, [5] make in less than 1 hour at low cost..
Field Test: I have used this mount for 1000+ miles with my Yamaha FJ09 mostly on Ohio and New York turnpikes with no issues. It should work well on motorcycles with a similar size windscreen, but perhaps not on really wide windscreens like on a Goldwing.
Step 1: Materials and Tools


Material:
- 4 mm thick corrugated plastic 1 1/2 " wide and as long as motorcycle windscreen is wide. Craft store is a good source.
- 1/16 inch thick foam sheet. Normally comes in 8 1/2 by 11 sheet which is plenty. Craft store
- 3M Dual Lock strips 1 by 3 inches - Hardware store, Amazon, etc.
- Duck Tape - clear looks nicest
- Two Medium Binder Clips (1 1/4 inch wide). Office supply
Tools:
Utility knife
Step 2: Attach Foam Bumpers to Transponder Front Side


- The front side of the transponder (that is the side that normally attaches to the auto windshield) will press up against the back side of the motorcycle windscreen - so to avoid scratching of the windscreen, we'll fix foam bumpers at the corners as shown in the photos.
- You want the bumpers to be just slightly higher than the normal auto mounting strips - too high and you won't be able to reinstall the transponder back on the auto windscreen.
Step 3: Fab the Mounting Strip and Attach to the Transponder and Windscreen.


1. Cut the corrugated plastic into a strip about 1 1/2 inches tall and a little longer than the width of the windscreen. Cut so that the corrugations are vertical.
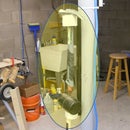
2. Attach the transponder to the center of the strip using 3M Dual Lock 1 by 3 inch strips. Test fit transponder and strip assembly to the backside of the windscreen, it's best if the transponder bottom edge rests against a support like the windscreen mount (see photo). The transponder should be oriented similarly to how it mounts to auto windshields.
3. Mark the ends of the strip to line up with the sides of the windscreen and trim to size.
4. Attach duct tape (clear duck tape looks best) to each strip end, folding it over on itself so the "flap" created extends about three inches from the end of the strip on each side. The flaps keep the binder clips from marring the windscreen surface.
5. Finally, using the binder clips, attach the strip and transponder to the inside of the windscreen as shown.
6. Take a test ride to ensure the mount is secure and the transponder communicates with the toll booth system.
That's it you're done!

Participated in the
Car and Motorcycle Contest


