

Introduction: Easy Sheet Metal Flower


This Sheet Metal Flower project is one I occasionally have my students do in my Introduction to Manufacturing classes. The project isn’t as technical as many of the other sheet metal projects we do and allows my students to be more artistic. I’m a big fan of this little project as there are no plans students have to create or read and they can complete them in less than one class period, which makes it a great filler project for students who are ahead or at the end of a quarter or semester. The other great thing about these flowers is that we mainly just use scrap metal left over from our other classroom projects. This Instructable walks through how to make a generic looking flower but I have had students use the same process to create specific flowers, like a tulip, rose, or daisy. Many of my students make these as gifts for their friends or moms.
PLEASE BE SURE TO USE ALL PROPER SAFETY GEAR WHEN WORKING WITH METAL! Especially safety glasses as a metal splinter in your eye is not a fun experience.
Supplies
Materials
- Sheet Metal
- Circular Object (Roll of tape)
- Pop Rivet (Optional)
- Paint (Optional)
Tools
- Scratch Awl or Metal Scribe
- Aviation Shears
- Spot Welder or Drill
- Pliers
Step 1: Video Tutorial
If you like watching to learn more than reading, check out the video tutorial of this project above. It's an updated version with some alternate fastening methods and all in under nine minutes!
Step 2: Cut Starter Squares


Start by gathering your sheet metal and measure, mark, and cut out three or more squares of metal. The size of the squares are up to you but they should ascend in size by about 1-1/2 to 2 inches each square you create. For example, I usually have my students start with a 2 inch square, then move up to 4 inch square, and end with measuring out a 6 inch one. We have found that two inches is about the smallest we can go and still have a relatively easy time shaping the metal into the petals of the flowers later on. I always have my students measure and mark all of their squares on their metal before cutting them out to make sure they have enough metal for the size of their flower.
To cut the squares I have my students use a large foot shear but simple aviation snips would work just fine as well.
Order of operations
- Measure and mark smallest square
- Measure and mark a square that is 1.5 to 2 inches larger than the smallest square
- Measure and mark a square that is 1.5 to 2 inches larger than the previous square
- Cut out each square
Step 3: Cut to Flower Petal Shape


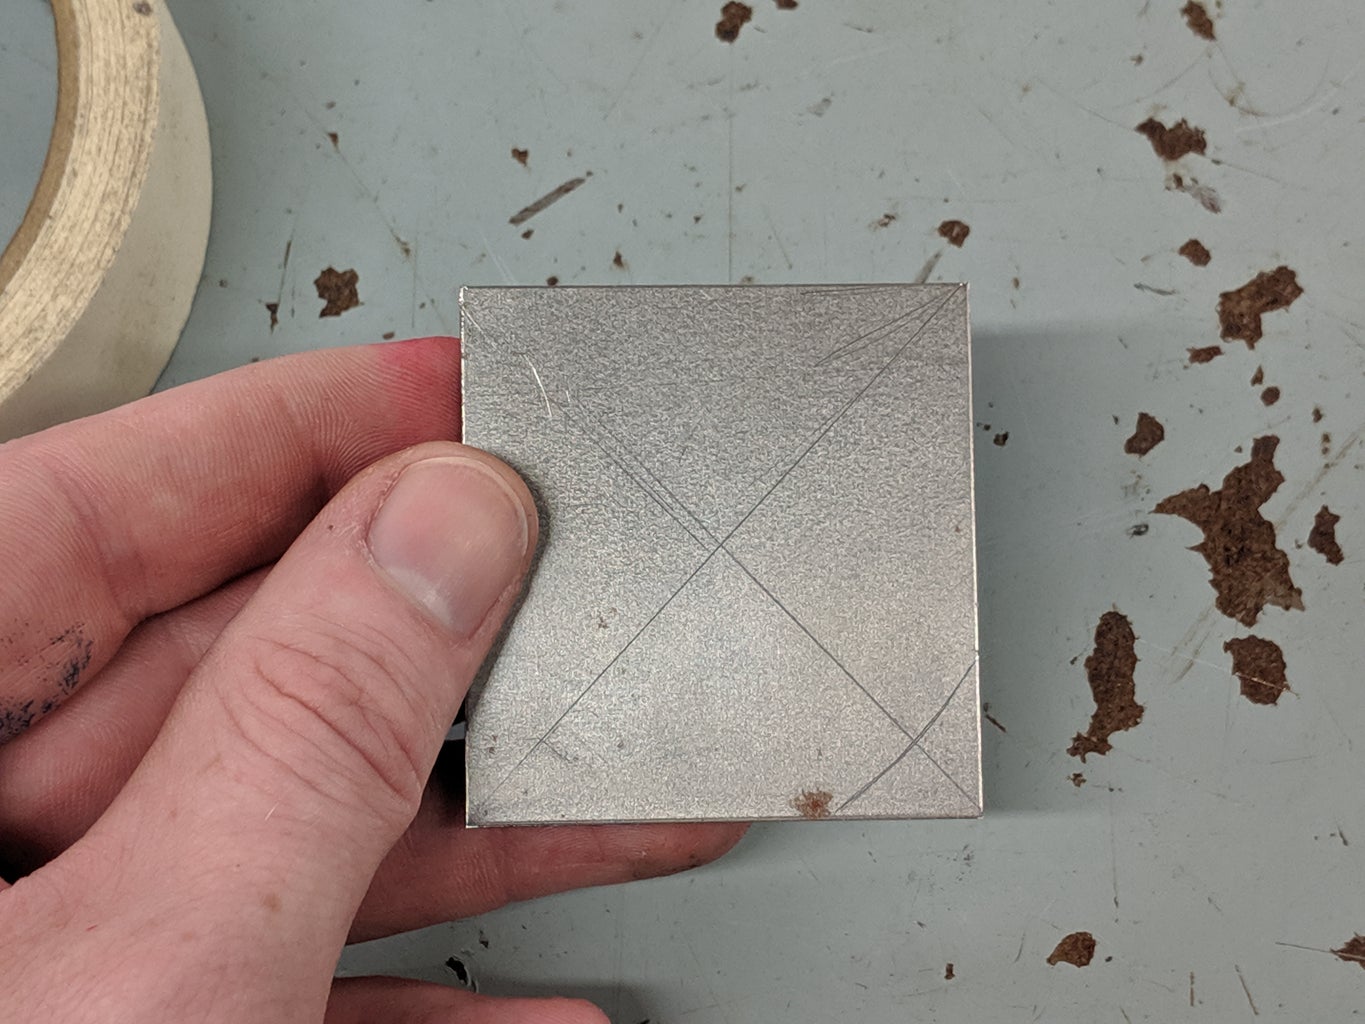


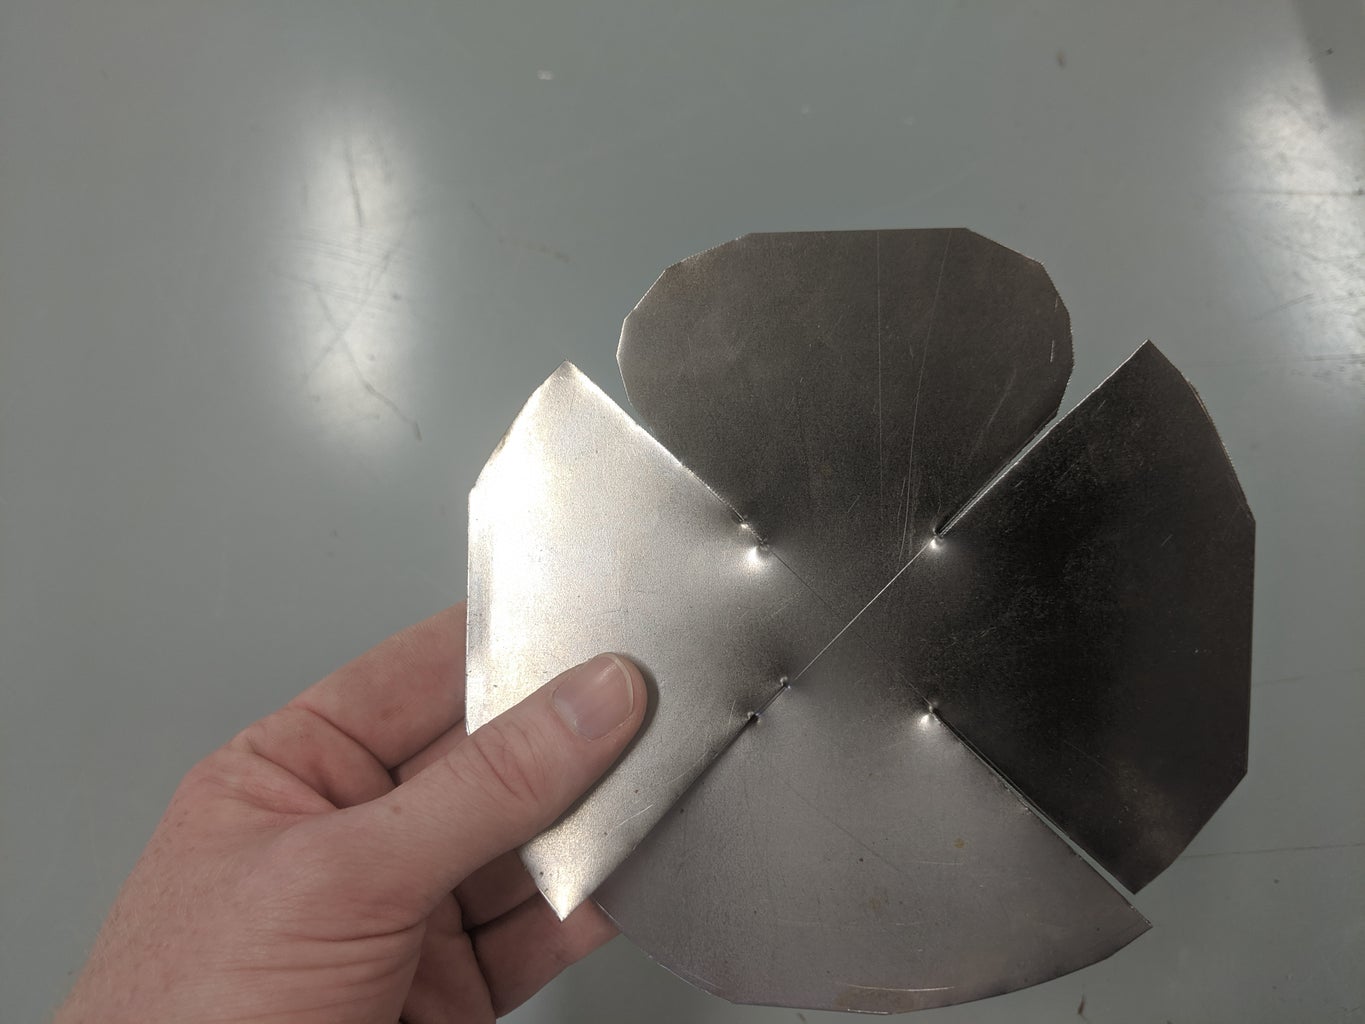

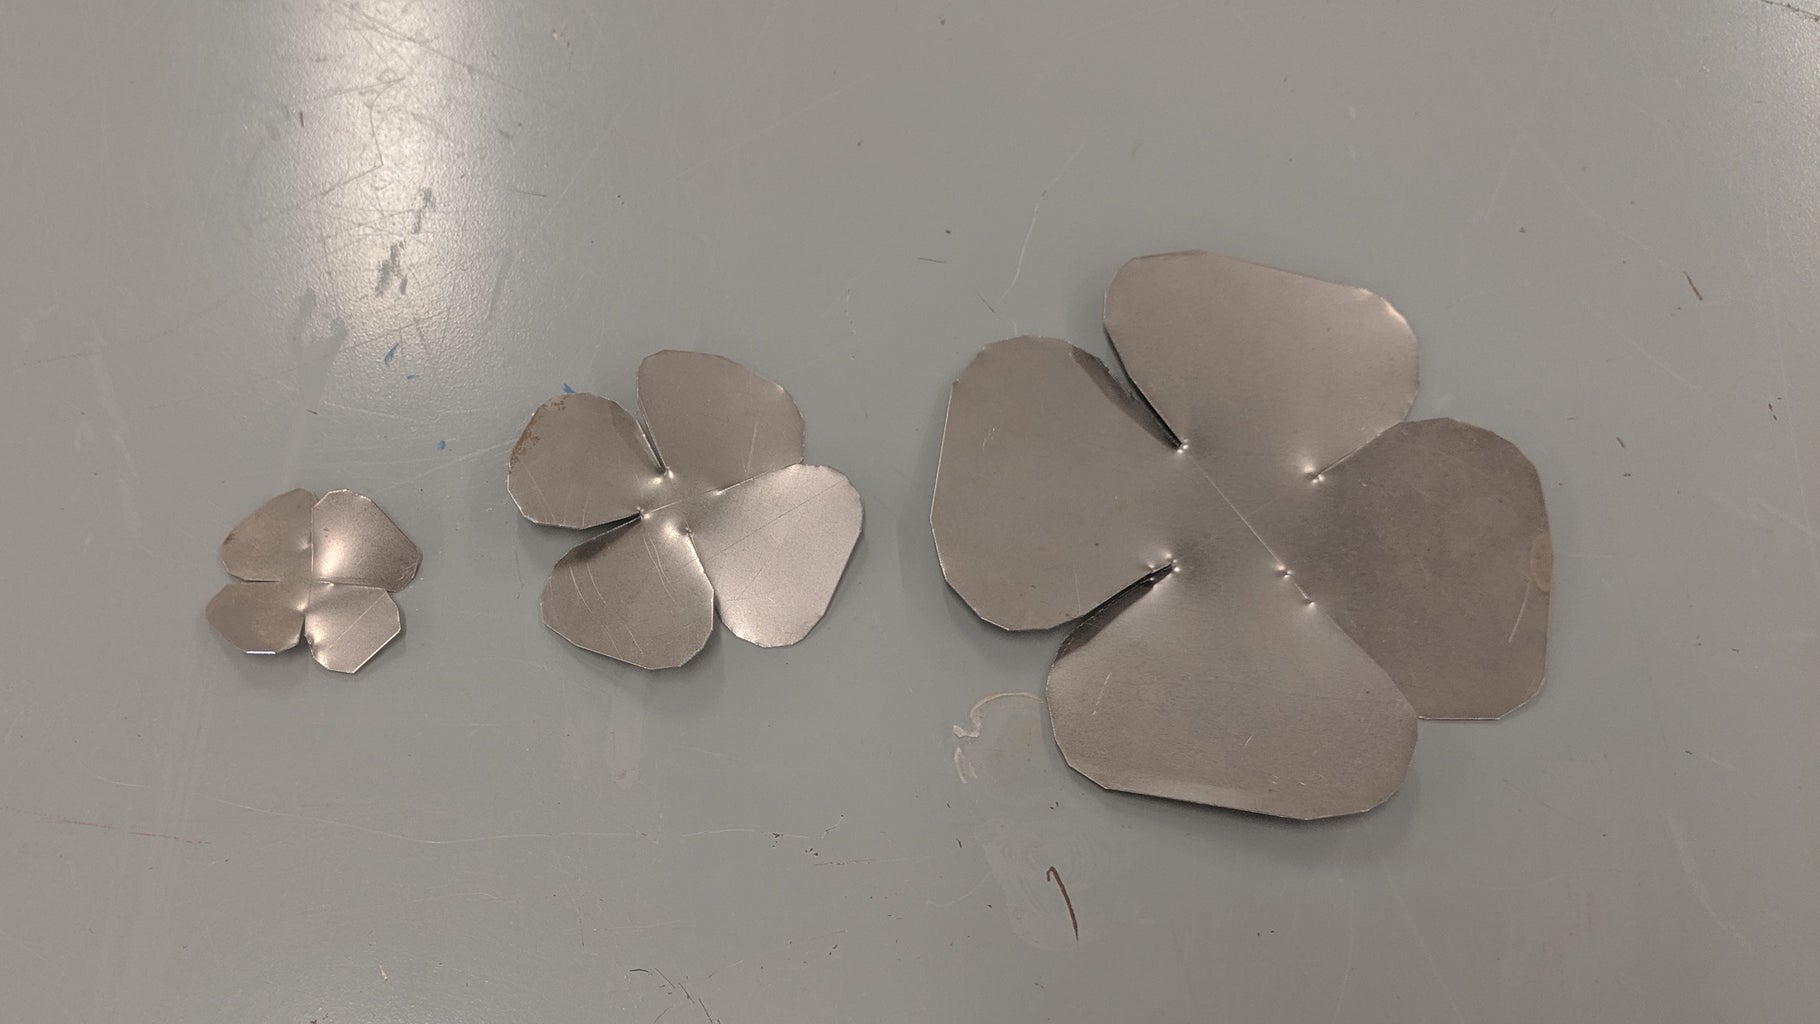
Once you have your squares cut, the next step is to cut the them into petal shape. We normally use a four petal per square design. You begin by marking lines on your metal from one corner to the opposite corner twice on each of your squares. You should end up with an “X” on your metal. Next you will round off the corners of your squares so they end up in some semblance of a circle. I have my students use a roll of tape as a template to mark the corners off with an arc.
To begin getting your now circular pieces to look like flower petals you will cut each piece of metal into a pinwheel. The biggest mess up when cutting the pinwheels is cutting too far into your metal and not leaving yourself enough area to fasten all of your metal pieces together in the next step.
You don’t want your petals to have sharp corners, so as you are cutting your pieces be sure to then round off the edges of each petal. The goal is to have them look like actual flower petals so they do not all have to look exactly the same, a little difference between each petal will actually make the flower look more natural.
Order of operations
- Mark a line from one corner to the opposite corner on each of your metal squares. You should end up with an X on each square.
- Use a circular object to mark an arc you can use to round off each corner
- Cut each square into a circle
- Cut each straight, diagonal line about ¾ of the way into the center of each circle.
- Round off the sharp corners on each flower petal.
Step 4: Fasten Petals Together


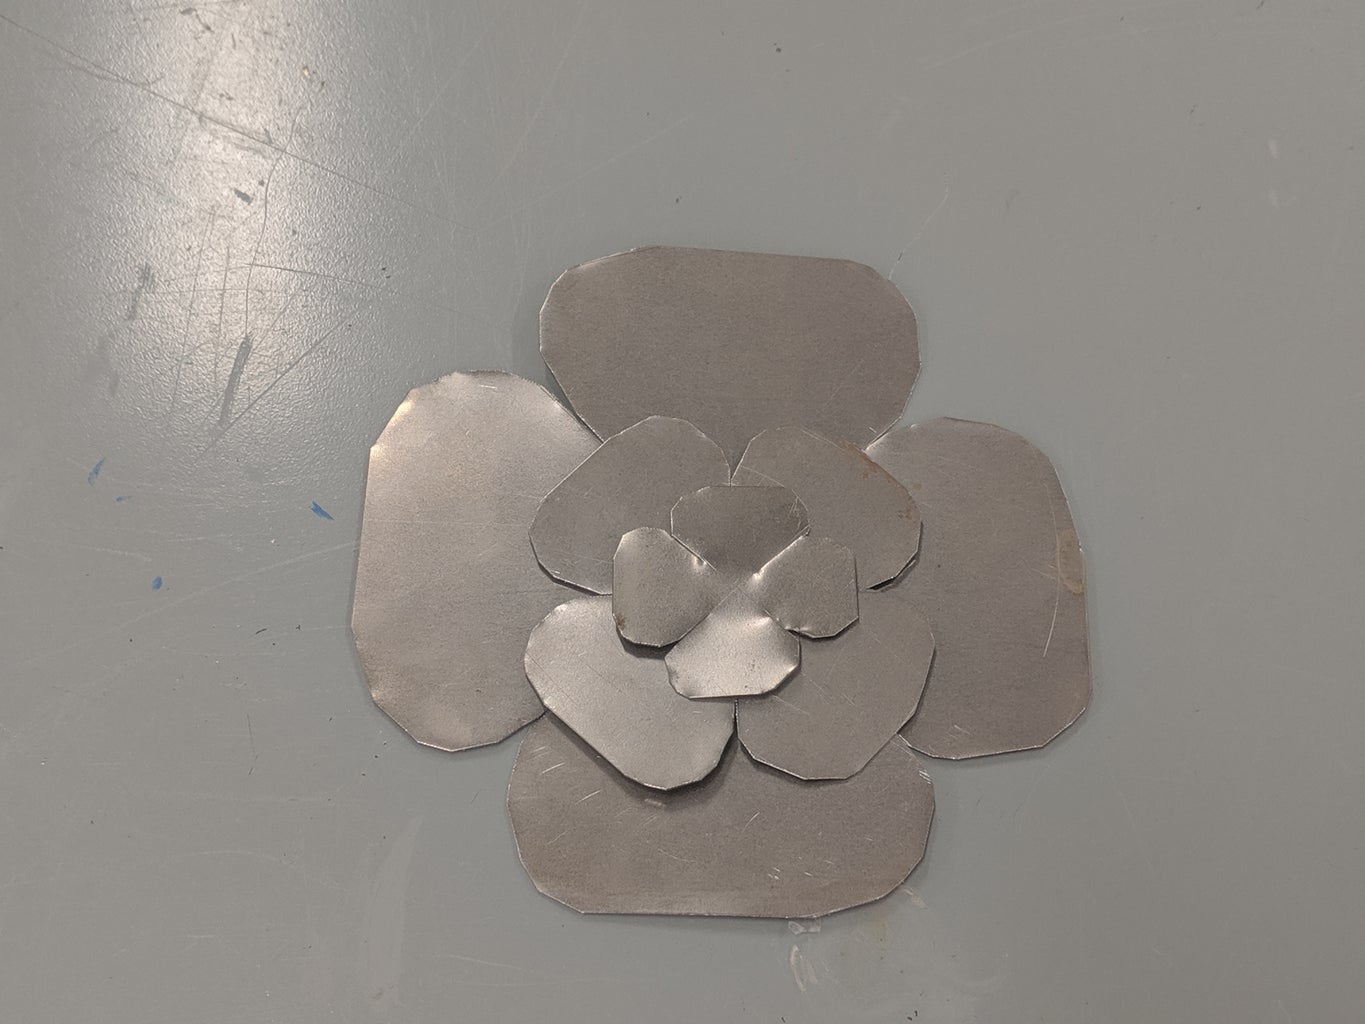


Your metal should now be in the shape of a pinwheel without any sharp corners. Next, you will want to flatten out each pinwheel. The flatter the better, as you need to fasten all of your pieces together.
We have a spot welder in our shop, which is what we use for this step. But we have also used pop rivets and machine screws and nuts before. Pop rivets have worked the best if we do not spot weld, your pieces will hold together but there will probably be a little wiggle room once your pieces are attached together. Machine screws and nuts can work but you need to tighten the nut down as much as you can, as these have a tendency to come loose over a little bit of time.
If you are using a mechanical fastener you will need to drill a hole in the center of each piece of metal, which should be conveniently marked from the X you marked in the last step.
If you use a spot welder you just want your pieces of metal to touch as much as possible where the weld is going to be going.
Before fastening I always recommend to my students to stagger the petals to give the flower a more natural look. If all of the petals are positioned directly on top of the one behind the flower just doesn't quite look as good when finished.
Order of Operations
- Flatten out your metal
- Fasten metal together
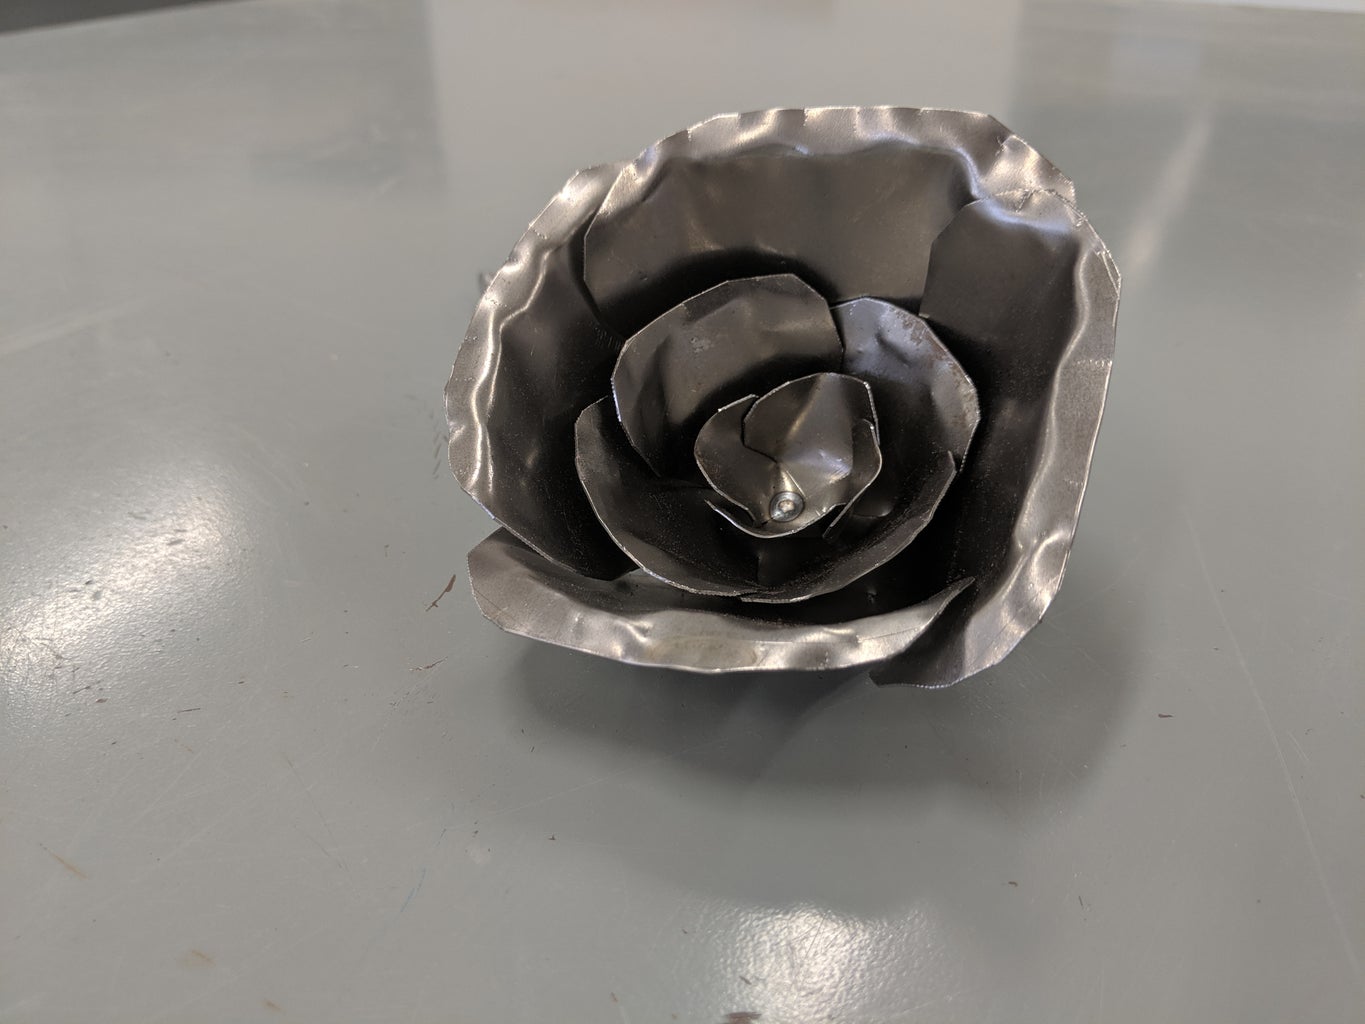
Step 5: Form Into Flower


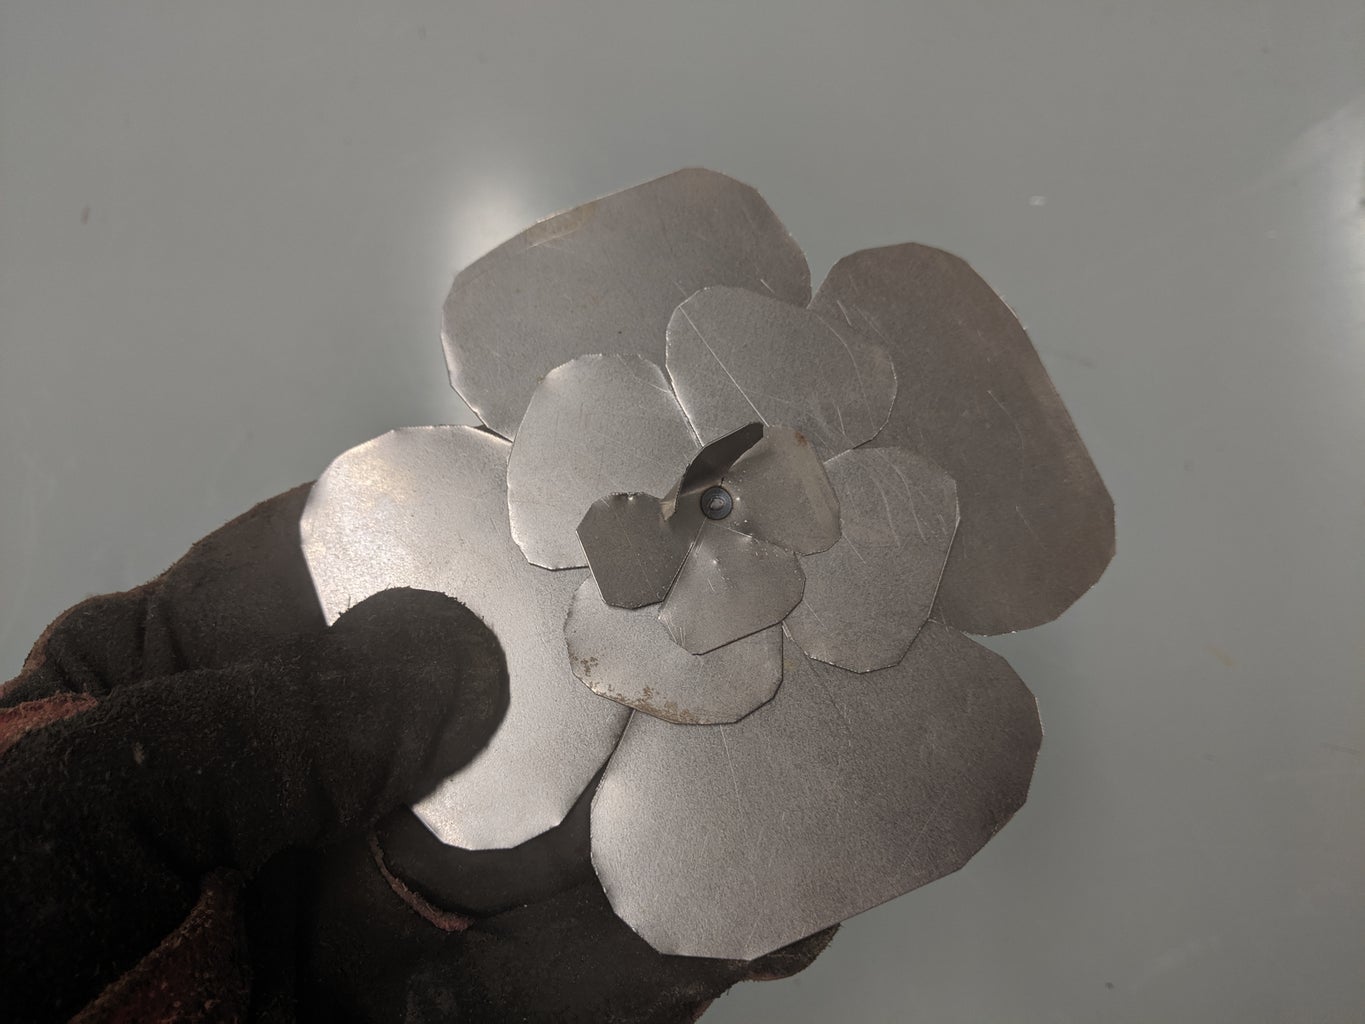
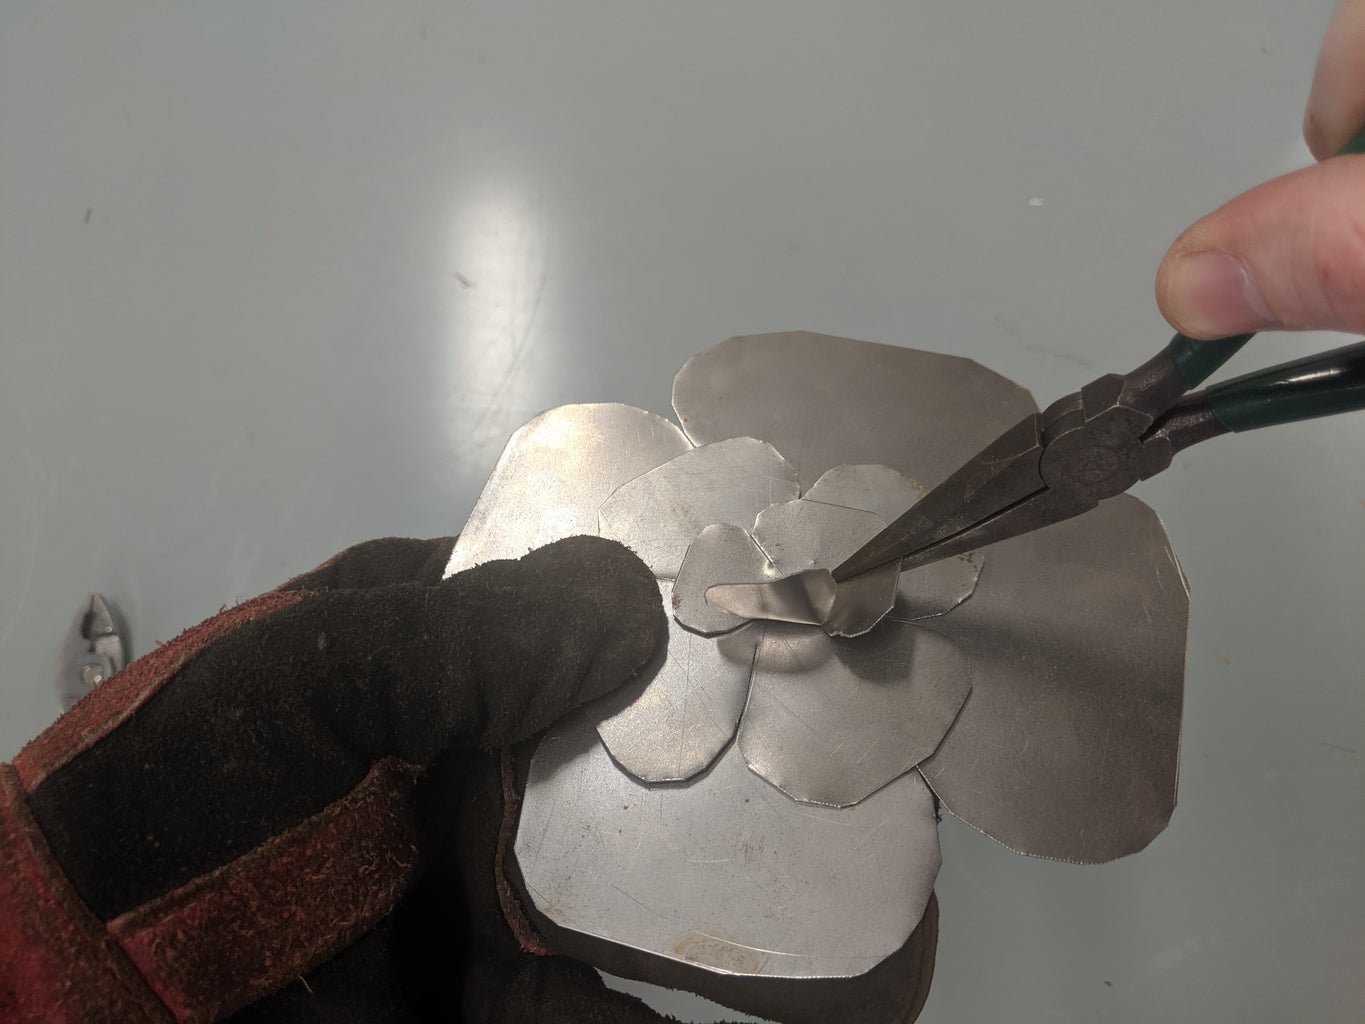


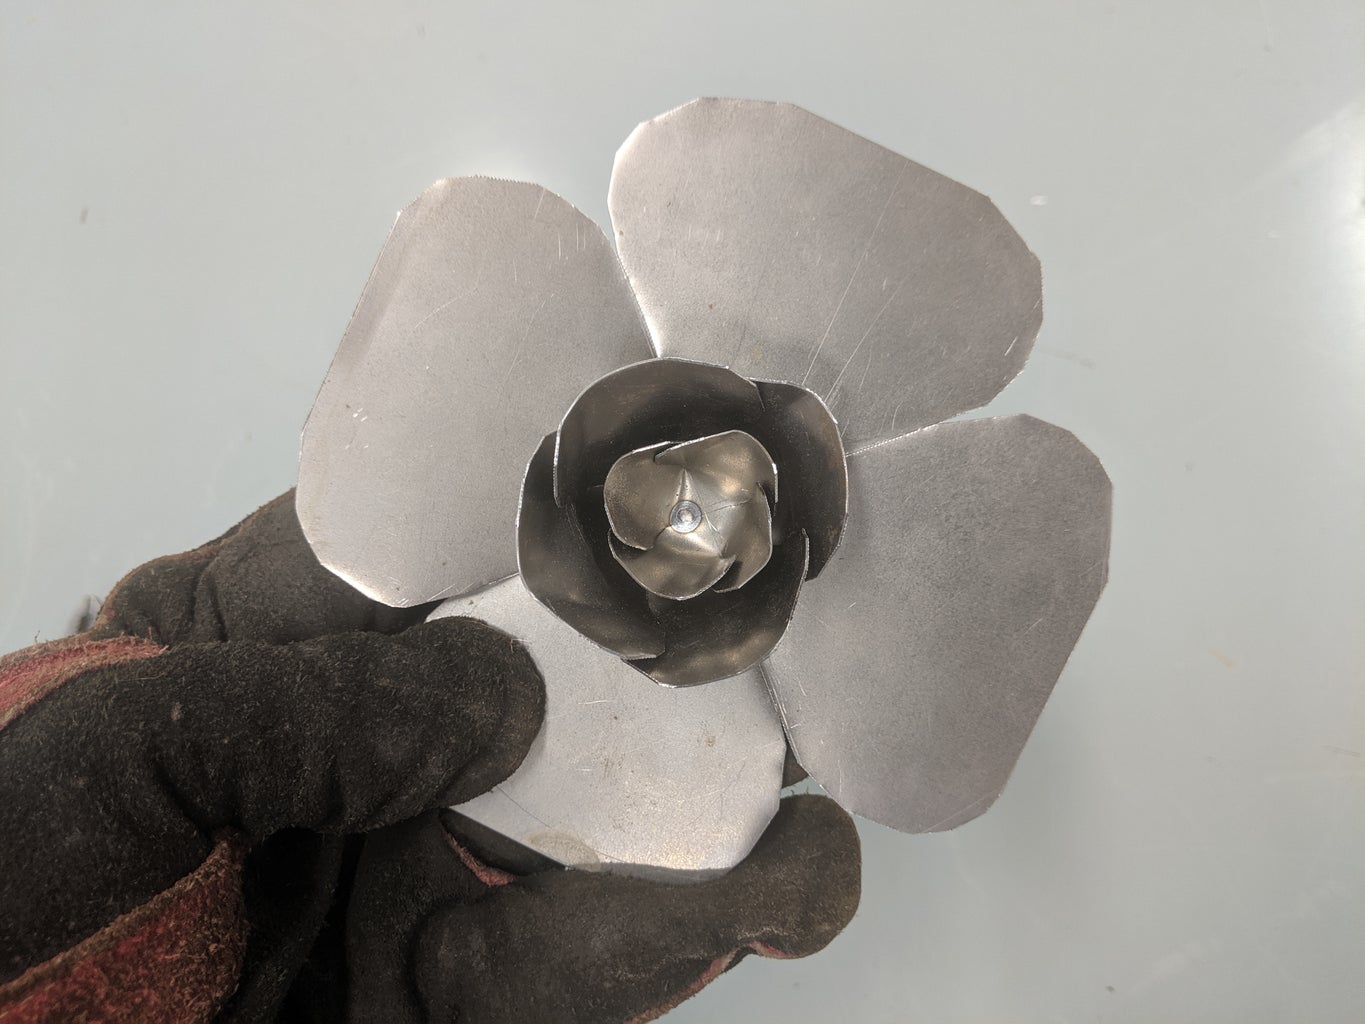


You should now have your metal petals attached together and the fun is about to begin. This is where you can start using those artistic skills of yours. Get your pliers out and start bending the metal into a flower. We use two types of pliers in class for this step, a pair of needle nose pliers and a pair of slip joint pliers. You could do the whole process with just one type of pliers if you wanted.
Be sure to wear a glove on whatever hand will be holding your metal. The edges will be sharp and you will need to have a firm grip as you form your metal into a flower.
We start from the inside and work out using the needle nose pliers to form each petal. Bend one petal at a time up roughly 90 degrees and then use the pliers to bend a curve into the petal. Once you have one section done repeat the same process on the other layers of your flower.
When all of your petals are sticking up at 90 degrees and curved take your pliers and start to curve the top of each petal out, as if the flower is blooming. We use the slip joint pliers here as they have more surface area to grab onto the metal. Work from the outside in for this part of the process. It is personal preference on how much you bend and form your flower, work with your metal until you get the look that you like.
Order of Operations
- Bend one petal at a time up to 90 degrees and to a curved form
- Repeat until all your petals are at 90 degrees and curved
- Bend a curve on the top of each petal, as if the flower is blooming
- Repeat until you get your flower to your desired look.
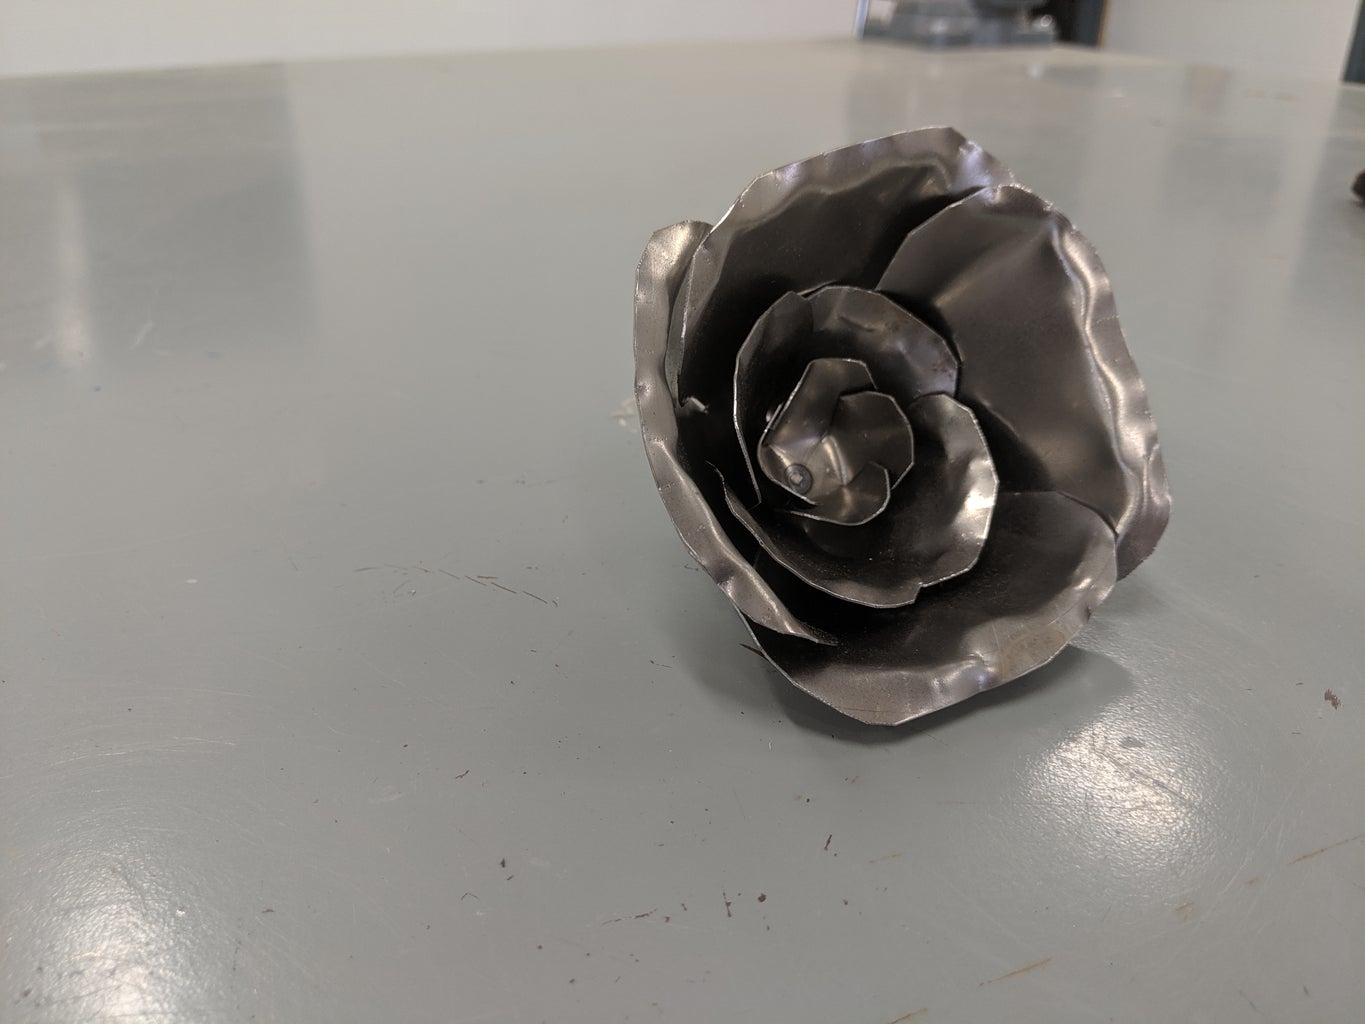
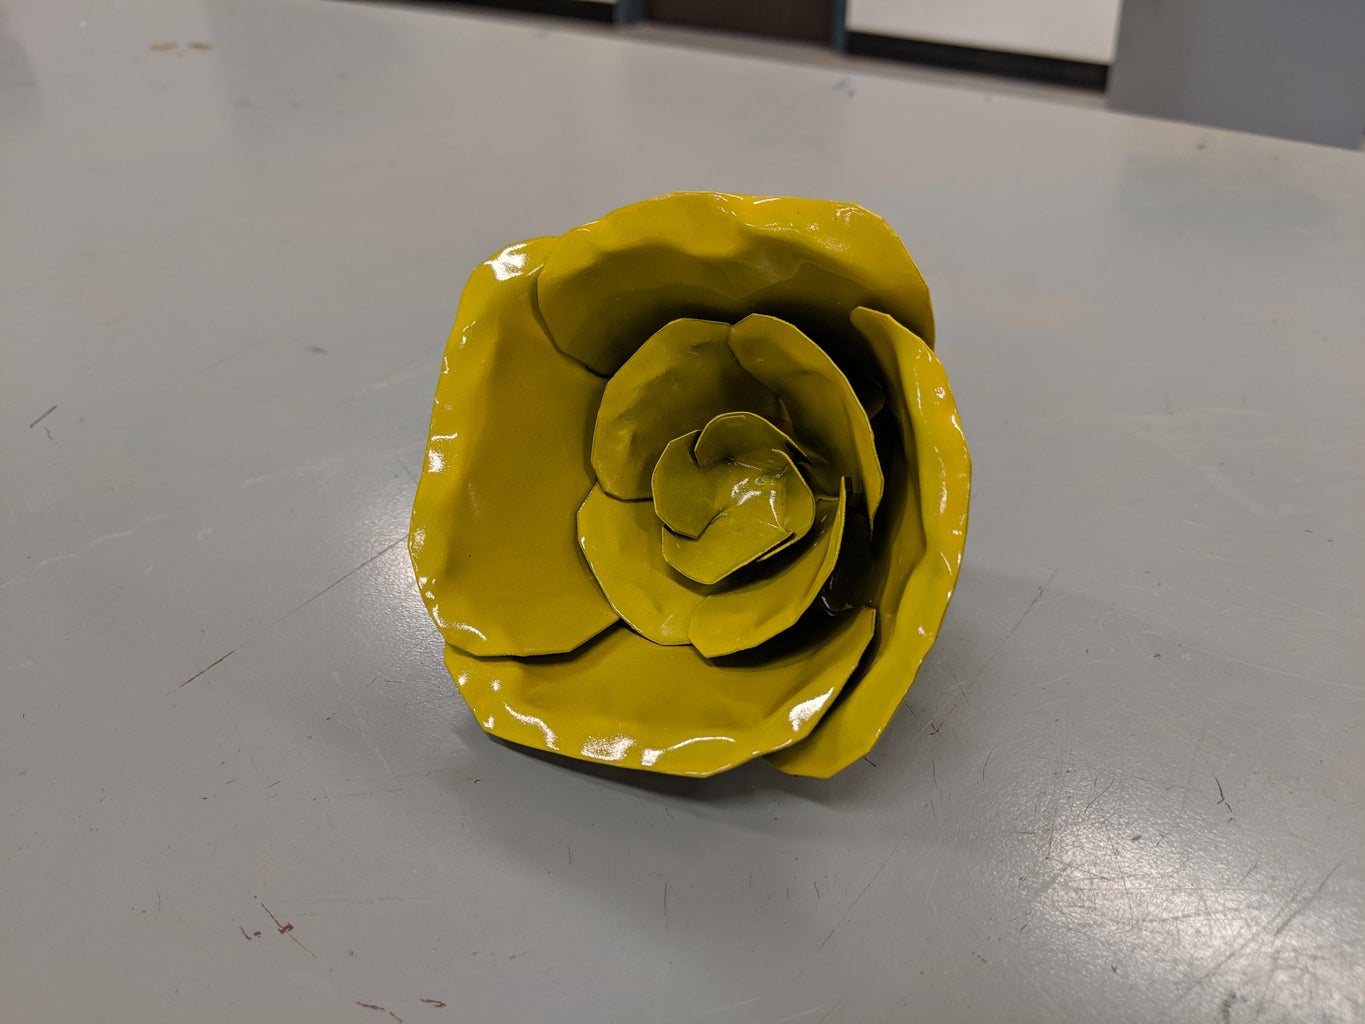
Step 6: Optional Step: Paint Your Flower
All of our metal is donated from a local manufacturer in town, after working with it in class the metal begins to rust rather quickly. Some of my students prefer that rusted look and have no plans to give the flower to anyone so they leave their work as is. Many students want to preserve their flower and give it as a gift, so we paint them with whatever spray paint or clear coat we have on hand. If you are going to paint your flower just take your time and work to cover all the nooks and crannies of your flower.
Step 7: Show Off!

You’re finished! Now go off and make yourself a garden of flowers that never wilt and never need water!
If you need any help or clarification on a step, let me know in the comments. I'll try to help as much as I can.
If you make a flower, let me know!
Enjoy creating and learning!

Participated in the
1 Hour Challenge


