

Introduction: Eclipse & JUnit Setup

Step 1: Download the Two Files Provided Before Starting the Rest of This Guide.
Click the hyperlinks in the introduction to download the two necessary files before you continue the guide.
Step 2: Open Eclipse IDE. Use the Default Workspace.

Step 3: Create a New Project Called Csc301.

Navigate to File>New>Java Project, then name is csc301 & all the default settings.
Step 4: Create the "hw2" Package.

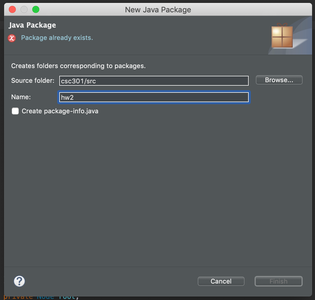
Expand the csc301 project folder and then inside the src folder, create a “hw2” package. Do this by right-clicking the “src” folder in the explorer window and selecting “New” > “Package” and using “hw2” as the name.
Step 5: Select the Files You Downloaded and Copy and Paste Them Into Eclipse.
Select the two files you downloaded and copy and paste them into the “hw2” package in Eclipse. This can also be done by simply dragging and dropping the files manually into the “hw2” package.
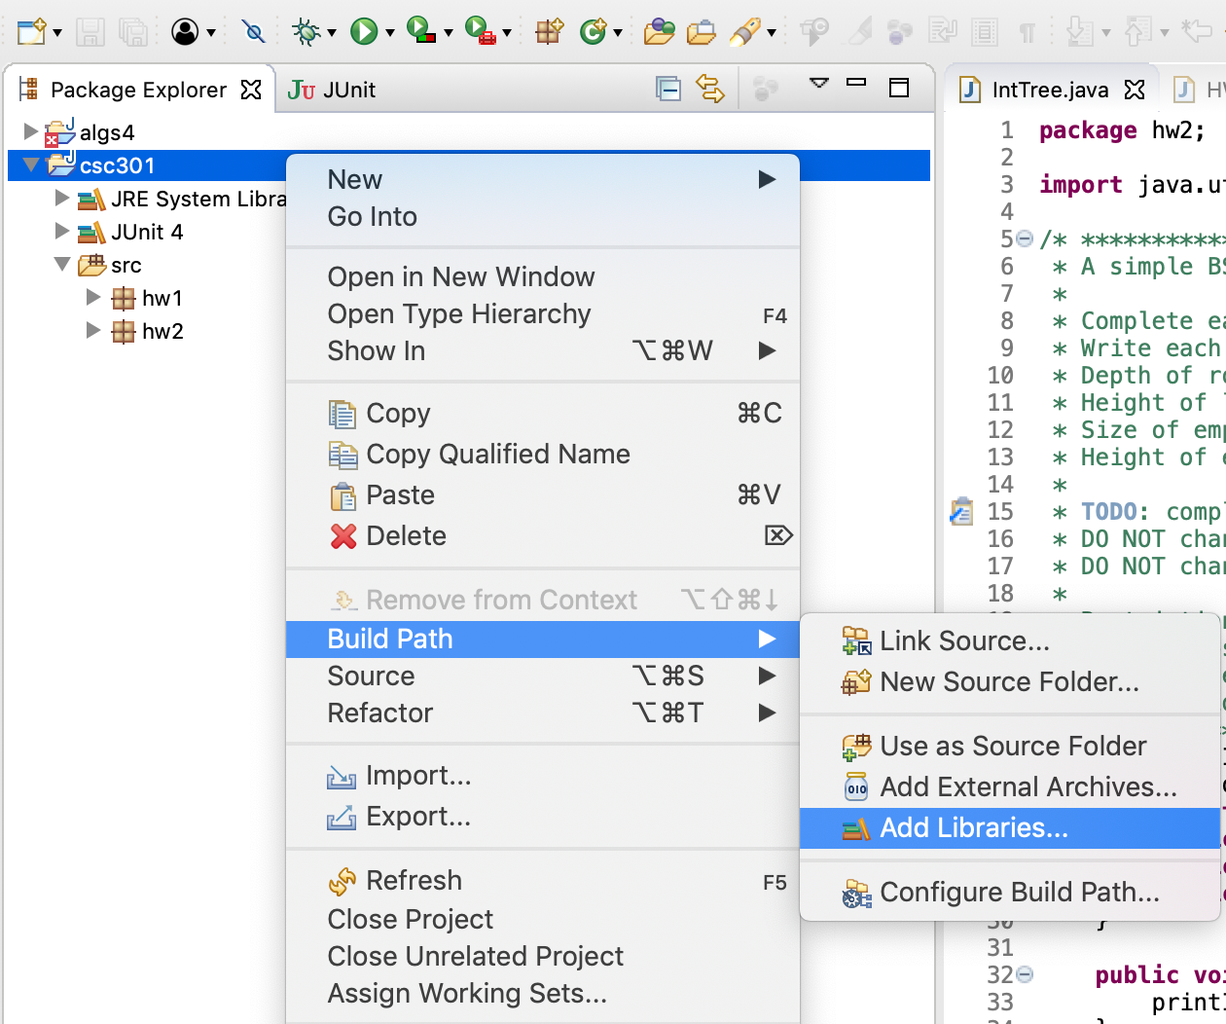
Step 6: Highlight Your Project Folder (csc301 in the Image).

Step 7: Right Click on the Project Folder & Open “Build Path” to Select “Add Libraries.”
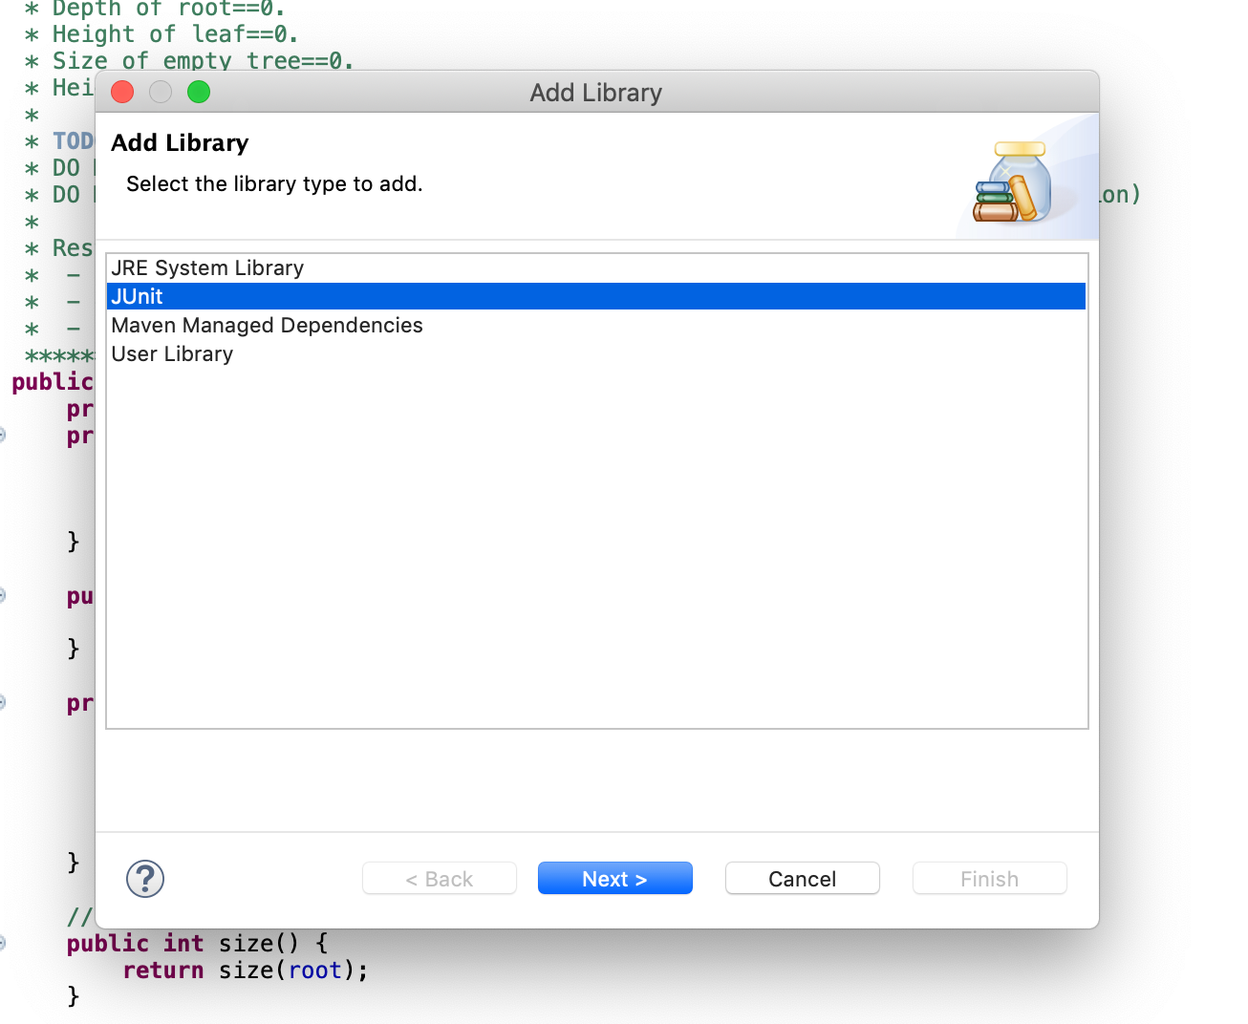
Step 8: Select “JUnit” When the “Add Library” Window Opens Up & Click “Next.”
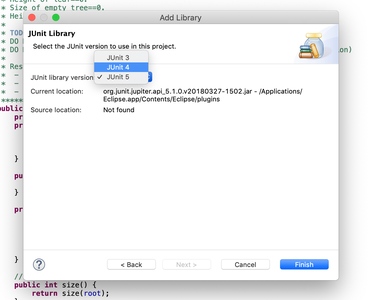
Step 9: Select “JUnit 4” From the Dropdown Box When the “JUnit Library” Window Opens & Click “Finish” to Add JUnit to Your Project.
Step 10: Run Your JUnit Test File to Confirm That Your Tests Are Functioning Properly After Your Install of JUnit.
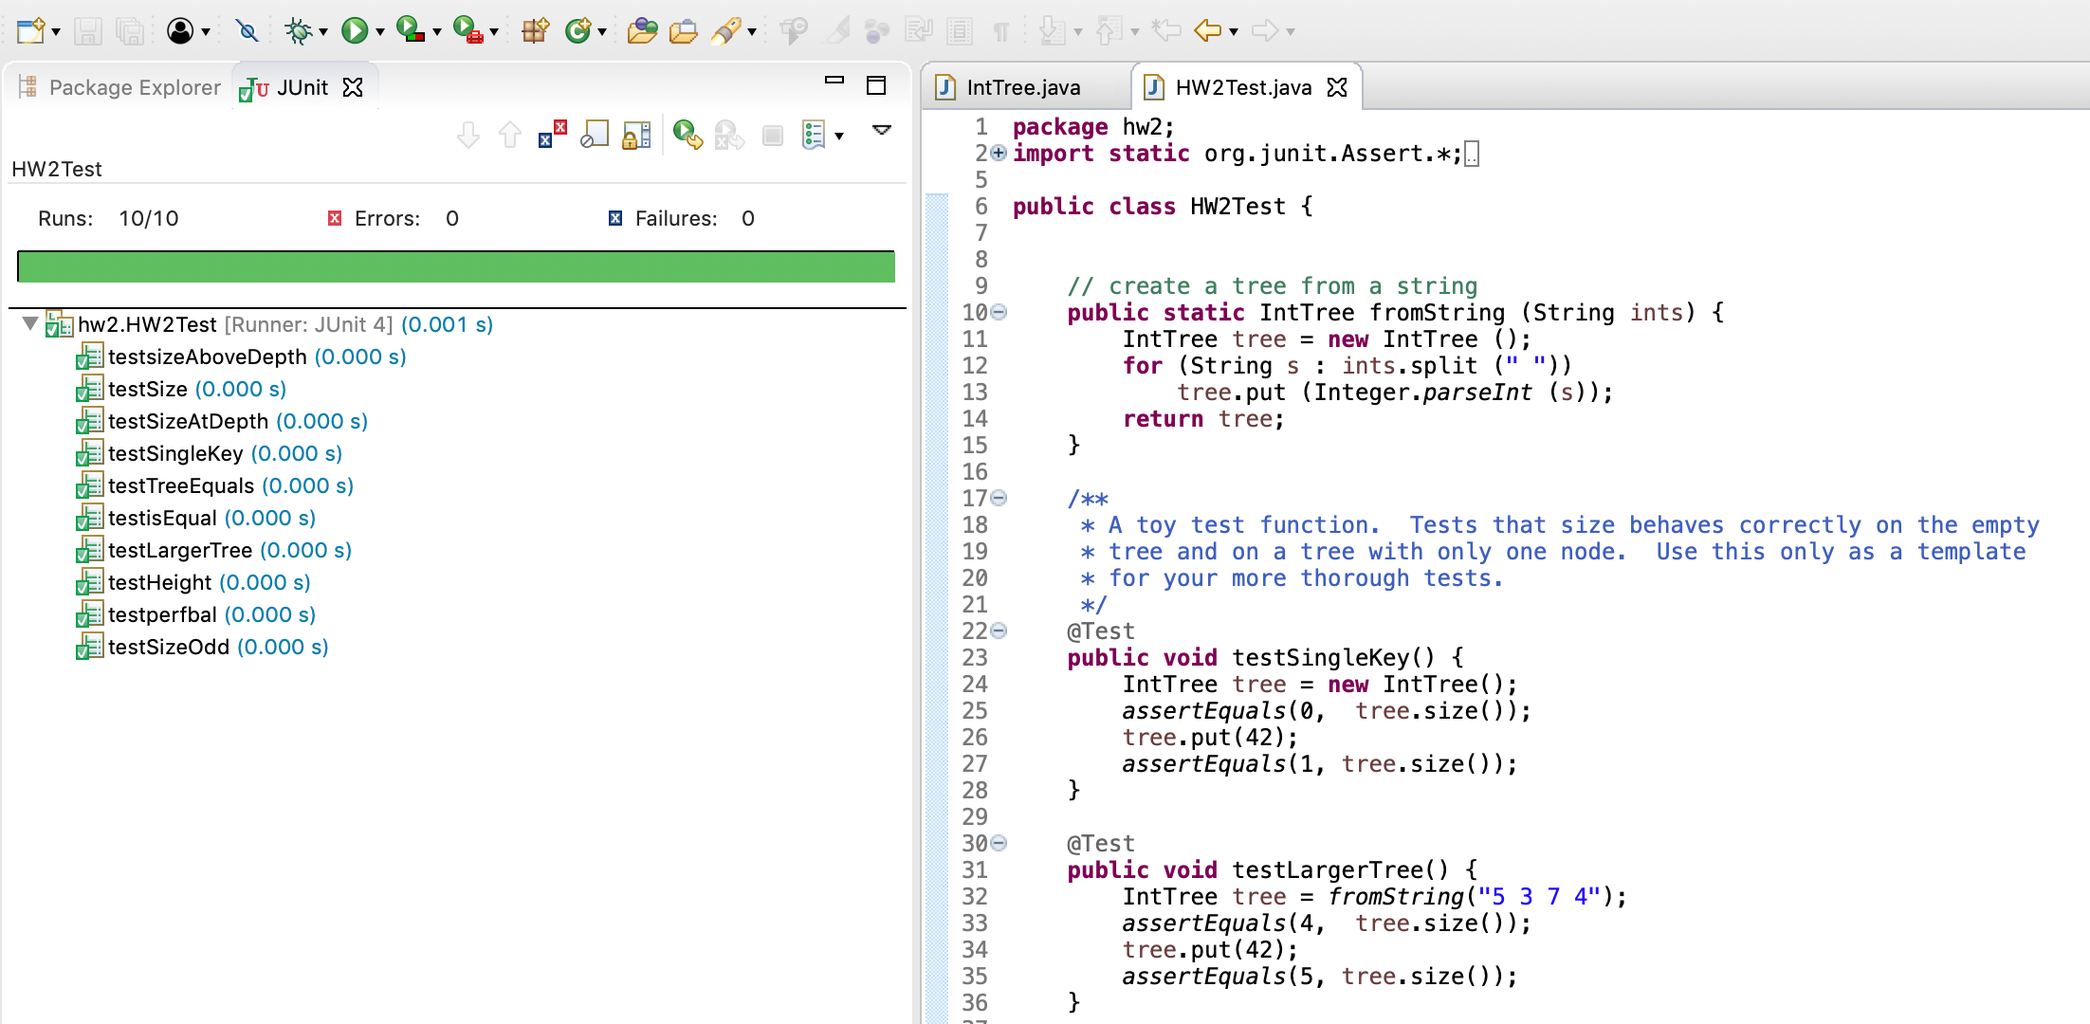
You should see a pop up window for JUnit on the upper lefthand side of Eclipse showing your JUnit test results after you run the file.
Step 11: You've Completed Your Eclipse & JUnit Setup!
Congratulations, you’re now done with your setup of JUnit for Java testing! Now you are able to create your own JUnit tests and test your code for various cases!
If your tests are still not functioning correctly, make sure that the function file & test file are calling the correct methods. At step 9, if an error appears telling you that JUnit is already added to your Eclipse project, then disregard the error & the rest of this guide, JUnit is already installed! Once this is verified, make sure you followed each step in this instructional guide in the correct order. Ultimately, your Java project should now be able to run JUnit tests on any functions you write!


