

Introduction: Edible Knife Handle


Before we get started, let me just say that this knife handle is edible, it is made out of carmelized honey that hardens when it is cooled.
I wanted to make a knife and tool
This knife had four survival components
-A knife with a tang
-A hardened honey handle that you could eat if you were starving
-Matches, fishing wire, water purification tablets, and a fishhook that are incased in straws in the honey handle
-Two meters of paracord for many uses in survival situations
*Bonus* -This knife is also perfectly comfortable, it fits in my hand perfectly.
Step 1: Tang Your Blade


first we must find a knife that has a tang on it. My chosen blade was from a broken pocket knife, and it didn't have a tang.
I used a piece of stout wire and put it through the whole and twisted it to before welding it. I left a loop at the back of the tang so i could drill a hole for the paracord to go through in the end. Twisting the wire will help the honey from coming off
I do not have a welder, so my shop teacher kindly welded the spot for me. you could also use solder, but it will not be as strong. if you do use solder, then use lead free solder because the honey will come in direct contact with this part.
Step 2: Honey Straws


On these honey straws, the honey will be on the outside.
Seal the ends of some straws with pliers and a flame, then put whatever you want that will fit in the straws. Seal the other end the same way and you now have a set of sealed packages to put into your knife.
I used matches, a straightened fishhook that can be bent later, water purification tablets, and some fishing wire. Some other ideas for things to put in the straws are thread and needle, Asprin, or any pills for personal allergies or diseases.
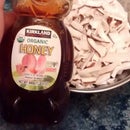
Step 3: Preparing Your Honey


The amount of honey in the first picture is WAY too much, it bubbled over a lot and I had to clean up a lot.
Use the amount of honey that you think will fit around your tang to make the handle, then add a little bit more. If you use a bigger pot, then you could use a larger amount. Heat this honey up until it bubbles profusely and begins to turn a deep red amber. The color you are looking for is a bit lighter then the last picture. Do this slowly because it goes fast.
Do not make too little because you can not easily add new honey to what you have already caramelized.
Step 4: Dipping Like a Candle


In this step you will dip the tang of the knife into the honey and/or pour it over it with a spoon. After one coat we must let it cool before another coat is added.
On the second coat, right when the honey is put on the tang, add the straws with your survival amenities in them around the honey. let this cool a bit while spinning it slowly to prevent drips.
Keep adding coats until the handle is just smaller then the size that you want by about two coats. While this coat is cooling you must form it to the shape of your hand. Just squeeze the handle lightly while the honey is still warm
Next you must boil the last bit of honey until it is almost black. Then dip your handle one more time in this black honey. This last coat will give the outside shell a hard glass-like feel, while also being more resistant to dissolving in water. Again form it to your hand lightly while it is cooling. (see last two pictures)
Step 5: Making It Fit


If you are anything like me, you will have bumps and low spots all over the handle due two having to spread on the last coat rather then dipping it. All is not lost, you can easily grind down the high spots with a rasp to make it fit your hands better. Another useful thing is to slowly heat the handle so you can reshape the handle with your hand.
I used a mix of warming-n-shaping, and filing with a wood rasp.
After you are happy with the handle's shape, you can flame polish the honey to get a nice smooth finish. Just hold the flame to the honey for a second and remove. You can also do this with a stove top or a heat gun
Step 6: Wrap the Handle


This step should get rid of the stickiness and any small imperfections in the handle by giving you a soft layer of fabric.
Before wrapping, you can drill a hole through the honey and your tang, if it has a hole already. Drilling through metal at this point would melt most of the honey and ruin the handle. This is why I left a hole in the back
Paracord is so thick that it would have made my handle too bulky, so I used gutless paracord instead. This is simple, just pull out the white centers of the cord.
Next, you just melt one end of the paracord to the blade side of the handle and wrap tightly and smoothly to the hilt side of the knife. end by going through your hole to leave a bracelet cord or lanyard then coiling the cord to the end of the knife and melting the honey a bit on the back to make the paracord stay in place.
You can melt the honey just a tiny bit with a flame if you want the paracord to stick in that place without moving.
Step 7: Now Go Use It


You should be proud of the knife/survival tool that you just created.
now go play with it and enjoy having so many useful items right in your hand.
I hope you liked this project, because I sure did.
Please comment below with any ideas, thoughts, or criticism.
Also go vote for me in the Apocalypse Preparedness Contest if you liked it.

Third Prize in the
Apocalypse Preparedness Contest

Participated in the
Bracelet Challenge

Participated in the
Explore Science Contest


