

Introduction: Electric Kiln -- Top Loader


I really had a need for a second kiln but was strapped for cash. This kiln was a little easier to build and less expensive. This kiln will be great for PMC clay, glass enameling, annealing metals, small ceramic pieces and many other low fire operations (It can get hot enough to melt most metals too!) Minus the thermocouple, pyrometer, and ICS controller, you should be able to build this for under $70. The nice thing about this kiln is it is customizable to a variety of sizes, element lengths and the elements can be replaced cheaply. It runs on a 120V outlet. This Instructable will also show you how to make your own element wire!!
Materials Needed:
1. 6 x soft fire bricks (4 1/2" x 9" x 2 1/2"- make sure they are soft)(About $30)(any ceramics supplier)
2. 2 x steel bolts (short ones about 1/2" long) and 4 nuts that fit them. ($3)(hardware store)
3. 1 extension cord at least 6-10' long rated to at least 15 amps.($10)(hardware store)
4. 2 pipe clamps. One 6" in diam. and one 4" in diam. ($4)(hardware store)
5. 1 stand alone ICS kiln controller (more on this later). (about $84)(sundanceglass.com)
6. Coil of Kanthal A1 wire, 16 gauge (50ft)($17)(e-bay)
7. 1 piece of wood 2x4, about 6 feet long (a scrap will do)
8. 1 steel rod 3 ft long and 1/4" in diam.($5)(any hardware store)
Optional but important:
1. Type K Thermocouple ($20)
2. Analog or digital pyrometer rated for at least 1100 degrees C (about $50)
Tools Needed:
1. Flat head screwdriver
2. Router with 3/8" bit
3. Hand saw
4.Cordless Drill with small bits
5. Wire cutter/stripper
6. Needle nose pliers
7. Small file
**Safety!!!! --This is an electrical device that runs at 120V and about 10 amps. Make sure you ground your connection as indicated in the Instructable and do not touch connection wires on the back of the kiln while in operation to avoid electrical shock!! This project can also reach temperatures at or above 1000 degrees C. Run the kiln only on concrete or fire resistant surfaces. All other safety precautions should be observed such as: wearing safety goggles, wearing a mask while routing to keep from breathing dust and careful operation of the router.
Step 1: Body of the Kiln


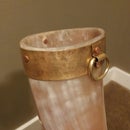
The kiln is not supported off the ground so the bottom should rest on a concrete floor or a non-flammable, heat resistant surface. Two of the bricks form the floor, and 3 for the sides. I cut one brick in half so I ended up with two squares that are 4 1/2" inches in length. I used my router to make 3/8" channels as in the pics. The channels for the element should be routed in the longer bricks too (the top and bottom channels in the longer bricks were 5 inches long). While routing these I had the room well ventilated and wore a dust mask. The soft bricks will throw off a lot of dust! After I made my element I found the element was a little too wide for my channels. I just took a small file and ground down the channels to fit. These are soft bricks so I didn't have to take very much off. I took the 2 pipe clamps and connected them end to end. This made one long pipe clamp. I filed down the corners of the fire brick where the clamp touches (pic.4 and 5) and connected the loose ends of the clamp around the kiln body. I needed to flatten down the clamp on the sides to make it reach all the way around. Once I got the ends to meet, I used my flat head screwdriver to tighten the clamps. My final kiln body looks like pic. 4.
**Safety!!!! --This is an electrical device that runs at 120V and about 10 amps. Make sure you ground your connection as indicated in the Instructable and do not touch connection wires on the back of the kiln while in operation to avoid electrical shock!! This project can also reach temperatures at or above 1000 degrees C. Run the kiln only on concrete or fire resistant surfaces. All other safety precautions should be observed such as: wearing safety goggles, wearing a mask while routing to keep from breathing dust and careful operation of the router.
Step 2: Winding a Kiln Element (down and Dirty)


This step is really very easy, fun and cheap! First l needed to build a small stand for my steel rod. I just used a 2x4 cut into 3 pieces like in the first pic. I mounted the stand to my workbench with some wood screws. I made the stand about 6 inches shorter than my steel rod and then drilled a hole that was a little bigger than my 1/4" steel rod. I made the hole the same height as my drill because I needed to connect the chuck of the drill to the steel rod (pic 2). The Kanthal wire will pop off the spool like a spring as you uncoil it (just an fyi). I connected the free end to the steel rod with some duct tape. I left a tail of about 10 inches so I could make a terminal end when I was done. I slowly turned the rod with the drill while feeding the wire onto the rod. I like having it wind on top (pic.4). I also marked the steel rod with a sharpie to make sure I could get a coil to the length I want. In this case I made a coil that is 20 inches long. It was hard to keep a tight coil so didn't worry that my coil was not perfect. I was going to stretch it anyway! Once I had my coil, I just slid it off the rod and cut the other end leaving another tail with another 10 inches.
Making my terminal ends (or pig tails) was easy. I folded the 10 inches in half and then put the loop end in my drill chuck and tightened it down. I held the other end of the wires with my pliers then slowly turned the drill to twist the wire (pic 5 and 6). I gently stretched the coils apart until my coil was about 32 inches. Voila! I made my own kiln element! I should have plenty of Kanthal left over to make several more coils. If you alter my design, just make your coil longer. It is important that the coils don't touch each other. This is where your element will burn out if the electricity arcs across the coil.
Step 3: Installing the Heating Element


First I cut some more of my Kanthal into 1 inch lengths. I needed about 8 or 9 of them. Then with the pliers, I bent them over into a U shape (pic 1). I drilled two holes an inch apart through one of the small square bricks and through the channel for my pig tails to come through (I have one in the top channel and one in the bottom). I put my pig tails through the inside of the of the kiln into the holes I drilled and installed my element into the channels. I used the U shaped pins to hold the element in. I just pushed the pins into the brick with my fingers.
**Safety!!!! --This is an electrical device that runs at 120V and about 10 amps. Make sure you ground your connection as indicated in the Instructable and do not touch connection wires on the back of the kiln while in operation to avoid electrical shock!! This project can also reach temperatures at or above 1000 degrees C. Run the kiln only on concrete or fire resistant surfaces. All other safety precautions should be observed such as: wearing safety goggles, wearing a mask while routing to keep from breathing dust and careful operation of the router.
Step 4: Connecting the Electrical Connections


I took the extension cord and cut off the outlet end (I will need the plug end). I stripped the wires so I had about 1/4 inch of bare copper wire to use. I used a small metal screw and attached the green ground wire right onto the clamp band as seen in pic 2. Using 2 nuts on each element wire, I sandwiched the copper wire between two nuts. This separates the copper wire from the element wire. The bolts provide an excellent heat sink so the copper wires do not get too hot.
**The ICS control box is one I ordered from sundanceglass.com for 84$ (pic. 3)(http://www.sundanceglass.com/controllers.htm) The Infinite Control Switch is a controller that gives you full power 50% of the time and turns off 50% of the time. For my applications, this controller is working very well, but my kiln still gets pretty hot even on low settings. If you want greater control or want to do ramping temperatures etc. then it is probably better to install a PID controller. SirHacksalot, on Instructables, has directions on how to wire these controllers. PID controllers can cost about the same amount. Sundanceglass also has Type K Thermocouples and Pyrometers that can help you with control of your temperatures.
**Safety!!!! --This is an electrical device that runs at 120V and about 10 amps. Make sure you ground your connection as indicated in the Instructable and do not touch connection wires on the back of the kiln while in operation to avoid electrical shock!! This project can also reach temperatures at or above 1000 degrees C. Run the kiln only on concrete or fire resistant surfaces. All other safety precautions should be observed such as: wearing safety goggles, wearing a mask while routing to keep from breathing dust and careful operation of the router.
Step 5: Finished Kiln!


This version of the kiln is not as fancy as my first one, but it is easier to build and a little cheaper. I had need for a top loader, so this is what I came up with! The last brick was used for my roof. I drilled a hole in the top for my thermocouple. I use leather work gloves to move the roof if I need to peek inside--all the bricks can get hot! This little kiln got up to 500 degrees C just on the minimum setting. It got up to around 1100 degrees C very easily on setting 3. It heats up pretty fast. With these instructions you should be able to build a kiln from beginning to end. If you need to buy every one of the materials, it will probably cost you about $230 without tax (that includes the thermocouple, pyrometer, ICS controller and the element wire).
Have fun and please vote for me in the Build A Tool Contest!!
**Safety!!!! --This is an electrical device that runs at 120V and about 10 amps. Make sure you ground your connection as indicated in the Instructable and do not touch connection wires on the back of the kiln while in operation to avoid electrical shock!! This project can also reach temperatures at or above 1000 degrees C. Run the kiln only on concrete or fire resistant surfaces. All other safety precautions should be observed such as: wearing safety goggles, wearing a mask while routing to keep from breathing dust and careful operation of the router.

Participated in the
Build a Tool Contest 2017


