

Introduction: Elegant Track Lighting System


Rope Lights + PVC Pipe + 3D Printer = Simple, Elegant, Mood Lighting.
I was putting some rope lights into storage a while back and noticed how it seemed the rope lights would fit inside 1/2" PVC pipe and thought If only I could find a nice looking bracket that did not look like PVC fittings. The included files will allow you to create a system for your own room.
Required Materials:
- Rope lights long enough for your entire room
- 1/2" standard PVC pipe (our master bedroom required 8 10' pipes - Approx $10)
- PVC Cement (helps lock everything in place once you test fit all the parts)
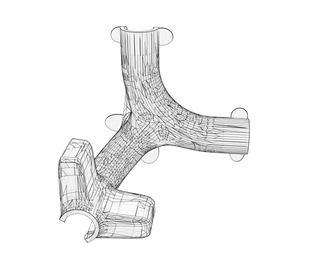
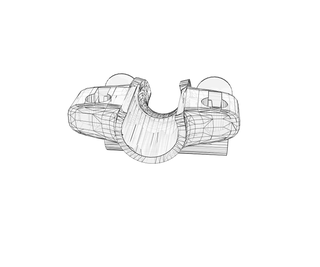
- Printed brackets. files attached (an average room would require at least 4 corner brackets and 2 or 3 connector brackets spaced between along the wall)
- 1" drywall screws
- Bonus: printable templates (files attached) for marking where the screw holes need to be spaced and distance from the ceiling
Step 1: Print, Gather, Cut

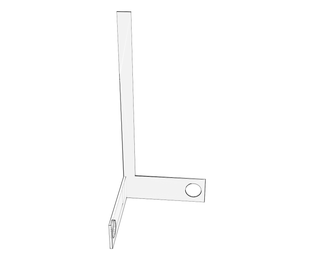
First, decide how many bracket parts you will need for your room. As your parts are printing, you can gather and cut the 1/2" PVC Sections. Please note that I cut the top section off my PVC pipe to direct light toward the ceiling and allow the rope lights to snap into the pipe. The photo above shows a side profile of a pipe section that i have cut the top off. You could set your table saw for 15 or 16mm thickness cutting just the top off that includes any writing or bar codes. (I would advise extra caution and safety with this step and perhaps setting up a jig to guide the pipe through for cutting)
Note: if you don't want light shining through your PVC, I suppose you could line it with tin foil or something to block light.
Step 2: Attach Brackets to Your Wall


Now that you have the brackets and pipes ready to install, use the handy templates for marking the ideal placement of 1" screws on your drywall. Drive the screws so the head is still sticking out from the wall. the brackets are designed like picture frames or shelving that is meant to hang on the head of screws and has the recieving holes designed into the back of the brackets.
Snap or slide your pipe sections into the brackets and you are now ready for the last step of inserting your rope lights!
Step 3: Light Up Your Room!

The rope lighting should now be able to snap into place by lightly pushing it into the pipe as you work your way around. (I should mention that our room has an outlet near the ceiling as i had wired it to a light switch for ease of use. However, each bracket type is designed with a channel that would allow the rope lights to bend downward along the wall vertically if you are planning to plug into a standard outlet at some place in your room)
If everything works as desired, you can glue the brackets to the pipe sections with (you guessed it) PVC Cement to make everything more secure. (I also coated my bracket parts with XTC-3D just to prevent any delamination or breaking during installation)
Hope you enjoy! Please see next step for the files.
Step 4: Attachments
Printed these files without any vertical supports. There are some tabs on the base that you can break off as I printed these parts in PLA on my machine and found that it helped secure the parts to the build plate for printing.
Do not scale these parts as they are sized to accept the PVC pipe inserts!


Participated in the
3D Printing Contest


