

Introduction: Enabling Developer Options on Android Phone

Materials required: Android phone
Difficulty: Easy
Expected Duration: 4 mins
This section describes how to enable developer options on an android phone for those who are starting out in Android Development. This is so that you can interact with the app that you are creating on Android studio on your phone directly. The default alternative is to use the emulator provided by Android Studio which can be a much more slow and inconvenient experience when starting off in Android development. For demonstration purposes the images in this instruction set will be from a Motorola Moto E Phone.
Step 1: Find the Build Number

Although this step is universal in all Android phones, the place where you can find the build numbers can differ. For the Moto E we are using for demo and most stock Android phones, it is under Settings->About Phone- >Build Number. Here is a list of ways to find the build number for other phones:
• HTC: Settings->About->Software Information->More->Build Number
• Samsung Galaxy: Settings->About Device->Build Number
• LG: Settings->About Phone->Software Information->Build Number
Step 2: Tap on the Build Number 7 Times

As you tap on the build number twice a notification will appear counting
down the number of times left to tap, till eventually a notification will appear letting you know that “you are a developer.”
Step 3: Check That the Developer Options Appears in Settings

To ensure that you have completed the previous steps correctly go to the main settings screens and check for an option called “Developer Options.” Otherwise repeat the first 2 steps or seek professional help.
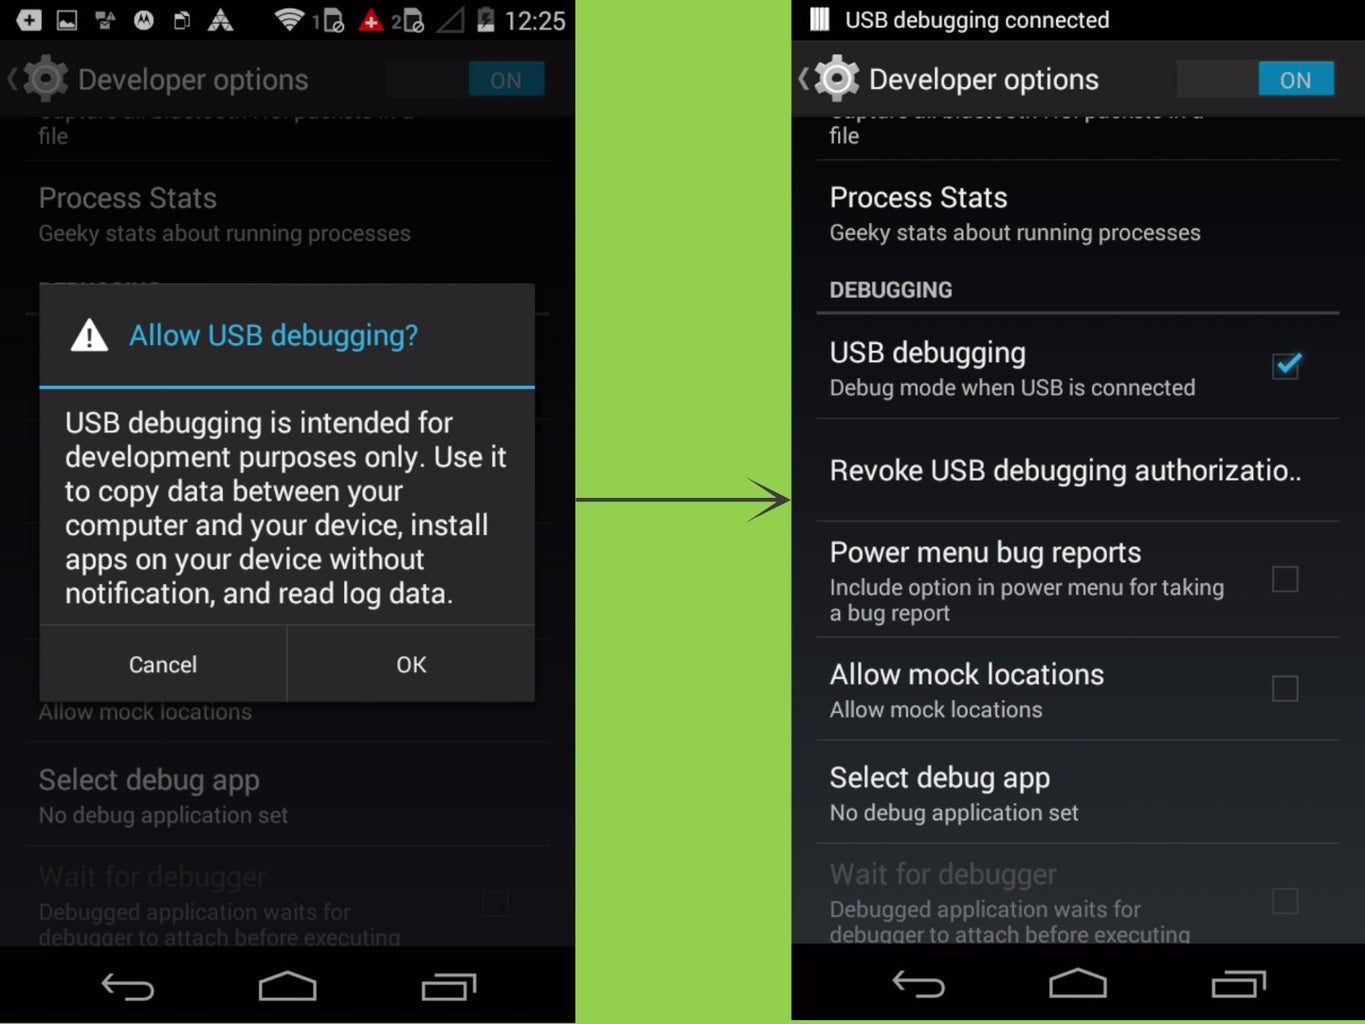
Step 4: Click on Developer Options and Then Click on “Enable USB Debugging”
For our purpose this step is important as this is what allows Android Studio to use your phone to run the app through a USB connection. Now you can connect it to your computer and start developing in Android studio and using this as your Android Debug Bridge(ADB) device. Clicking on enable USB debugging causes the appearance of a confirmation prompt as shown in the figure. Just go ahead and click “OK” as this simply is a disclaimer that you understand the purpose of this feature.


