

Introduction: Evive's Menu Based Visual Interface for Arduino Using TFT & Joystick


Conventional way of using Arduino is by making a program in Arduino IDE and upload it on Arduino based device. Every time even for doing a small change or to test your robot with different parameters, we need to plug in the USB cable and re-program. It happens that we need to debug or tune some part of your project and hence have to program it. To cater this, evive introduces a novel way of menu based approach for programming. It is preloaded with many utility functions while the user can add user defined functions. It gives you the ability to change your programs in real time (although you can use evive normally as Arduino MEGA). Using the user defined function, the user can add multiple custom codes, which can run same as loop function in Arduino IDE.
Step 1: How the Menu Driven Programs Works Using Arduino, TFT Screen and Joystick?

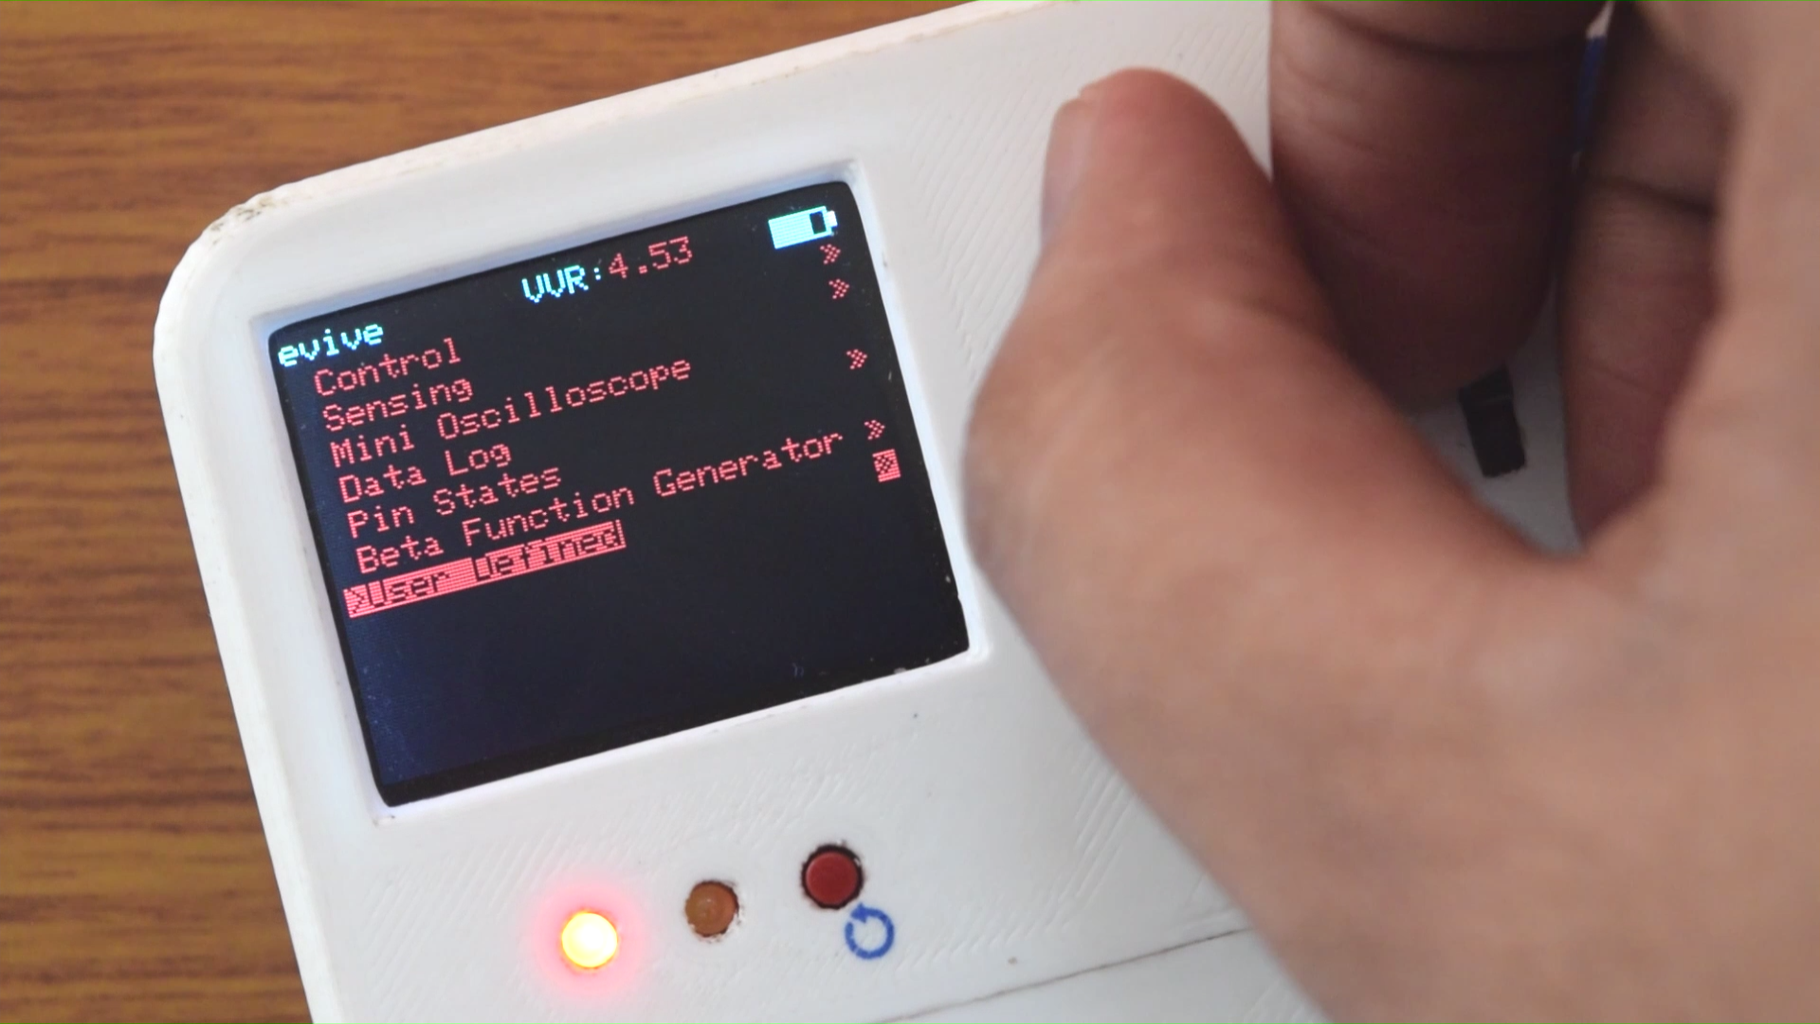
evive’s menu gives an intuitive textual interface to users. It is programmed using Arduino IDE along with some AVR commands. The menu has a tree structure. On the startup screen, the list of basic utility functions like controlling motors or servos using inbuilt hardware (switches, potentiometer, etc.), sensing currents and voltages, evive’s mini oscilloscope, Arduino pin states, function generator, data logging and user defined functions. Also internal battery level and variable voltage value are displayed on top status bar. The menu item’s having following sub-menus are indicated. Using a joystick (5-way Navigation key), the user can scroll across the menu item using up and down keys, or traverse to the following sub-menus (or select the menu function) using right key, or revert back to top level menu using left key. Any time during the function is running, the user can get back to menu using center key (in most cases or as per user’s requirement).
All the Codes are available here: https://github.com/evivetoolkit/evive/tree/master/softwareFiles/evive
Components Required: evive
(It has 1.8" TFT SPI Screen, MCP4725, Motor Driver SN754410NE, ADE7912 (24-bit ADC), Joystick, 2 Potentiomenters, 2 Slide Switches, 2 Tactile Switches, Arduino MEGA 2560 R3, SD Card Slot, Power module for 3.3V, 5V and Variable Voltage Output (1.25V ~ 30V range), Inbuilt 2600mAh Li-ion Battery and much more)
Step 2: Menu Details: Control Menu for Servo, Motor and Stepper Motor


evive includes hardware interaction and plug&play interface, which can be used to control many basic utilities like controlling motors, servos, stepper, relays, solenoid values for pneumatics using tactile switches slide switches and potentiometers. Also the user can use the inbuilt hardware (switches and potentiometers) to change/define the states of Digital I/O Pins or PWM output. Switches and potentiometers are internally connected to Arduino MEGA pins as control inputs and motor drivers are connected for output at plug&play interface. The state or values are displayed on screen. For example, to testing a hobby servo, the user needs to select the servo menu and it will open the servo control option showing the current angle. The angle of servo motor can be controlled using the potentiometers. This can be used to test, calibrate and debug actuators or components in your projects or use them to get desired output states at digital I/O pins for your custom needs.
Step 3: Menu Details: Sensing Currents and Voltages
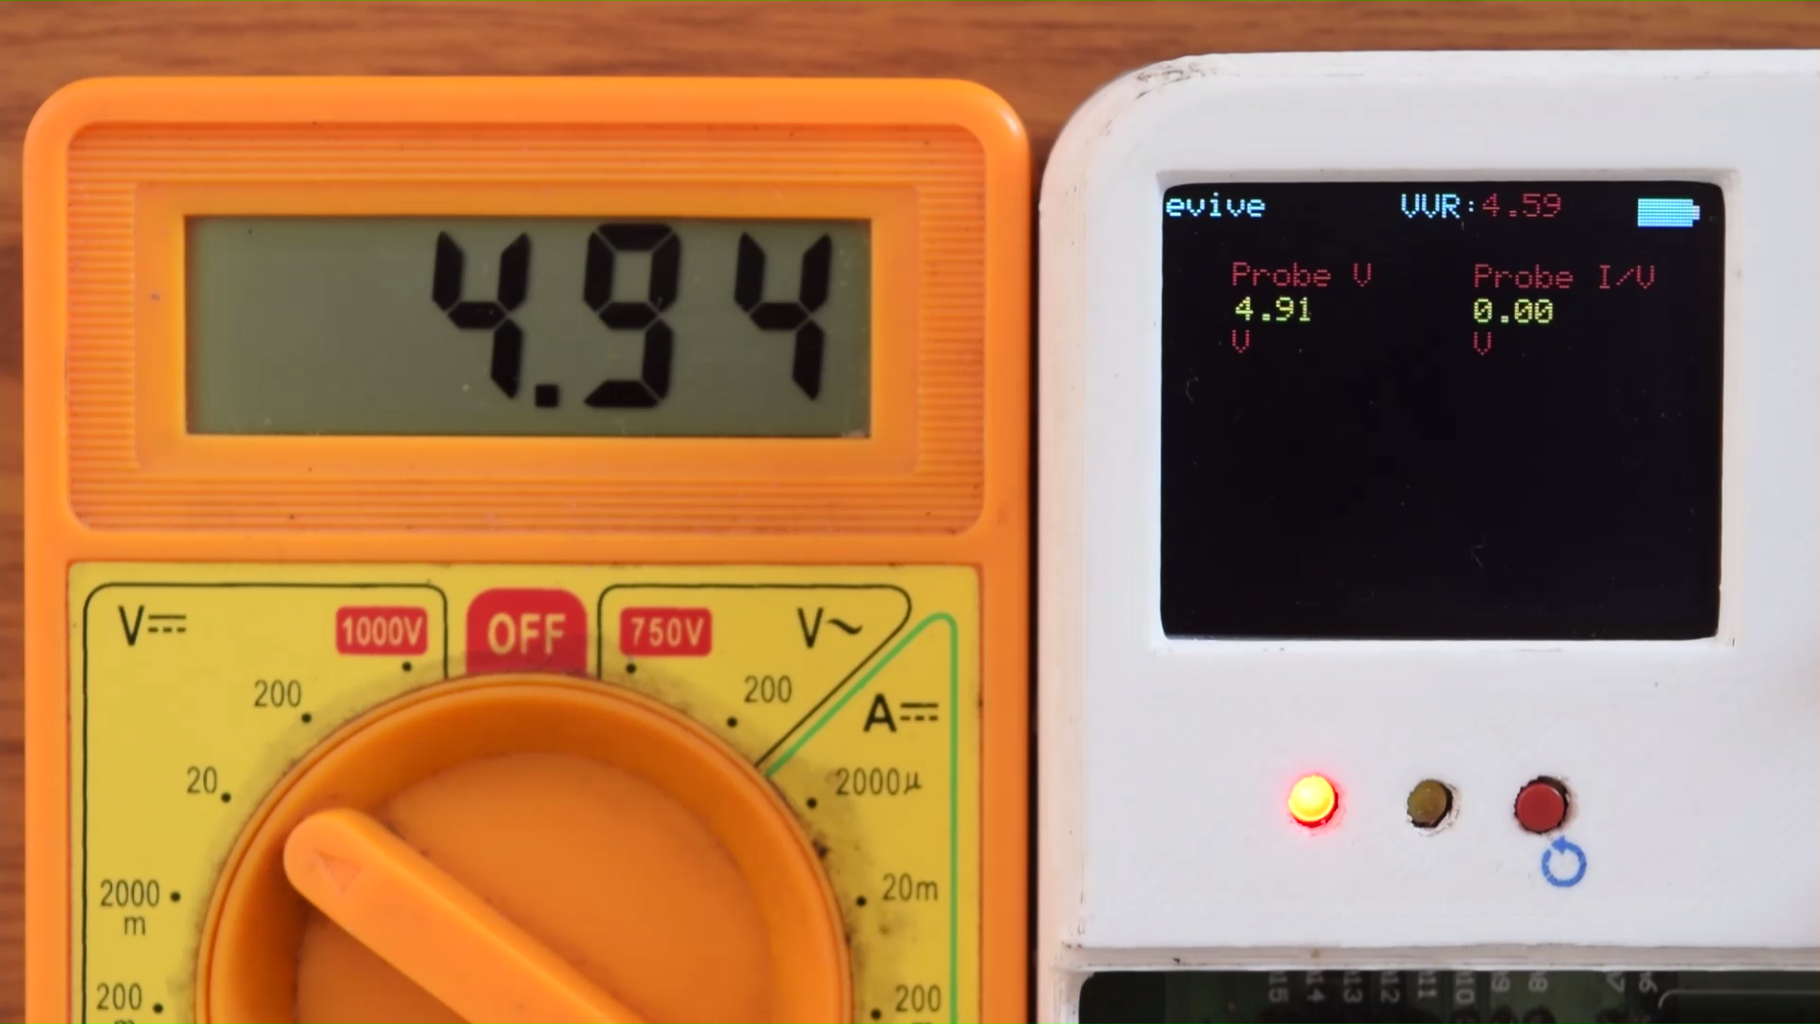
Evive can be used as mini oscilloscope to visualize voltage and current measurements. Is has lots of function like scaling voltage level, time scaling to see the reading in better way, trigger to start the measurement at some set value, scanning modes like single or continuous, offset, save readings to SD card and send data to computer. It uses a very accurate 24-bit dual channel ADC IC for sensing from Analog Devices (ADE7912). There are two channels for data acquisition namely Probe I/V and Probe V. The Probe I/V can be used to sense currents or voltage as per the Jumper selection. The maximum sensing frequency is about 1kHz. The current sensing has accuracy of 3mA with range of -3A to +3A, while in voltage mode, the accuracy is of 3mV with range of -5V to +5V. The Probe V can be used for higher voltage sensing in range of -30V to +30V with accuracy of 10mV.
Step 4: Menu Details: Mini Oscilloscope Using Arduino

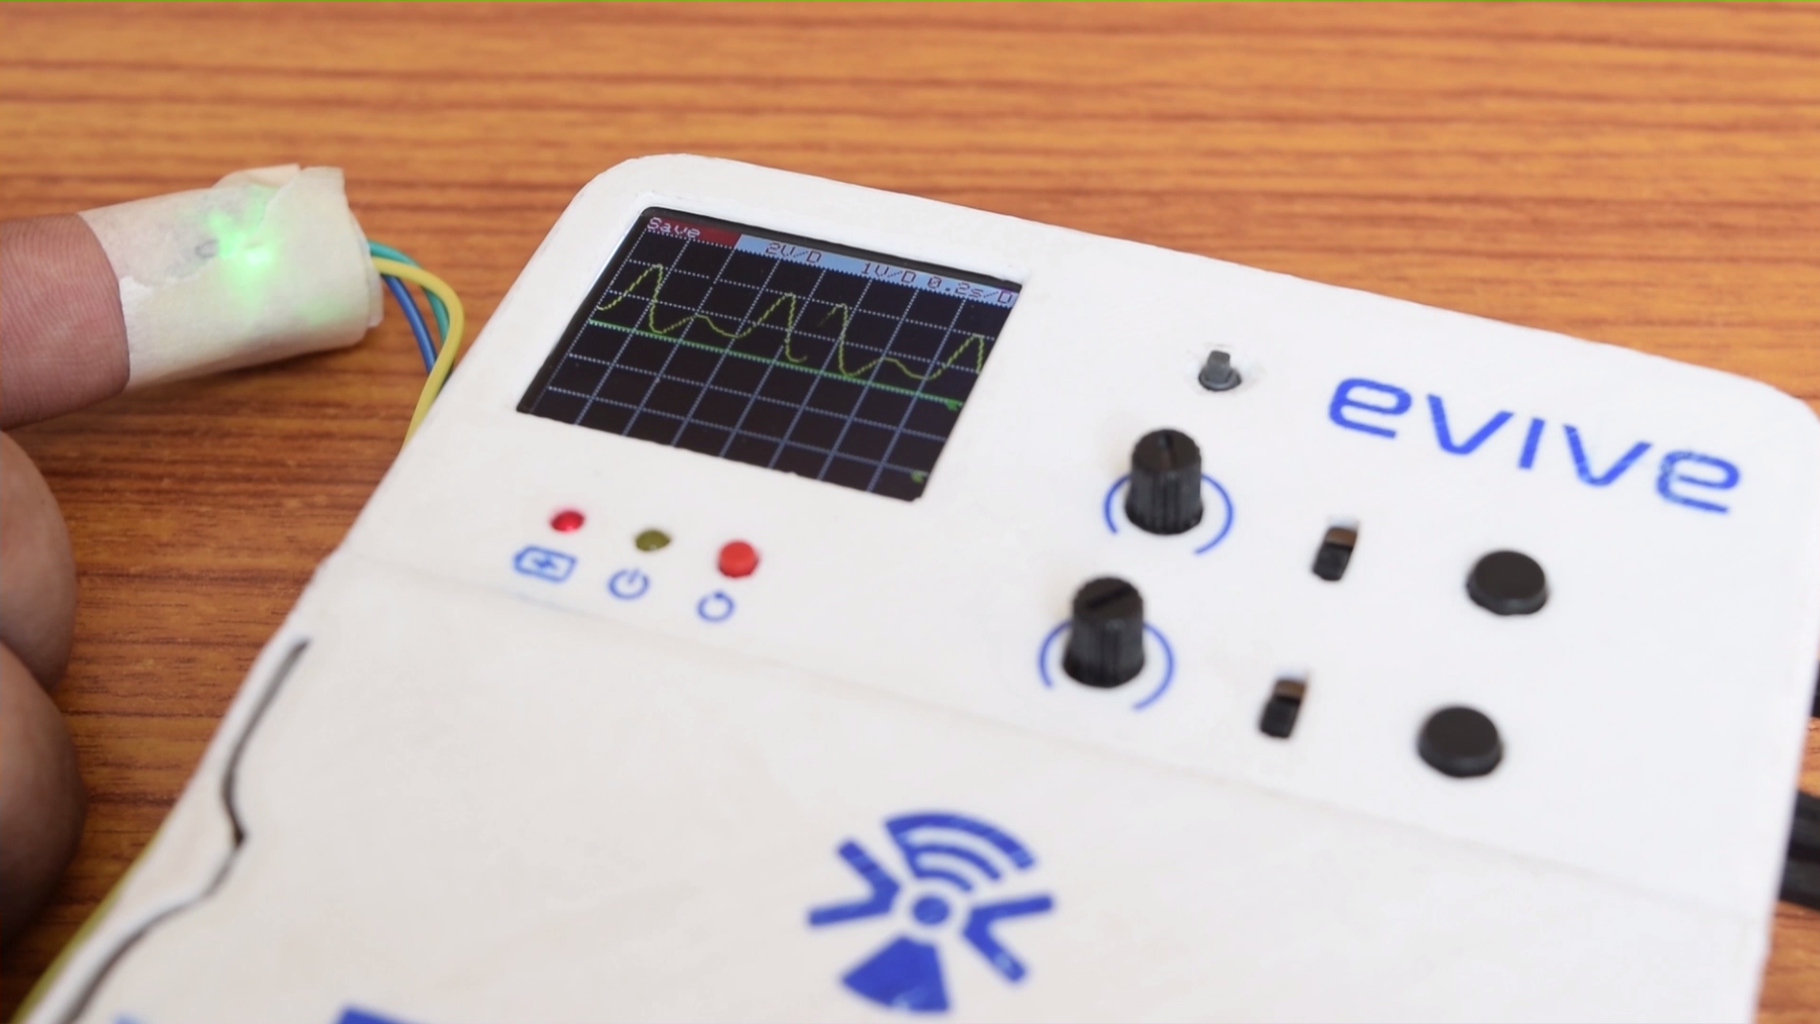
Evive can be used as mini oscilloscope to visualize voltage and current measurements. Is has lots of function like scaling voltage level, time scaling to see the reading in better way, trigger to start the measurement at some set value, scanning modes like single or continuous, offset, save readings to SD card and send data to computer. It uses a very accurate 24-bit dual channel ADC IC for sensing from Analog Devices (ADE7912). There are two channels for data acquisition namely Probe I/V and Probe V. The Probe I/V can be used to sense currents or voltage as per the Jumper selection. The maximum sensing frequency is about 1kHz. The current sensing has accuracy of 3mA with range of -3A to +3A, while in voltage mode, the accuracy is of 3mV with range of -5V to +5V. The Probe V can be used for higher voltage sensing in range of -30V to +30V with accuracy of 10mV.
You can find the test codes here: https://github.com/evivetoolkit/evive/tree/master/testCodes/testGraphingNavKeyADE7912
If you dont have evive (and ADE7912), still you can make your mini oscilloscope with Arduino's inbuilt ADC pins along with 5 switches (or joystick) and TFT Screen , but the range will be limited to 0 to 5V only. Find codes here: https://github.com/evivetoolkit/evive/tree/master/testCodes/testGraphingNavKey
Find the connection for joystick and TFT to Arduino here http://evive.cc/files/eviveSchematicPinOutDiagram.png
Step 5: Menu Details: Serial Monitor on TFT Screen Using Arduino
Evive can be used as a serial monitor for applications like to display received data at any serial port of Arduino MEGA or what data is sent to it via USB Jack. The data (numbers or characters) will be displayed on the TFT screen. Also, the user can print data on the screen using the serialTft.print(str) like functions for any Arduino code or User Defined Functions (explained below). (Under development)
Step 6: Menu Details: Arduino Pin State Monitor
Sometimes, it is required to monitor the states of either input pins or output pins (ports). This menu will show the current states of all the available Digital Input-output pins and Analog Input Pins. (Under development)
Step 7: Menu Details: Beta Function Generator Using Arduino
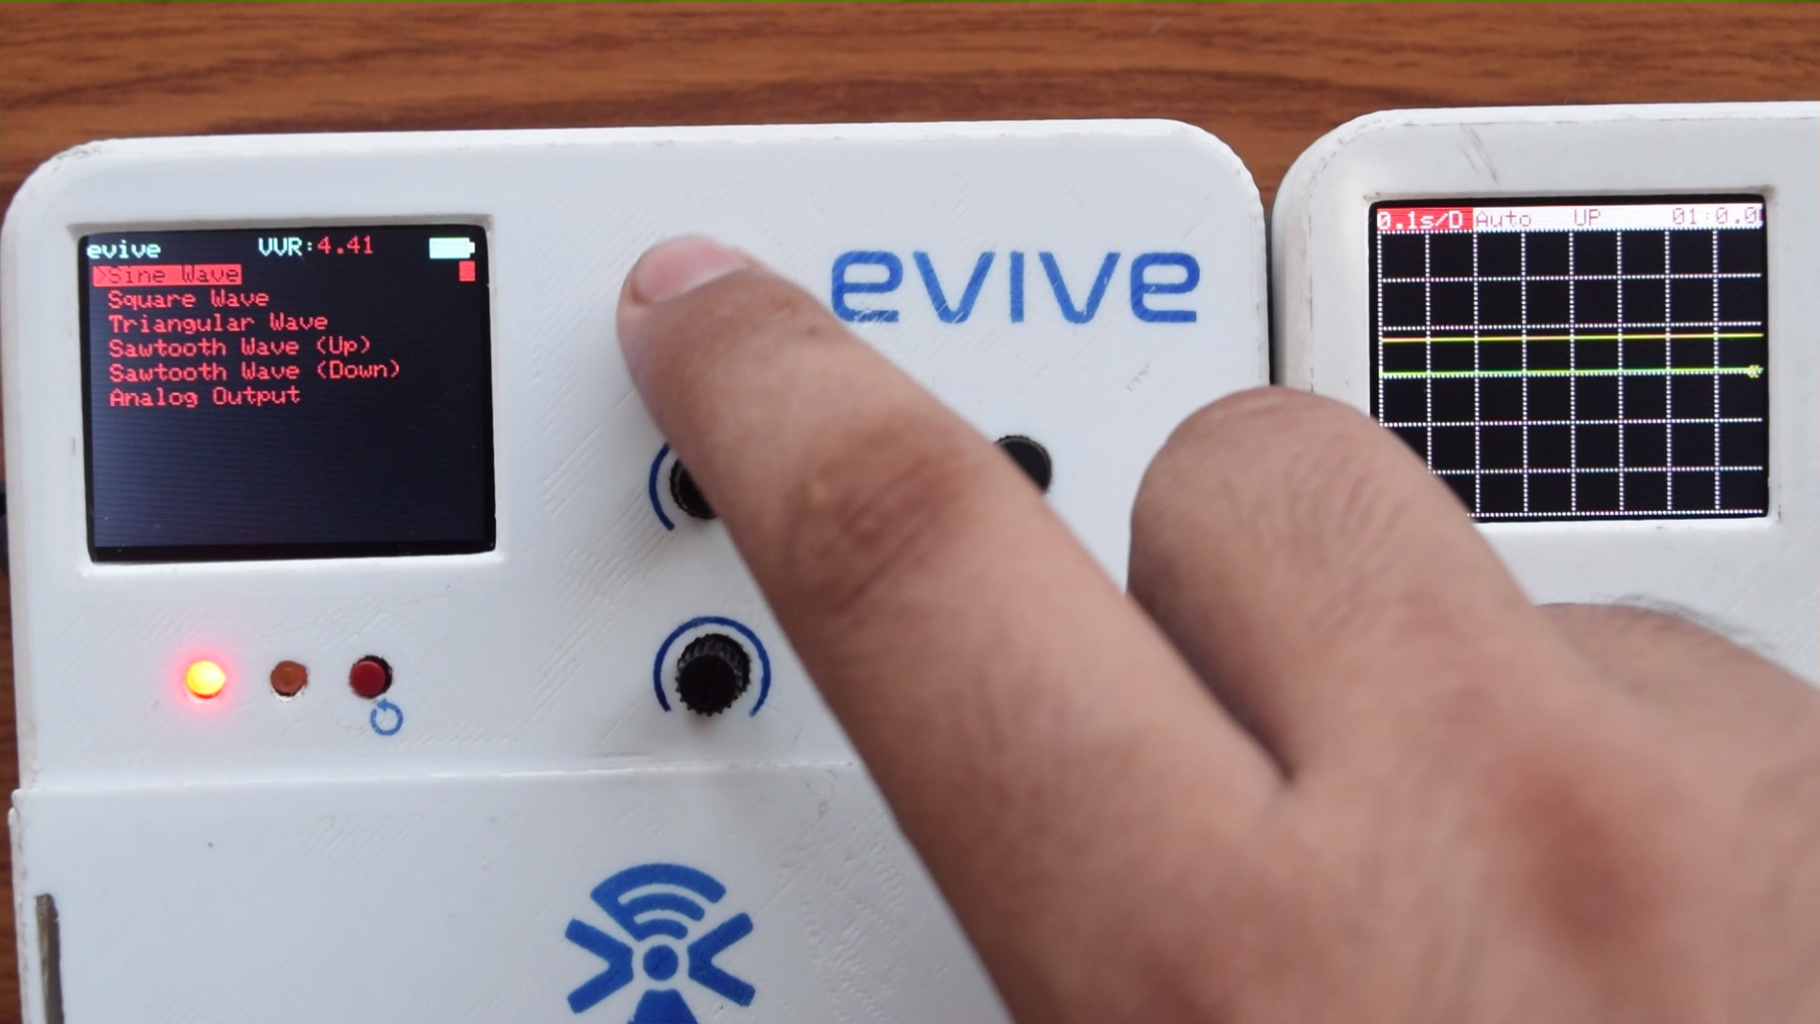


Evive has a built in 12-bit DAC using IC MCP4725 (IIC Address 0x60 or 0x62). It is controlled using IIC (or I2C) commands using Arduino MEGA with output range of 0 to 5V. Many inbuilt function to generate waves like sine, square, triangular or saw-tooth shapes are provided with option to control amplitude between 0 to 5V and frequency upto few hundred hertz. Its limited to 8.5Hz ~ 500Hz. Or the user can set the desired output voltage using knob.
Step 8: Menu Details: User Defined Functions in Evive's Menu


This is one of the most important feature as it helps to change the programs without the need of re-programming. In the Arduino IDE, the user will add his custom codes in space provided in file named userDefinedFunctions.cpp in similar fashion to “void setup_user_defined_function(){….}” and “void loop_user_defined_function(){….}”. And just upload the program to evive using Arduino IDE via USB cable. So the code with be available under the user defined menu list item. When the user will select that particular user defined function in the sub-menu of user defined function, the code will start running in loop.
Explore more in details in this video: https://www.youtube.com/watch?v=c5ne1dfeFOQ&feature=em-upload_owner
Step 9: Explore More
You can build up your functions and add more to evive's menu. We need suggestions (contact@evive.cc) to add more pre-defined functions like motor control shown to reduce the time spend everytime to test a motor in your robot.
Explore more about evive here: http://igg.me/at/evive

Participated in the
Maker Olympics Contest 2016


