

Introduction: FISHING ROD VAULT


I have suffered from “vault envy” for several years. A fishing rod vault is a tubular roof top storage container, preferably lockable, that allows the rod to be stored, fully assembled, with reel and tackle. It eliminates the need to have the rod inside your car or having to break the rod down into pieces as you move from location to location. Sometimes being first to the water equates to being first to catch fish.
I searched www.Instructables.com and could not find an instructable on my topic so I decided I would create one.
My design is based on seeing commercial ones and visiting some DIY sites. Store bought vaults can cost more than $300 and, while they admittedly have deluxe features, that is more than what I am willing to pay for what I need. The one I made cost me under $25.00.
Parts required are a lockable plastic ammo box, tubular pipe insulation, 1.5 inch x 10 feet of PVC pipe (because I have a 9.5 foot rod) 10 feet of pipe insulation (sold in 6 foot lengths),1.5 inch PVC threaded coupler, large o-ring to fit coupler, glue. Parts mostly came from one trip to Home Depot.
These are the parts I assembled for the project. This is an easy project and I clearly spent more time gathering the parts than it took to make the finished project.
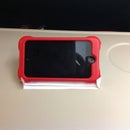
Step 1: Prepare the Box


Plastic ammo box go for about $8.00. Less, when on sale at boxstores.
Using a hole making bit sized to fit the threaded coupler I cut the hole in the bottom of the ammo box to allow the reel to sit in the box. I had to use a vertical box orientation but horizontal could work with smaller reels.
Step 2: Mount the Coupler


Apply glue to underside of the coupler to glue it to the box. The coupler is inserted into the hole with the threads inside the box. Put the o-ring over the threads and snug to the bottom. The o-ring is used to fill the gap between the male and female parts of the coupler when fully tightened. Screw on the female side of the coupler and tighten down against the o-ring.
Step 3: Insert Insulation Into Pipe

Since the insulation comes in six foot lengths I had to trim the second piece to pad the entire ten foot length of the interior of pipe. In order to slide the foam inside the tube I needed the foam with an outer diameter not more than 1.25 inches. This padding will protect the rod from the shaking caused by vibrations while driving.
Because the rod eyelet closest to my reel is much larger than the other eyelets, I had to cut a seam in the insulation to make room for that eyelet to slide into the cushioned pipe. I ran a bead of glue on one side of the insulation to keep it in place after it is seated in the pipe. In order to slide the foam inside the tube I needed the foam with an outer diameter not more than 1.25 inches.
Step 4: Complete Assembly


I needed to mount the ammo box in a vertical direction to accommodate my reel. Others may want to orient it horizontally to accommodate multiple rod holders. Reel size seems to the key factor. You do want to close the box. A lockable box offers a little more security.
Attach the PVC pipe of the needed length to the coupler outside the box using PVC glue., For me that was a 10 foot length of 1.5 inch pipe. Some may want a larger diameter pipe with a matching coupler for their rods.,
Attach the end cap to the other end of the pipe, glue. Let dry.
Project completed.


