

Introduction: FPV Virtual Reality Arduino Controlled Tracked Robot
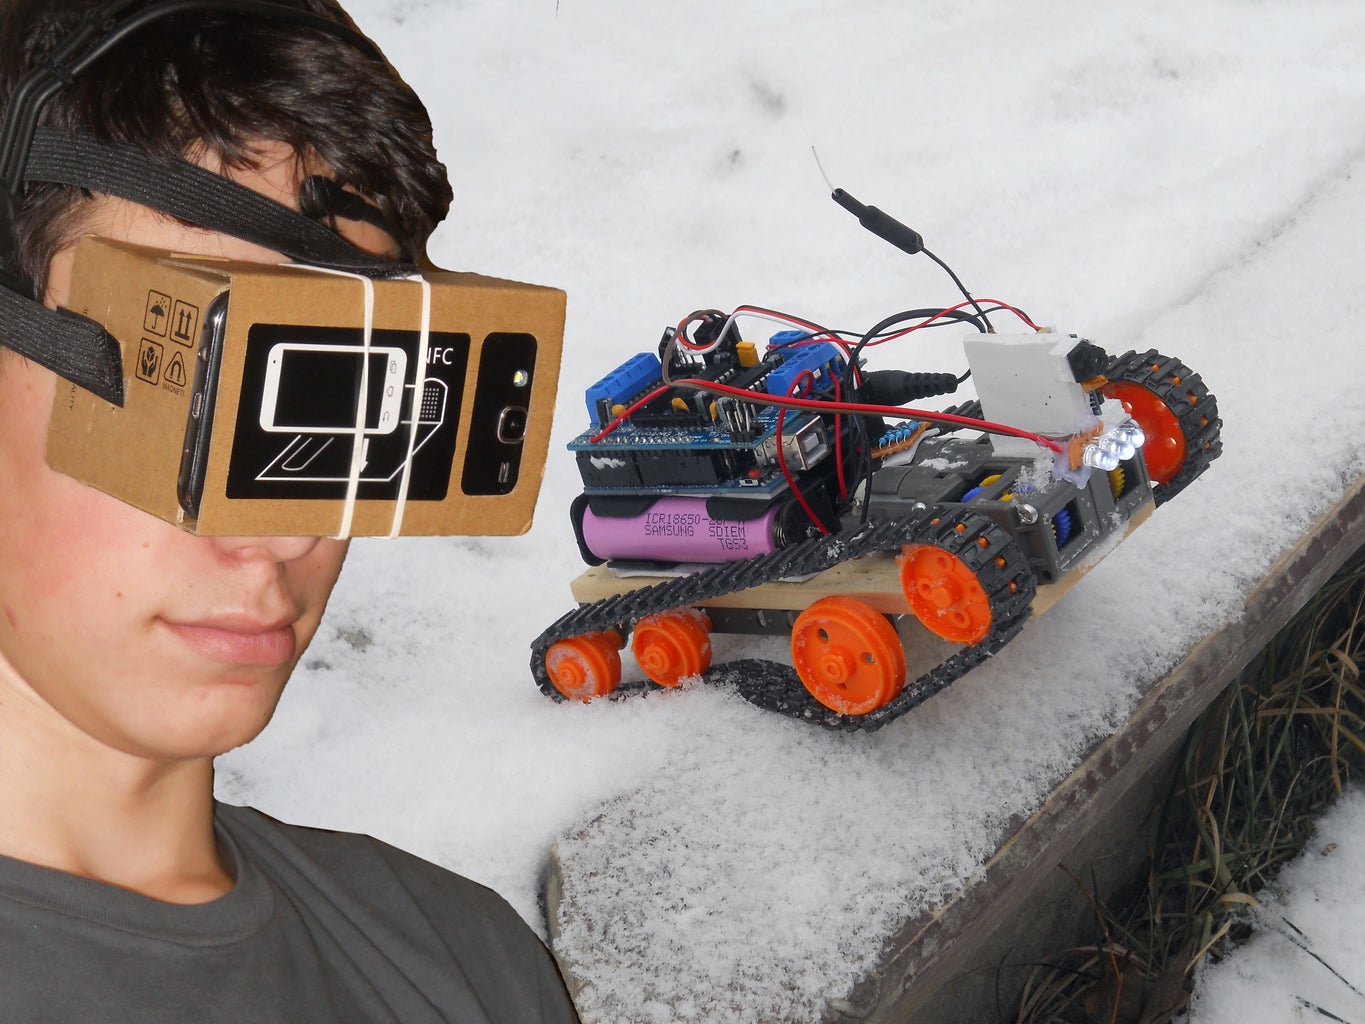


Have you ever tried to look at the world from a different point of view? With this project you can control a tracked robot with your brainwaves or with a joystick while you are watching its camera's live-stream in a virtual reality glass.
This is an all terrain vehicle, that means that you can control it on snow, sand, any kind of ground, wet surface and of course indoors. It is powered by two 18650 lithium-ion batteries with a capacity of 2600 mAh. These are connected in series so the maximum voltage is 8.4 volts, that ensures the seamless operation. Can climb hills that up to 35-40 degrees. The maximum control range with the new HC-12 serial communication module is 1.8-1 kilometers if the controllers can see each other. That's insane! Of course the WiFi FPV's range is only around 45-50 meters, but the HC-12 ensures a very stable communication.
The Camera: the most interesting thing in this project is that you can see what the robot sees in real time with a salvaged camera. I had a cheap Chinese drone that was broken, but its camera seemed to be operating and when I took apart my drone I found a small WiFi chip with a video transmitter. I decoded that I will use this little circuit for a project and I started to buy and salvage the parts.
Two ways to control: (please read this) this robot has two controllers: a brainwave based controller that can be controlled with the user's thoughts and an ordinary, traditional joystick R/C controller.
By brainwaves you can move the robot forward, left, right and you can watch the FPV streaming through the glasses. This version is recommended if you want to build something really interesting and scientific. You will learn so much about the human brain and how it's functioning.
With the joystick and potentiometer combo you can move the robot in all four axis, in all directions with variable speed and you can control three white LED's that ensure the light for the camera. I recommend this version if you want to enjoy playing with it so if you want to have a precisely controllable and more efficient robot.
Step 1: Video

In this video I am showing you how can you control the robot outside and inside with the joystick and the brainwave sensor. Please decide which one would you like to build. (Or you can make noth of them...) I was really amazed by the world of Star Wars as a kid, that is why I built a device that allows you to control the robot by your thoughts.
If you want to make the Joystick Controlled Version follow Joystick Controlled steps...
If you want to buld the Brainwave Sensor Controlled follow Mindwave Controlled steps...
I am going to mark in brackets that which steps where belongs to, for example: "Circuit (Joystick Controlled)". If you liked the video give a thumps-up and you can gathering parts and then start building your robot.
Step 2: Gathering Parts and Tools


I am going to give links for each part used in this project. You can buy everything from there. You can use Bluetooth modules as I did for the first time or you can use directly the long range HC-12 modules. When you buy batteries bevare of fake batteries, buy Samsung, Panasonic or Sony.
Tools:
- Soldering Iron
- Solder
- Glue Gun
- Wire Stripper
- Wire Cutter
- Ultra-Strong Double Sided Tape
- Screwdriver
- Some Arduino Programming Skills...
Softwares:
- Arduino IDE Compiler
- Software Serial Library
- Adafruit Motor Shield Library (Download from Github)
Parts:
- Arduino UNO
- Arduino Mini Pro
- HC-05 Bluetooth Module (Optional)
- HC-06 Bluetooth Module (Optional)
- HC-12 Radio Frequency Module - 2 pieces
- Wires
- Tamiya Tracked Vehicle Kit
- Tamiya Double Gearbox Kit
- 6.8k, 10k, 1k, 500 ohm Resistors
- 10k Potentiometer
- Lithium Ion Battery Charger Circuit
- 5v Step-up Module
- Arduino Compatible Joystick
- 18650 Lithium Ion Batteries - 2 pieces
- Battery Holder - 2 pieces
- White LEDs - 3 pieces
- Adafruit Motor Shield Small Lithium Ion Battery (for the transmitter)
- FPV WiFi Camera
- Google's VR Cardboard Glasses
Only for Brainwave User's: I have to notice that I used a ahcked Nacomimi Brainwave Toy, that is made by the same company, but to save time use this headset instead:
- NeuroSky Brainwave Headset
- HC-05 Bluetooth
- Mindwave Library from Github
If your parts arrived let!s get to work!
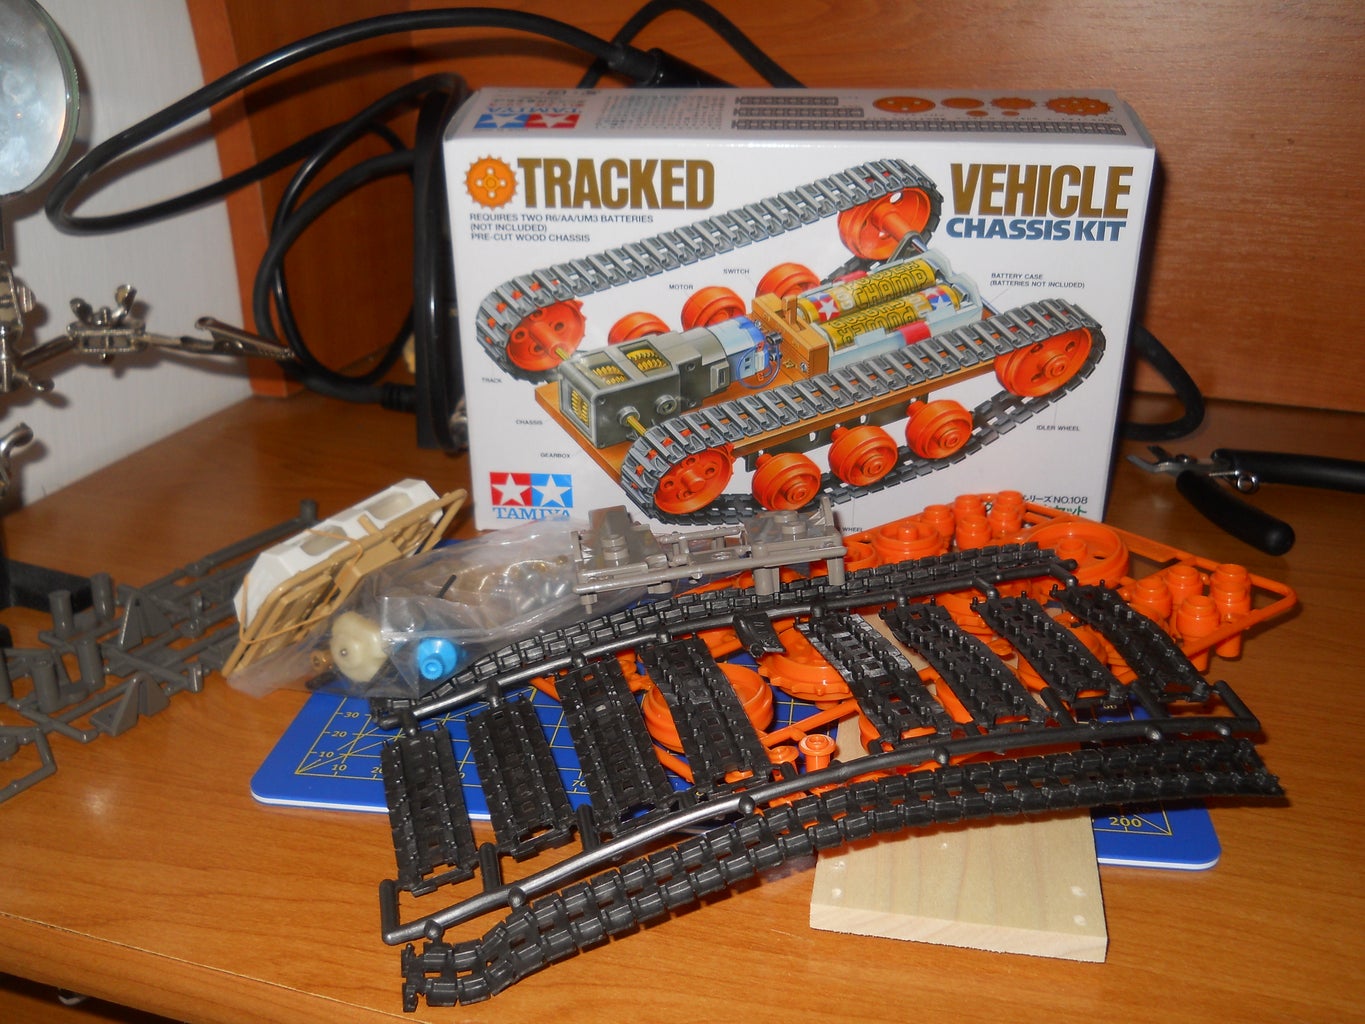
Step 3: Building the Frame


First the chassis arrived so I put it together, but this general build was so inefficient so I modified when the double gearbox arrived. This design is much more better and can climb hills easier. You can see this big effect when you try to drive on the snow.
There is a tutorial coming with the parts, that helps you to put the Tamiya Vehicle together. After 30 minutes of crafting you should have something like I have...
Step 4: Pairing the Bluetooth or RF Modules

Whether you use RF or Bluetooth modules you have to pair them to each other. If they aren't they won't know each others address so they cannot communicate. Please follow the videos and pair the two modules with the help of two Arduinos...
Step 5: The Camera Mount


These are usually coming without any enclosures so I made one for myself. I used some plastic sheets and with a super glue I have built a a camera holder. I just used a very strong double sided tape to fix the camera on this plastic piece.
Step 6: Circuit (Josytick Controlled)
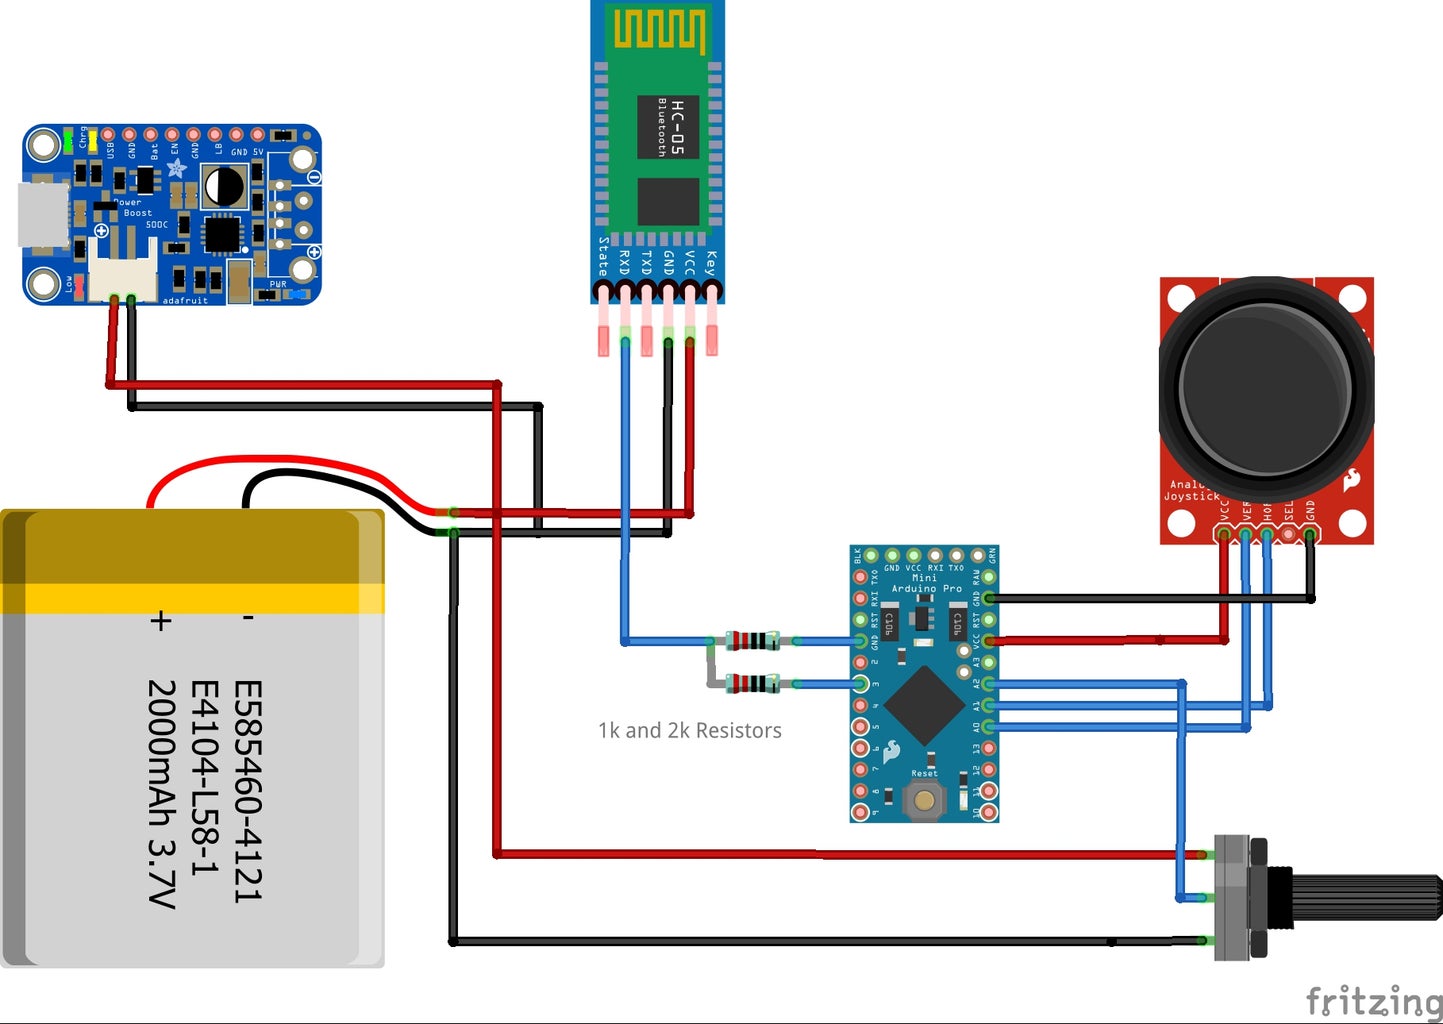

Here you can see the circuit of the controller and the robot's circuit. Build these two with the help of your soldering iron.
On the transmitter, so on the joystick's circuit the Arduino Mini Pro measures the incoming signals from the joystick and the potentiometer than transmits these to the Bluetooth module or RF module in bytes. The measurement happens at analog pin A1, A0 and A2. The 5v step up module ensures the voltage for the micro-controller and the vharger circuit charges up the battery safely. The serial communication module is connected to pin D3 and I used a 1k and a 2k resistor to decrease the voltage to 3.3 volts.
On the receiver, I mean the robot's circuit the Arduino UNO gets the bytes from the RF or Bluetooth module and the controls the motors via the motor shield or turns on/off the lights. The camera is powered up by the 3.3 volt regulated pin of the Arduino. The serial comm. module is connected to pin A0.
Step 7: Circuit (Mindwave Controlled)
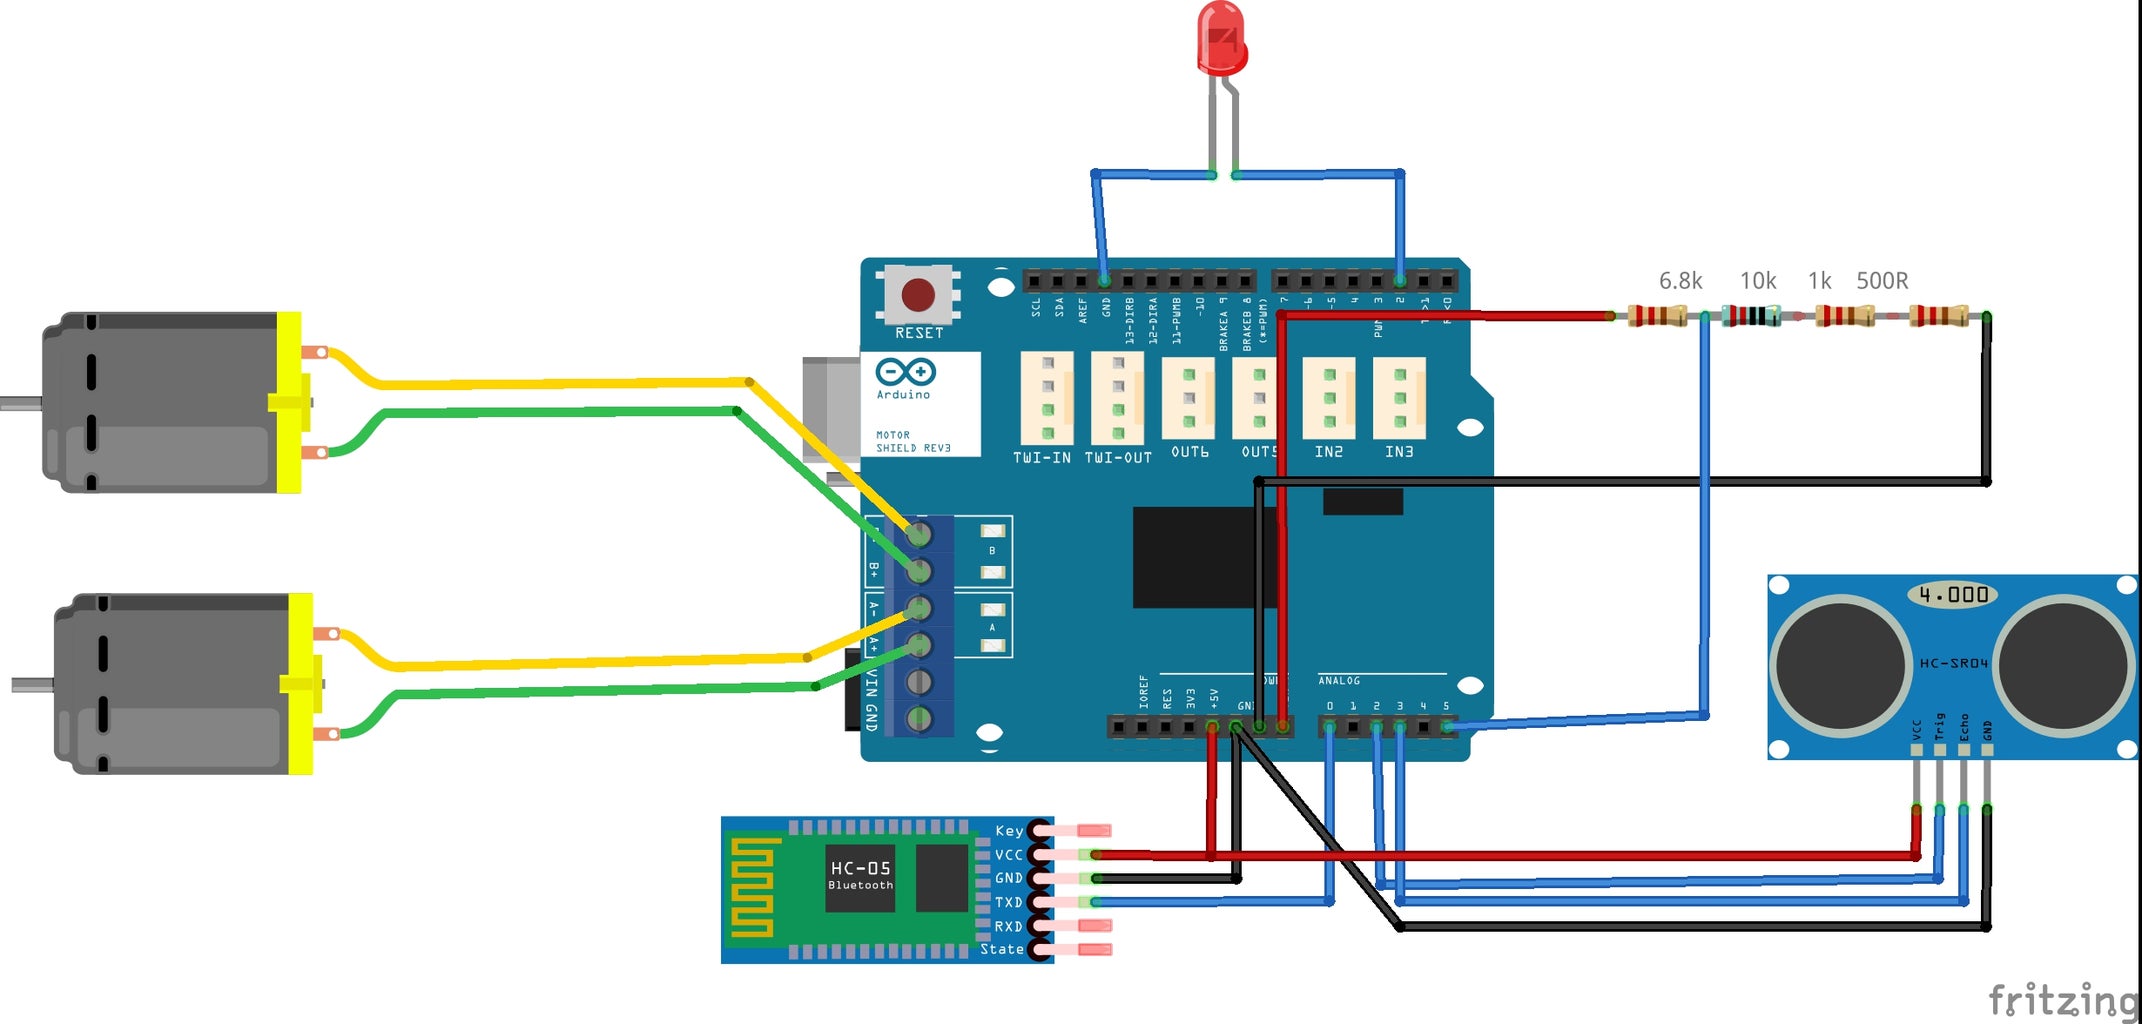

Almost everything is the same, but we don't have to build a transmitter.
- Now be careful: we have a NeuroSky brainwave measuring tool that is the transmitter. This is working with Bluetooth. At the "Connecting the Communication Modules" part program your HC-05 module to connect to the address of the NeuroSky headset. And there you go... It is a litle bit tricky, but the video shows you everything.
- The brainwave controlled version isn't as precise as the other so I decided that I add an ultrasonic distance sensor module. This way I can avoid obstacles.
Step 8: Transmitter (Joystic Controlled)


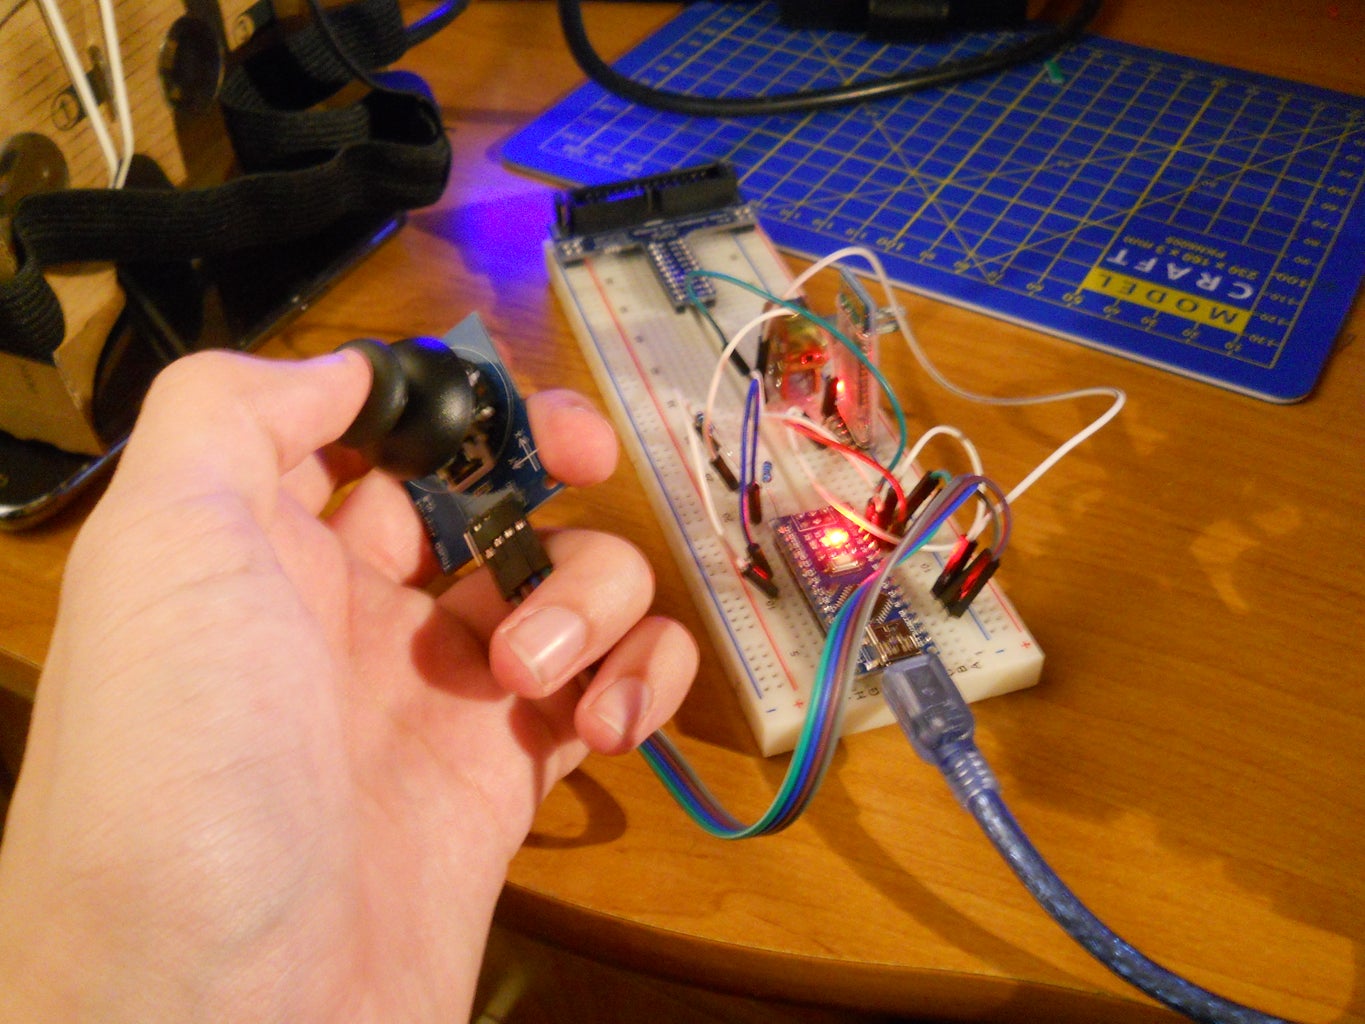
Following the circuit schematic build your circuit and find a project enclosure for it. I drilled a few holes for the joystick and for the potmeter then glued everything inside the box. In my opinion this looks pretty good. It is a nice little controller with a very long range. You can charge up with an USB cable.
Step 9: Transmitter (Mindwave Controlled)


As I said I have a hacked brainwave toy, but if you want to save time use a NeuroSky product. You don't even have to suffer with the transmitter this way.
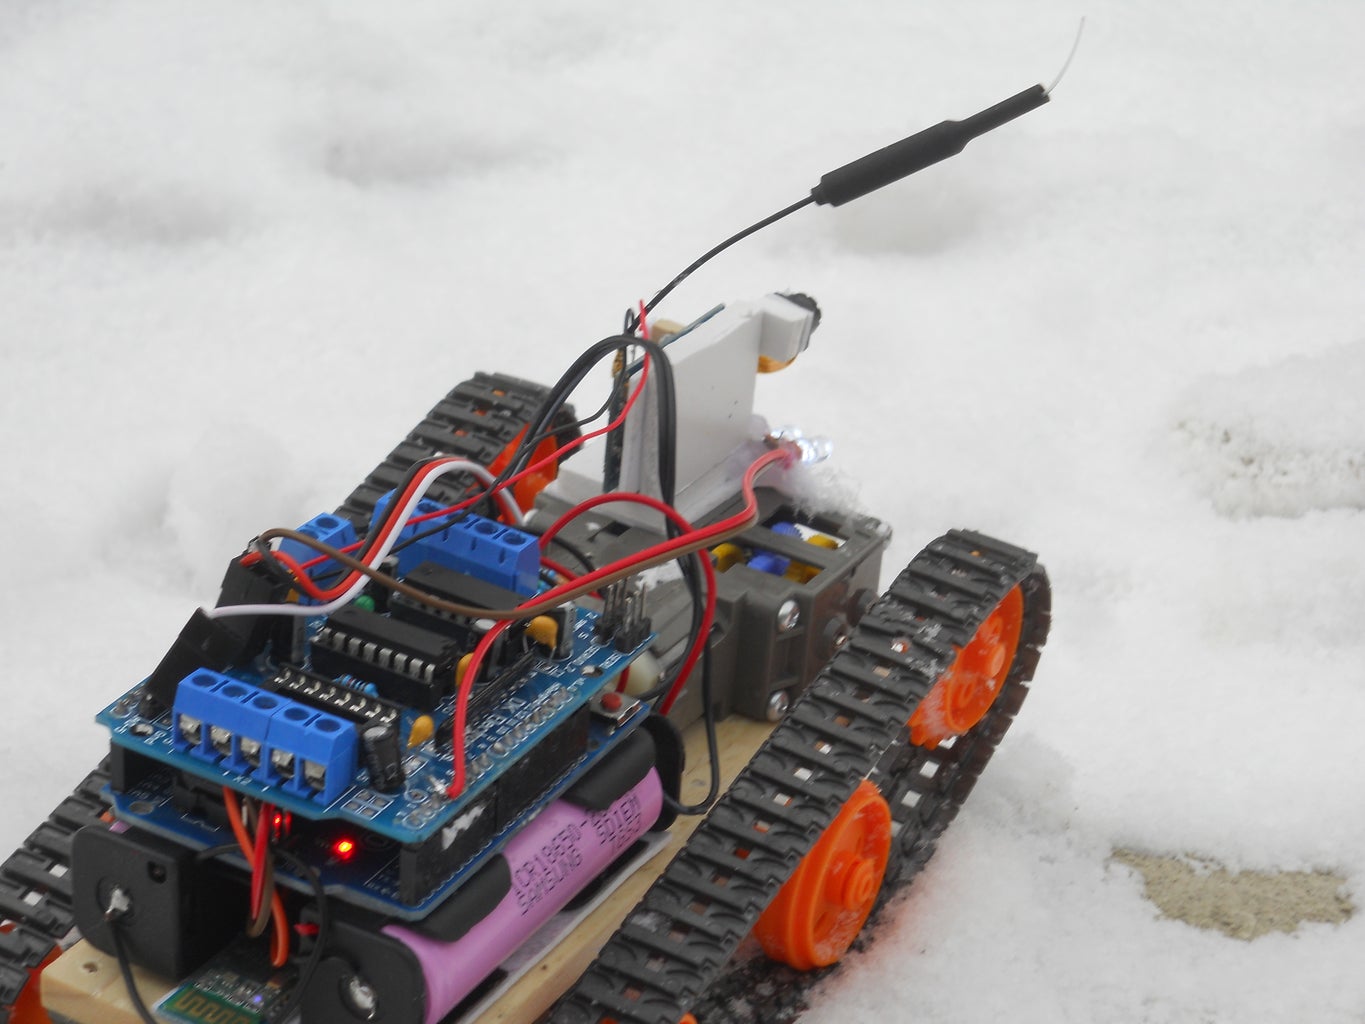
Step 10: Mounting Components on the Frame


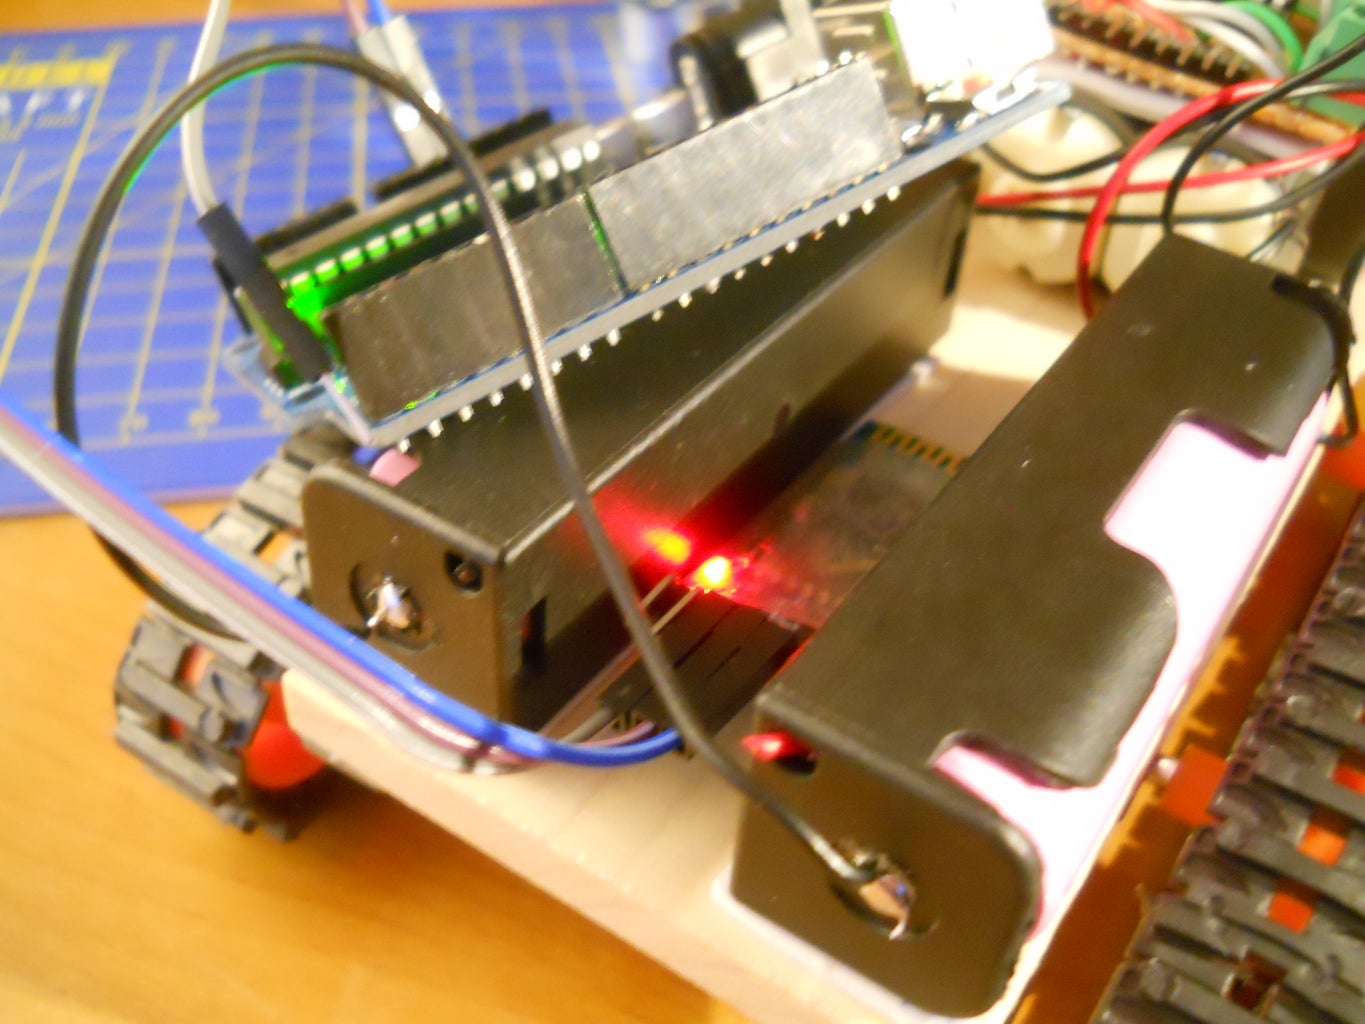


Staring with the battery holders fix all of the components on the frame using tape or hot glue. I put the Arduino on the batteries and the Motor Shield in the Arduino. With a screwdrived fix the motor's wires to the srew therminals of the Adafruit Motor Shield and solder a 5mm power jack to the batteries so you can power up the Arduino this way with 7.4 volts. In the next step you can see the circuit. It will be easier to explain that way.
Step 11: The Code
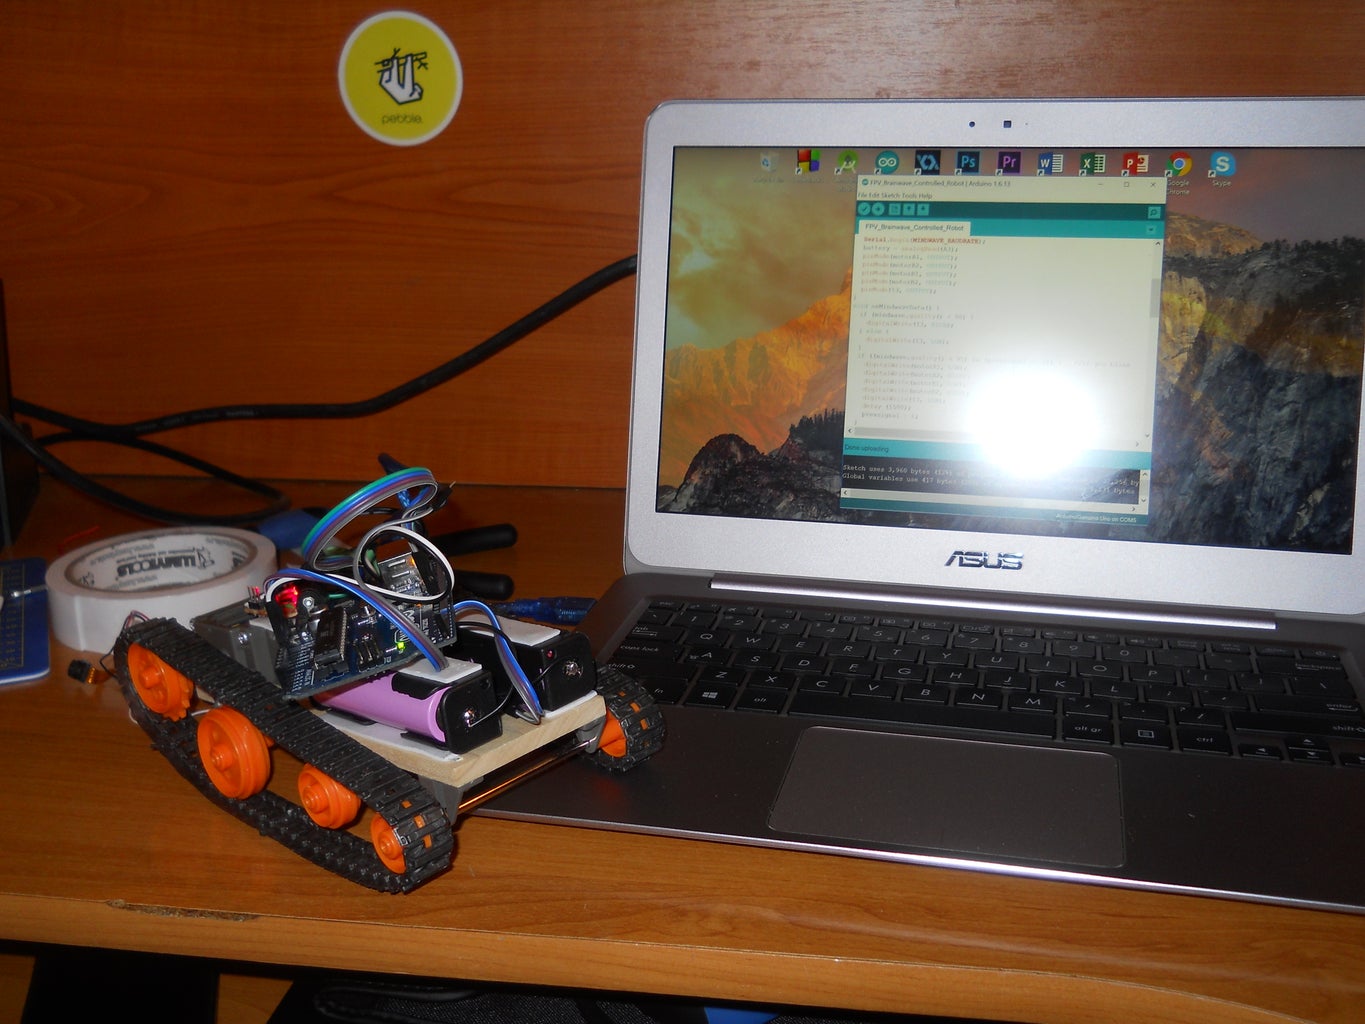

Does not matter what kind of PC do you use just have an Arduino IDE on it. I am copying the code here, but if you want you can download this .rar file and after extraxting you'll be able to upload the codes on the microcontrollers. Please be attentive and upluad the codes that you need not the other.
Code for the Joytick Controlled Robot:
// The code was made by Tamás Imets for an Arduino UNO project
#include <softwareserial.h>
#include <afmotor.h>
int command = 0;  //incoming serial data
int led = 3;
SoftwareSerial bluetooth(A0, A1);
AF_DCMotor M1(1, MOTOR12_64KHZ); //initialize motor1 that is connected to the M1 port, this motor moves forward and backward
AF_DCMotor M2(2, MOTOR12_64KHZ); //motor2 is connected to M2 and this turns BB-8 left and right
int cmd;</p><p>Servo head;
void setup() {
  bluetooth.begin(9600);
  Serial.begin(9600); // set up Serial library at 9600 bps - this is the speed the serial interface will work all
  head.attach(9); //attach servo to pin D9 or to servo2 on motor shield
  M1.setSpeed(255); //set default speed
  M2.setSpeed(255); //set default speed
  pinMode(led, OUTPUT); //connect here the blue LED
}</p><p>void loop() {
  battery = analogRead(A5);
  if (battery <= 570) {
    M1.run(RELEASE); // stopped
    M2.run(RELEASE); // stopped
  }
  if (bluetooth.available()) {
    cmd = bluetooth.read();
    Serial.write(cmd);
    switch (cmd)
    {
      case 'C':
        M1.run(RELEASE); // stopped
        M2.run(RELEASE); // stopped
        break;</p><p>      case 'A':
        M1.setSpeed(255);
        M2.setSpeed(255);
        M1.run(FORWARD);
        M2.run(FORWARD);
        break;</p><p>      case 'B':
        M1.setSpeed(100);
        M2.setSpeed(100);
        M1.run(FORWARD);
        M2.run(FORWARD);
        break;</p><p>      case 'D':
        M1.setSpeed(100);
        M2.setSpeed(100);
        M1.run(BACKWARD);
        M2.run(BACKWARD);
        break;</p><p>      case 'E':
        M1.setSpeed(255);
        M2.setSpeed(255);
        M1.run(BACKWARD);
        M2.run(BACKWARD);
        break;</p><p>      case 'F':
        M1.setSpeed(255);
        M2.setSpeed(255);
        M1.run(FORWARD);
        M2.run(BACKWARD);
        break;
      case 'G':
        M1.setSpeed(100);
        M2.setSpeed(100);
        M1.run(FORWARD);
        M2.run(BACKWARD);
        break;
      case 'H':
        M1.setSpeed(100);
        M2.setSpeed(100);
        M1.run(BACKWARD);
        M2.run(FORWARD);
        break;
      case 'I':
        M1.setSpeed(255);
        M2.setSpeed(255);
        M1.run(BACKWARD);
        M2.run(FORWARD);
        break;
      case '0':
        digitalWrite(led, LOW);
        break;
      case '1':
        analogWrite(led, 50);
        break;
      case '2':
        analogWrite(led, 100);
        break;
      case '3':
        analogWrite(led, 150);
        break;
      case '4':
        analogWrite(led, 200);
        break;
      case '5':
        analogWrite(led, 255);
        break;
    }
  }
}</p>
Code for the Brainwave Controlled Robot:
<p>#include "Mindwave.h"<mindwave.h><br>#include "Ultrasonic.h"</mindwave.h></p><p>Mindwave mindwave;
Ultrasonic ultrasonic(A4, A5);
int medlimit = 70;    //set limits
int attlimit = 65;    //set limits
const int motorA1 = 6;    //motor A positive (+) pin to pin 6 (PWM) (from L298 module!)
const int motorA2 = 9;    //motor A negative (-) pin to pin 9 (PWM)
const int motorB1 = 10;   //motor B positive (+) pin to pin 10 (PWM)
const int motorB2 = 11;   //motor B negative (-) pin to pin 11 (PWM)
int battery;</p><p>int distance;         //vconst int motorA1 = 6;
int prevsignal = 0;</p><p>void setup() {
  Serial.begin(MINDWAVE_BAUDRATE);
  battery = analogRead(A3);
  pinMode(motorA1, OUTPUT);
  pinMode(motorA2, OUTPUT);
  pinMode(motorB1, OUTPUT);
  pinMode(motorB2, OUTPUT);
  pinMode(13, OUTPUT);
}
void onMindwaveData() {
  if (mindwave.quality() < 90) {
    digitalWrite(13, HIGH);
  } else {
    digitalWrite(13, LOW);
  }
  if ((mindwave.quality() < 95) && (prevsignal == 0)) {   //if you blink
    digitalWrite(motorA1, LOW);
    digitalWrite(motorA2, HIGH);
    digitalWrite(motorB1, LOW);
    digitalWrite(motorB2, HIGH);
    digitalWrite(13, LOW);
    delay (1500);
    prevsignal = 1;
  }</p><p>  if ((mindwave.quality() < 95) && (prevsignal == 1)) {
    digitalWrite(motorA1, LOW);
    digitalWrite(motorA2, LOW);
    digitalWrite(motorB1, LOW);
    digitalWrite(motorB2, LOW);
    prevsignal = 0;
  }</p><p>  if (mindwave.quality() == 100) {
    digitalWrite(13, HIGH);
  }</p><p>  if (mindwave.meditation() > medlimit) {
    digitalWrite(motorA1, HIGH);
    digitalWrite(motorA2, LOW);
    digitalWrite(motorB1, LOW);
    digitalWrite(motorB2, HIGH);
    delay(600);
    digitalWrite(motorA1, LOW);
    digitalWrite(motorA2, LOW);
    digitalWrite(motorB1, LOW);
    digitalWrite(motorB2, LOW);
    prevsignal = 0;
  }</p><p>  if (mindwave.attention() > attlimit) {
    digitalWrite(motorA1, LOW);
    digitalWrite(motorA2, HIGH);
    digitalWrite(motorB1, HIGH);
    digitalWrite(motorB2, LOW);
    delay(600);
    digitalWrite(motorA1, LOW);
    digitalWrite(motorA2, LOW);
    digitalWrite(motorB1, LOW);
    digitalWrite(motorB2, LOW);
    prevsignal = 0;
  }</p><p>  if (distance <= 10) {   //check if there is an obstacle
    digitalWrite(motorA1, HIGH);
    digitalWrite(motorA2, LOW);
    digitalWrite(motorB1, HIGH);
    digitalWrite(motorB2, LOW);
    delay (600);
    digitalWrite(motorA1, LOW);
    digitalWrite(motorA2, LOW);
    digitalWrite(motorB1, LOW);
    digitalWrite(motorB2, LOW);
    prevsignal = 0;
  }</p><p>}
void loop() {
  distance = ultrasonic.Ranging(CM);
  if (battery < 700) {
    digitalWrite(motorA1, LOW);
    digitalWrite(motorA2, LOW);
    digitalWrite(motorB1, LOW);
    digitalWrite(motorB2, LOW);
    digitalWrite(13, HIGH);
    delay (1000);
    digitalWrite(13, LOW);
  } else {
    mindwave.update(Serial, onMindwaveData);
  }
}</p>
Code for the Joystick R/C Controller:
<p>//Made by Imets Tamás</p><p>#include <softwareserial.h>
SoftwareSerial BTserial(2, 3); // RX | TX
char *controller;
int x;
int y;
int led;
void setup() {
  pinMode(13, OUTPUT);
  Serial.begin(9600);
  BTserial.begin(9600);
  controller = "0";
}</softwareserial.h></p><p>void loop() {
  x = analogRead(A0);
  y = analogRead(A1);
  led = analogRead(A2);</p><p>  if (x > 0 && x < 250) {
    BTserial.write("A");
  }
  else if (x > 250 && x < 400) {
    BTserial.write("B");
  }
  else if (x > 500 && x < 520 && y > 500 && y < 520) {
    BTserial.write("C");
  }
  else if (x > 600 && x < 750) {
    BTserial.write("D");
  }
  else if (x > 750 && x < 1050) {
    BTserial.write("E");
  }</p><p>  if (y > 0 && y < 250) {
    BTserial.write("F");
  }
  else if (y > 250 && y < 400) {
    BTserial.write("G");
  }
  else if (y > 600 && y < 750) {
    BTserial.write("H");
  }
  else if (y > 750 && y < 1050) {
    BTserial.write("I");
  }
  //LED
  if (led > 50 && led < 200) {
    BTserial.write("0");
  }
  if (led > 50 && led < 200) {
    BTserial.write("1");
  }
  if (led > 200 && led < 400) {
    BTserial.write("2");
  }
  if (led > 400 && led < 600) {
    BTserial.write("3");
  }
  if (led > 600 && led < 800) {
    BTserial.write("4");
  }
  if (led > 800 && led < 1050) {
    BTserial.write("5");
  }
}</p>
Attachments

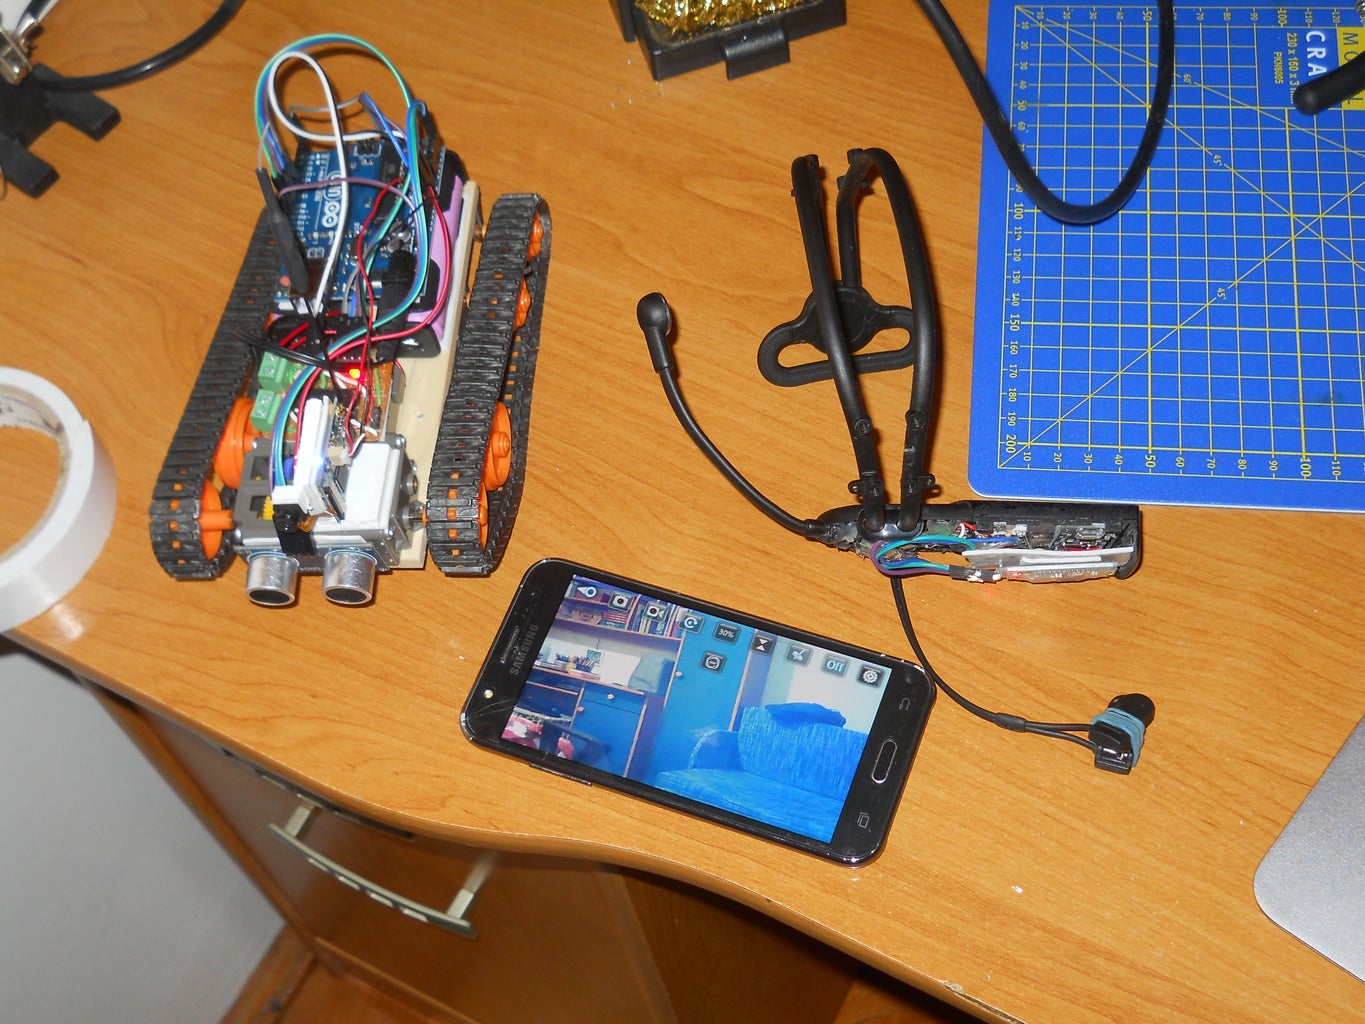
Step 12: Download the FPV Application

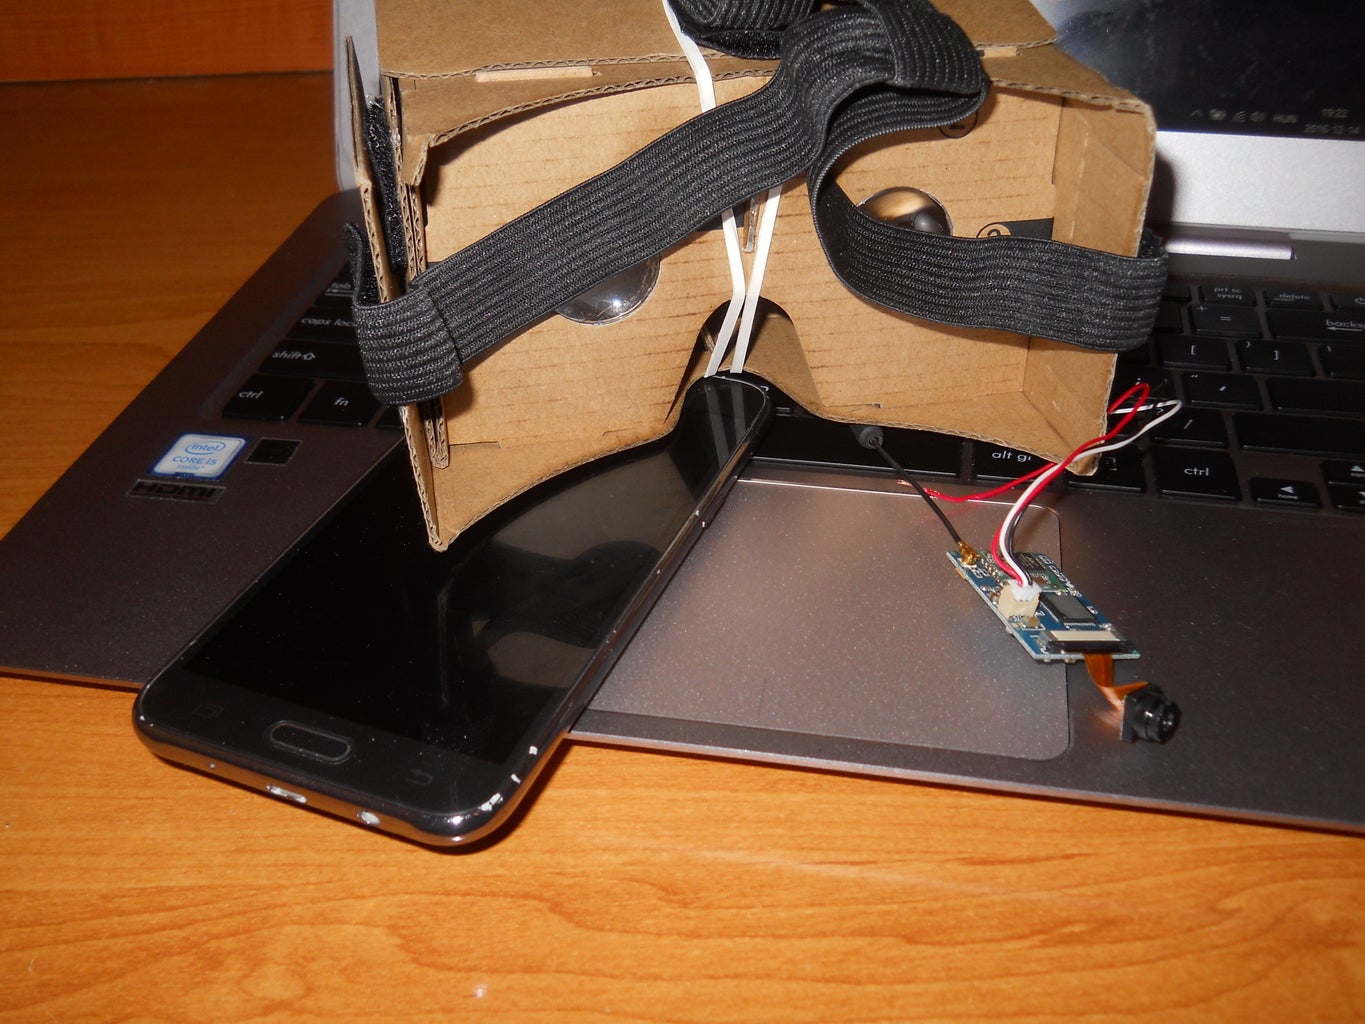
There is an app named WiFi UFO in the Google Play Store. Download it... :)
Android: https://play.google.com/store/apps/details?id=com....
iPhone: https://itunes.apple.com/us/app/wifi-ufo/id9775584...
Step 13: How to Use It?
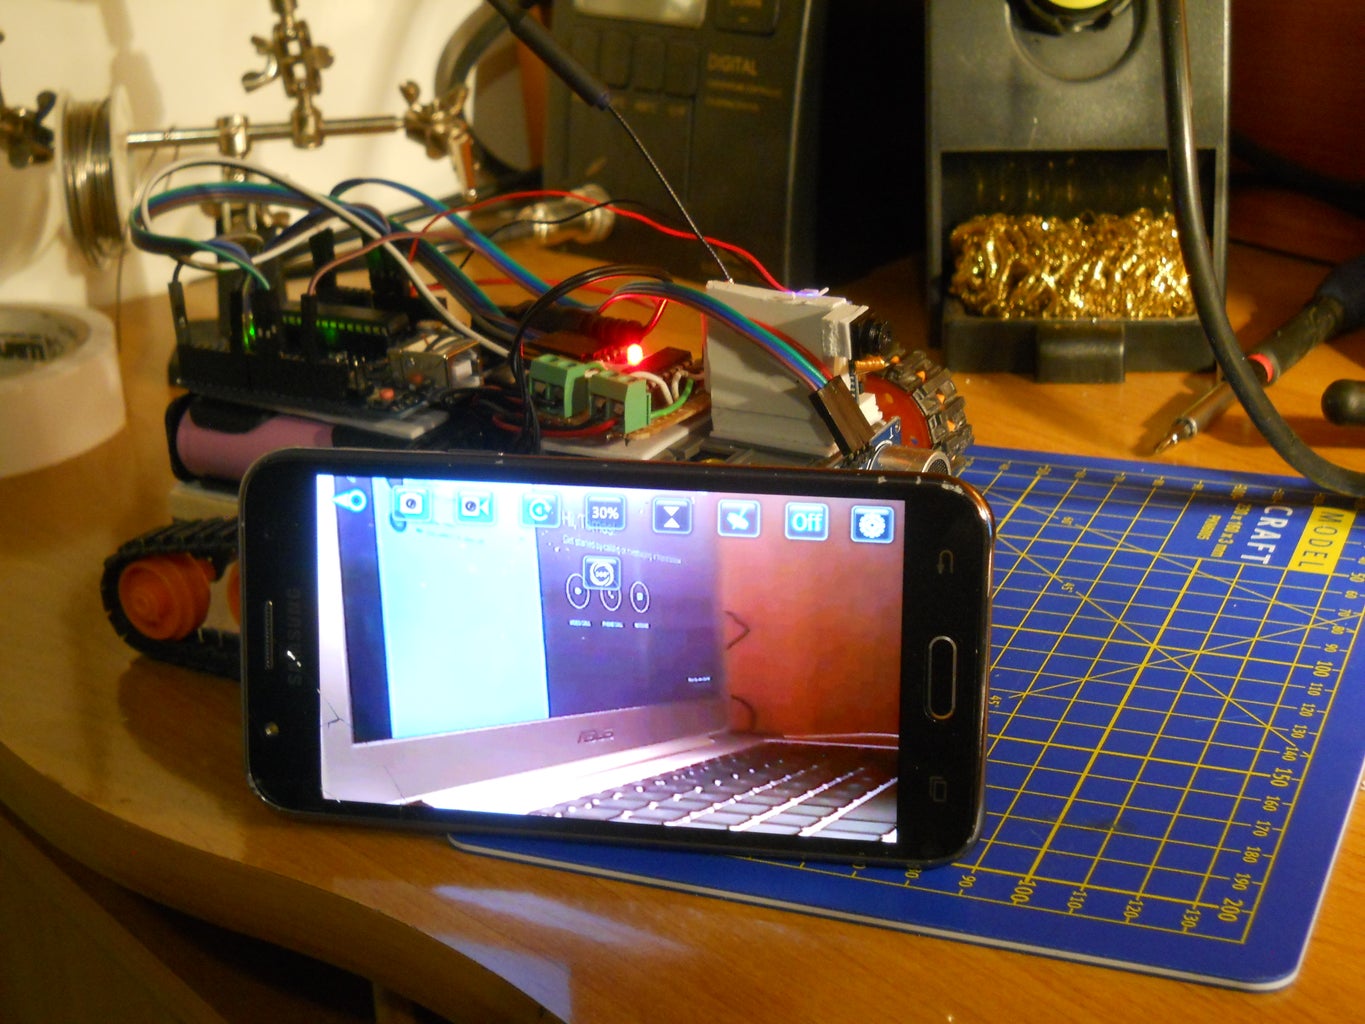


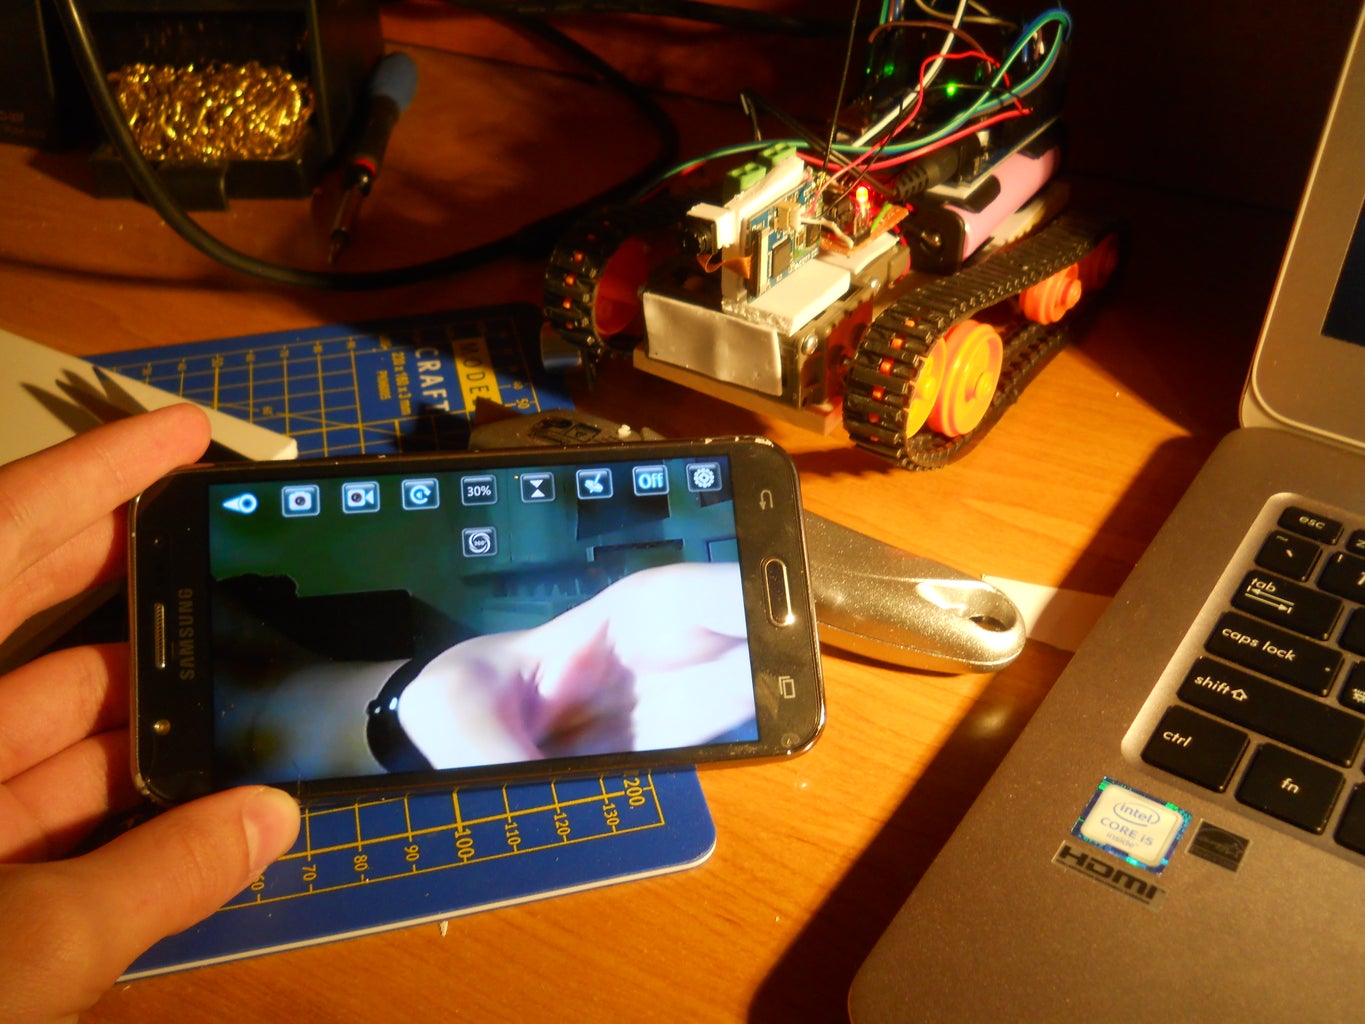

- Turn on your Robot
- Connect to WiFi UFO wifi network that is generated by the FPC Camera on your robot
- Open the WiFi UFO app
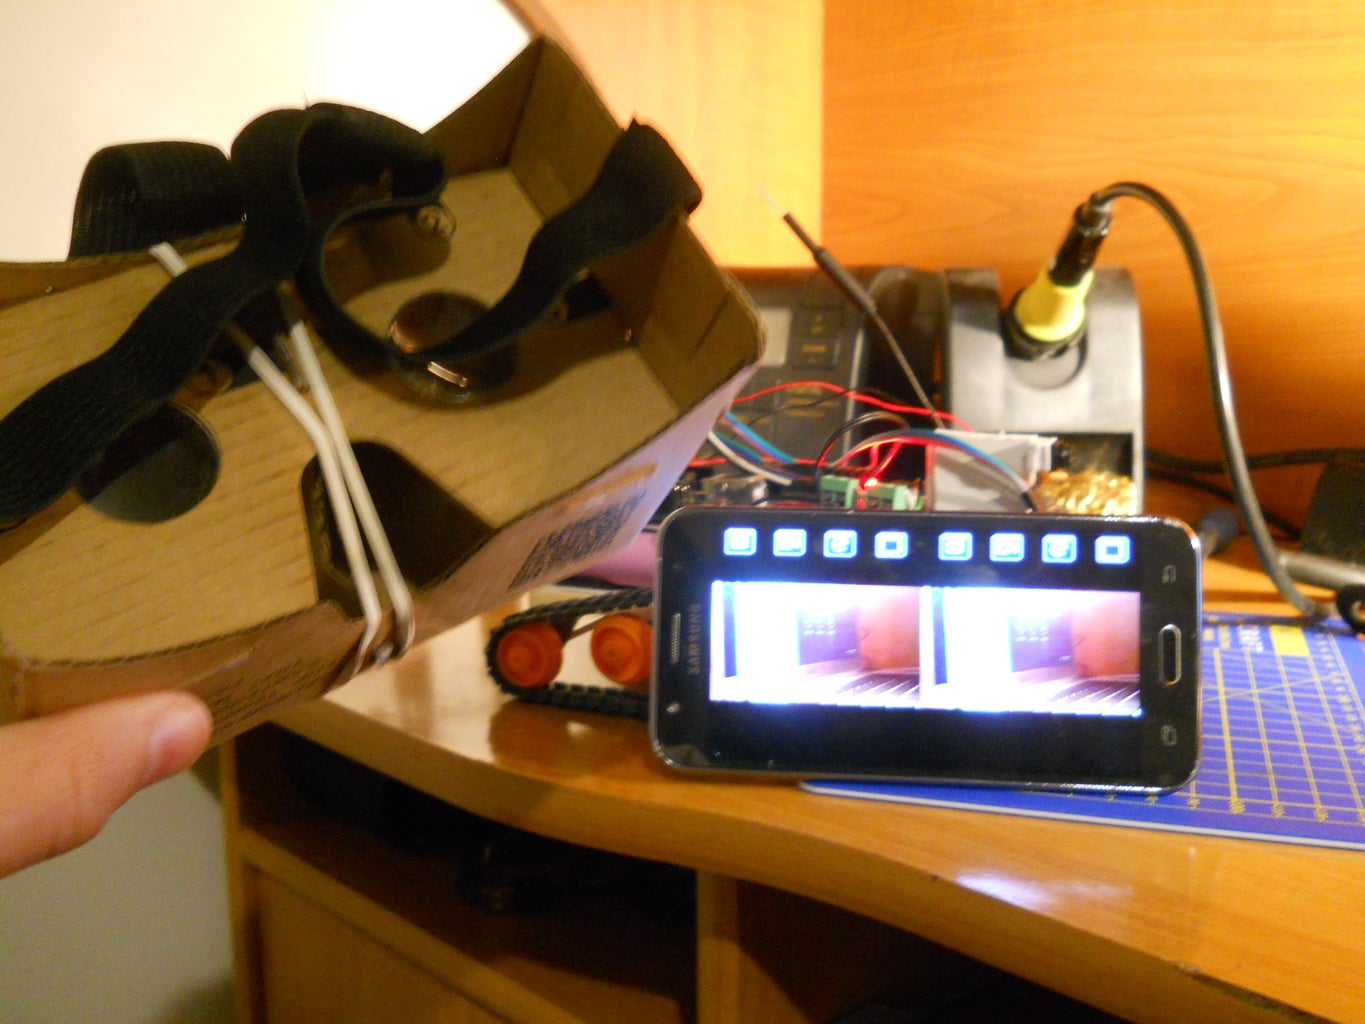
- Turn on VR (Virtual Reality) Vision
- Put your phone in the VR glass
- Enjoy!!!
Step 14: The Done Robot


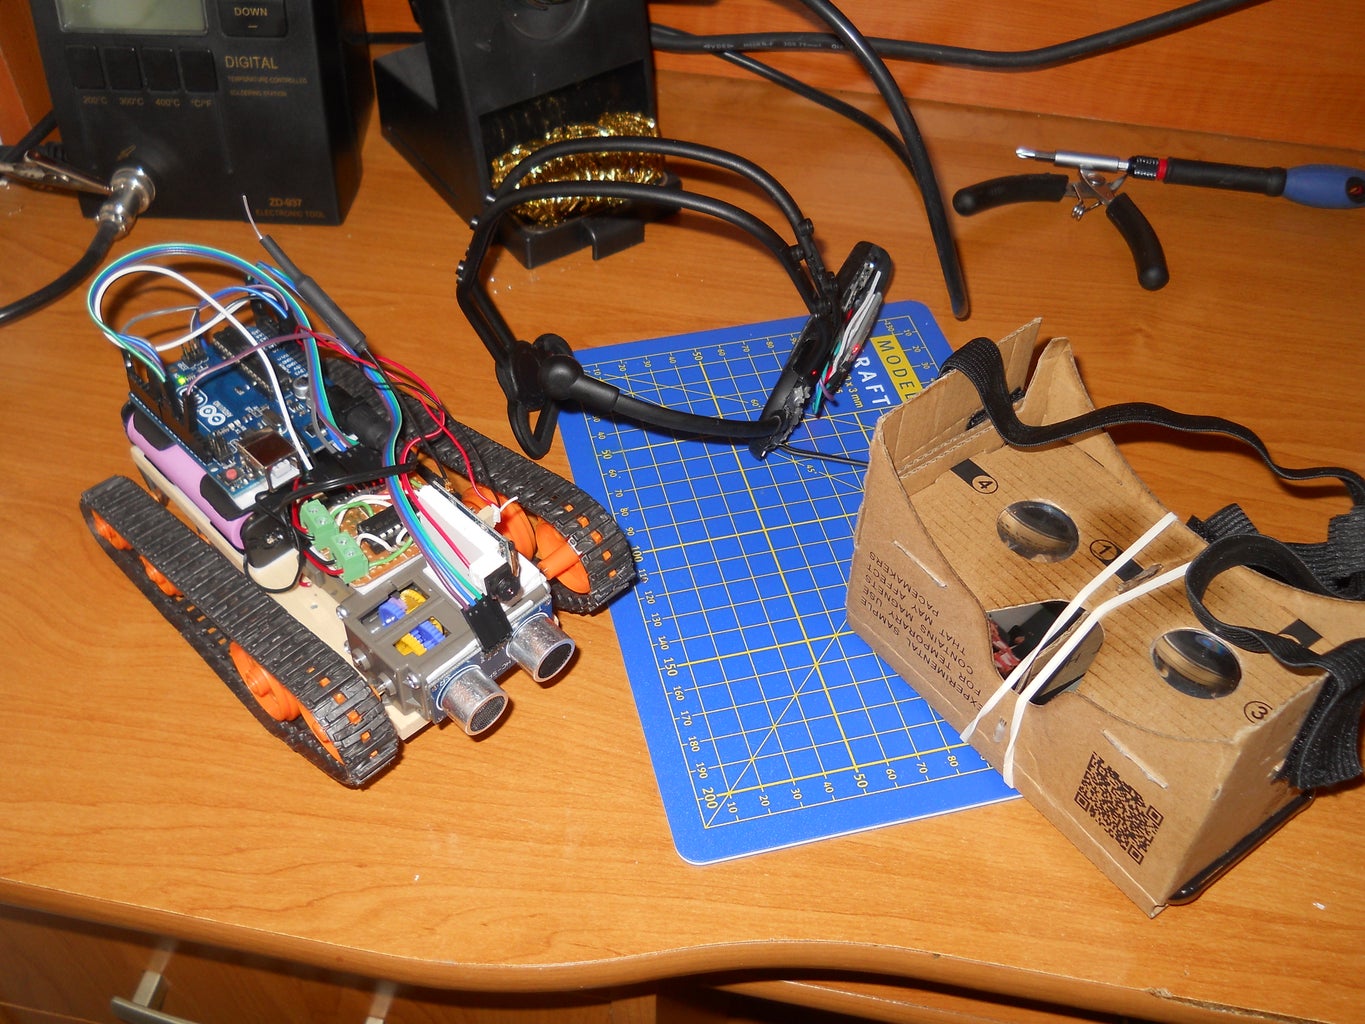
Now your robot is done, enjoy playing with it. :)
The maximum battery life is around 30-60 minutes thanked to the Samsung batteries. I really like to play with it and you can use it as a spy tool too. Once I asked my mom to put my breakfast on this robot's roof then I just drove back to my room. So have fun with it!
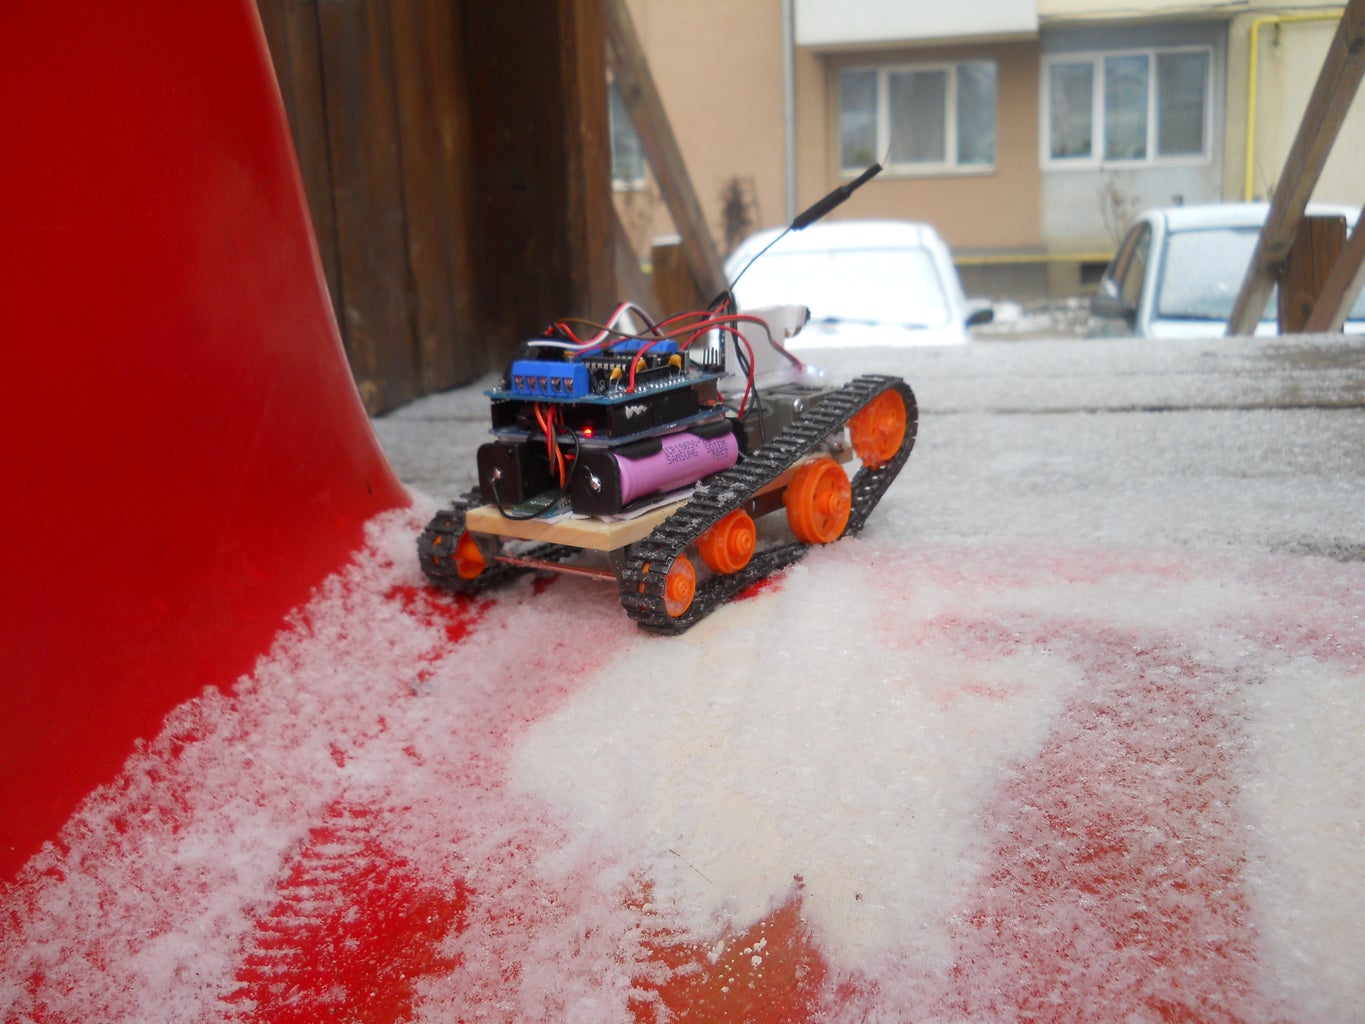
Step 15: Testing


The Video shows everything for you. Don't call me arrogant but it is very fun to play with joystick and with mindwaves too. I was working without problems in -20 degrees Celsius in the snow and look at the first picture... He is climbing so good...
Step 16: Thank You for Watching!


Thank you very much for watching my Instructable! If you liked give me a kindly Vote and Like or Share. I hope you'll enjoy building this project, if you have any questions feel free to ask, and I am trying o answer as soon as possible. May the Force be with you!
Step 17: Inspired by Sci-Fi Movies: Brainwaves, Measuring, Story of My Project...


Yes it is true... I was inspired by the Star Wars Saga and I was amazed by the Force. I always wanted to make something that can help me to get closer to this feeling and then I made a research in neuroscience. Last year I won a national competition with my brainwave based project and this year I made this virtual reality robot so actually this is the further development of my original project. In the world of Star Wars the Jedi knights were able to move objects with their thoughts and with the help of today's technology I was able to create a gadget that approaches the Force users' experience.
Don't worry, we can't steal your thoughts... There are millions of neurons communicating in your brain right now with electrical impulses. This can be measured by the device that I have shown you. To control this little robot we are using Alpha and Beta waves. Read more below. Brainwaves are detected using sensors placed on the scalp. They are divided into bandwidths to describe their functions (below), but are best thought of as a continuous spectrum of consciousness; from slow, loud and functional - to fast, subtle, and complex.
How to control the robot?
It is pretty easy... Try to focus on your right hand to move right, try to think on floating your left hand to move left and blink to move forward then blink to stop. The ultrasonic sensor helps you if there is any problem.
DELTA WAVES (.5 TO 3 HZ)
Delta brainwaves are slow, loud brainwaves (low frequency and deeply penetrating, like a drum beat). They are generated in deepest meditation and dreamless sleep. Delta waves suspend external awareness and are the source of empathy. Healing and regeneration are stimulated in this state, and that is why deep restorative sleep is so essential to the healing process.
THETA WAVES (3 TO 8 HZ)
Theta brainwaves occur most often in sleep but are also dominant in deep meditation. It acts as our gateway to learning and memory. In theta, our senses are withdrawn from the external world and focused on signals originating from within. It is that twilight state which we normally only experience fleetingly as we wake or drift off to sleep. In theta we are in a dream; vivid imagery, intuition and information beyond our normal conscious awareness. It’s where we hold our ‘stuff’, our fears, troubled history, and nightmares.
ALPHA WAVES (8 TO 12 HZ)
Alpha brainwaves are dominant during quietly flowing thoughts, and in some meditative states. Alpha is ‘the power of now’, being here, in the present. Alpha is the resting state for the brain. Alpha waves aid overall mental coordination, calmness, alertness, mind/body integration and learning.
BETA WAVES (12 TO 38 HZ)
Beta brainwaves dominate our normal waking state of consciousness when attention is directed towards cognitive tasks and the outside world. Beta is a ‘fast’ activity, present when we are alert, attentive, engaged in problem solving, judgment, decision making, and engaged in focused mental activity. Beta brainwaves are further divided into three bands; Lo-Beta (Beta1, 12-15Hz) can be thought of as a 'fast idle, or musing. Beta (Beta2, 15-22Hz) is high engagement or actively figuring something out. Hi-Beta (Beta3, 22-38Hz) is highly complex thought, integrating new experiences, high anxiety, or excitement. Continual high frequency processing is not a very efficient way to run the brain, as it takes a tremendous amount of energy.
GAMMA WAVES (38 TO 42 HZ)
Gamma brainwaves are the fastest of brain waves (high frequency, like a flute), and relate to simultaneous processing of information from different brain areas. It passes information rapidly, and as the most subtle of the brainwave frequencies, the mind has to be quiet to access it. Gamma was dismissed as 'spare brain noise' until researchers discovered it was highly active when in states of universal love, altruism, and the ‘higher virtues’. Gamma is also above the frequency of neuronal firing, so how it is generated remains a mystery. It is speculated that Gamma rhythms modulate perception and consciousness, and that a greater presence of Gamma relates to expanded consciousness and spiritual emergence.
Source: http://www.brainworksneurotherapy.com/what-are-bra...
The Force will be with you... Always.

Runner Up in the
Arduino Contest 2016

Participated in the
Sci-Fi Contest 2016

Participated in the
Epilog Contest 8


