

Introduction: FRIDGE (magnetic) GARDEN!


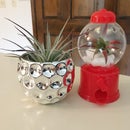

This Instructable will show you how to make your very own magnetic garden for your fridge (or freezer etc).
The plants/rocks are made out of clay so no need to water your garden!
You can rearrange your plant magnets to create new garden arrangements when you get bored of the old one!
If you want to gift a magnetic garden to someone, you can wrap it up with a single layer of wrapping paper then stick it to their fridge to see how long it takes them to see it (hehe).
I plan on making more of these magnets and updating this Instructable with new pictures in early January when I have wifi (currently in SF at my grandparents' internet-less house!)
If you don't like succulents you can make flowers or cacti etc. Just google images of plants you like and use clay to make it. Just be sure to bake it according to how thick it is and the instructions on your package of clay.
hope you enjoy this Instructable! feel free to vote for it if you did!
best.
elana
Step 1: Gather Materials


You'll need
-clay (I recommend using clay from same brand and manufacturer so you are working with clay with the same baking instructions (temperature and baking time). if you choose to use clay with different instructions, be sure to alter how you do the baking step)
--Browns for garden "grounds"
--greens for leaves/succulents/grass
--other colors for flowers (if you want)
-gray for rocks
-hot glue gun and sticks
-magnets (smaller than the garden you're making. It's less cool when you see a magnet sticking from edge of bottle cap garden.
-bottle caps (these are really optional but I use them. You could just glue the magnets to the clay grounds after they have been baked. Up to you
-clay tools
--highly recommend a tool with a sharp edge and one with a rounded edge
optional and not discussed: I think there is liquid clay glue. Like some sort of medium that adheres clay together and is made out of clay? I am not sure about this product and do not use it in the Instructable but it would make the project easier on you probably.)
Step 2: Glue Magnets to Bottle Caps


Use hot glue to glue magnets onto the backs of the bottle caps.
Make sure the magnet is flat and not at a tilt (if it's at a tilt that whole bottle cap garden will be slanted in respect to the fridge you put it on.
Step 3: Create "ground"


- roll small piece of brown into a ball
- press ball into bottle cap flattening it some
- take ground out of bottle cap with tool
- set aside to begin landscaping it (lol)
Step 4: Create Succulent Leaf


-Roll small piece of green clay into a ball (not pictured)
-then roll this ball into a rod (see first picture)
-pinch off small pieces of the rod and shape into a leaf shape using your fingers
-flatten this leaf slightly
That is the technique you will use to create other leaves for the succulents
Step 5: Create Succulents


-Use rounded end tool to press on the base of the first leaf
-make second leaf of the same size and attach to the ground next to the first leaf. Make sure to place the leaves for the first layer of leaves in a circular path. If you make the base of the succulent in a circle shape, it will turn out to look how we want it to look.
-finish the base layer of leaves
-create a leaf smaller than the first layer leaves and place over where 2 base leaves touch (overlap the new leaf over where the base leaves touch). Use rounded tool to attach leaf in place.
-continue this until you finish the second layer of leaves
-continue making new layers of leaves until there is only one small space open on top. That space is where you will put the last leaf.
-for the last leaf, make it as you did the others but do not flatten it. Place the top leaf at the top of the succulent and use you sharp edged tool to gently attach it to the succulent (mush/scrape some clay from the top leaf onto the succulent and move some succulent clay onto the leaf).
-smooth out any tool marks
Step 6: Create Rocks

-knead a piece of gray clay and pinch off small pieces of it in varying sizes
-roll the small pieces of gray clay into small spherical balls
-gently press the spherical rock pieces onto the ground. This will flatten the rocks a little bit but that is what we want! It will make them more realistic looking!
Step 7: Get Fancy With Flowers (if You Want)


to make a rose:
-roll piece of clay in color of choice into a ball
-flatten ball of clay into a thin sheet (I pinched it with my fingers)
-pinch off small piece of clay. The smooth side from the edge of the flattened ball will be the top of the rose. roll the piece into itself gently. This will be what we roll other pieces around.
-pinch off another piece of clay in the same way and roll it around the piece you just made. Make sure you overlap where the petals are and keep your rolling loose on one side (that will make it look like petals). On the opposite side, pinch the pieces together so all the pieces come together at a point (should look like base of a rose flower)
-I cut off some of this base so when I attached it to the ground, the flower would stand up off the ground less far.
Step 8: How to Make Grass!


get a kneaded piece of green clay (picture 1) and pinch off small pieces of it (not pictured)
Roll the small pieces to create thin rods of green clay (picture 2)
Group multiples of these rods to create patches of grass (not pictured)
Use sharp ended tool to attach the patches of grass to the ground (not pictured)
Step 9: Make More Garden Magnets!


Make more grounds/plant pieces. The more magnet garden pieces you have, the cooler your final garden will be! This is because the more pieces you have the more arrangements you can make!
Step 10: Bake
{"context":{"footer-robot":{},"you-image":{},"spinner":{"jQuery110200674016744841891":3731},"location":{"href":"https://www.instructables.com/editInstructable/publish/EL1XFAHIIEUKVXA","origin":"https://www.instructables.com","protocol":"http:","username":"","password":"","host":"www.instructables.com","hostname":"www.instructables.com","port":"","pathname":"/editInstructable/publish/EL1XFAHIIEUKVXA","search":"","hash":""},"jQuery110200674016744841891":1,"b":{"sizzle-1450819187604":{"parentNode":["9222 32",660]}},"h":{},"gtmHasClickListenerTag":true,"gtmHasLinkClickListenerTag":true,"gtmLinkClickListener":true},"selector":"#editor-Object-19"}
Step 11: Glue Clay to Bottle Caps
(Not pictured because couldn't take a picture and complete step quickly enough since using hot glue)
Use hot glue gun to place hot glue at the bottom of a bottle cap and around the inside edge of the cap and immdiately place one of the garden clay pieces into the bottle cap
let cool completely
Step 12: Put on Fridge and Admire

place your magnet garden pieces onto the fridge and repeat after me "OOOOOOO AHHHHH OOOOOOHHH AHHHHHH!!!!"
You are done! Decide if you want to keep them or give them (or some) to someone else.
I will update this Instructable in early January to show more garden pieces. I do not have wifi right now but wanted to share this project asap :)
Step 13: Rearrange Magnets for New "Garden"


got bored of this arrangement? rearrange the magnets into a new arrangement!

Participated in the
Indoor Gardening Contest 2015

Participated in the
Homemade Gifts Contest 2015


