

Introduction: Fashion of Star Wars - Organa's Ceremonial Necklace.


On May 4th, I spent the evening enjoying Star Wars Episode IV: A New Hope with the kids, while hunting for ideas for my next Instructable. Then at the end of the movie, I saw it !
The necklace that Leia was wearing - What is it ? How is it made ? And most importantly, can I make one ?
Even though I have never made any sort of jewelry before, I decided I could.
Research :
After lots of search engine pinging, I learned that the original item was made for Lapponia of Helsinki by Björn Weckström and was produced between 1969 and 1981. The official name of the necklace translates into 'Planetary Valleys' - its a sixteen inch chain made primarily of Sterling Silver.
SILVER ?!? Since I have a fairly small working budget, I wont be spending that much money to create my costume jewelry replica. In the end, I didn't need to spend any more than about $50.00 from start to finish. If you follow my lead, neither will you.
Now, as I mentioned earlier, I have never made jewelry. I have no tools, but I do have imagination, and I put it to use to find creative ways to repurpose common items into makeshift tools. - So, if you are ready to laugh at my lack of professionalism as I MacGyver my way though a build - read on !
Stuff you'll Need :
30 Gauge aluminium
Shapelock or similar product
X-Acto knives or similar product
Jump rings
A single Jewelry clasp - I used a 'spring ring'
Hot glue gun
Ruler, preferably metal
Spray on auto wax
Block of junk wood
Clamps
A meat thermometer
A pair of artist paintbrushes of differing diameter
Tongs
Small glass bowl
Small saucepan
Heavy duty scissors
Pliers
Rotary tool with drill bits, cutting disc, and buffer.
Safety goggles/gloves/ and long clothing
You'll also need photos of the original Planetary Valleys necklace as a reference. This Instructable will provide those, and the last step will link you to more.
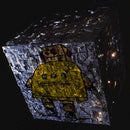
Step 1: Understand the Original.


Yeah, the title is kind of vague in a 'meta' sort of way - but it is important.
Take the time to study each of the squares that make up Planetary Valleys. At first glance, they seem rather simple - but when you look at the squares from other angles, you'll notice there is quite a bit more going on. After you make your brain good and numb from staring at close-up shots of the original piece, try printing out just one square, and scale it to approximately 1 inch. Get a pencil and trace the contours of the 'valley'.
That's all the room you have to work with. It isn't much, is it ?
Draw a box around the valley, - an inch wide, and 1.25 inches tall. This is the approximate dimension of each of the valley blanks that you'll be making later. Notice the valley seems to go over the edge of the printout. Using your pencil, continue it into the extra .25 inch, so you'll have an idea of what the valley looks like on a flat surface.
Keep going until you have a vague 3D image in your mind, then move on to the next step.
Step 2: Carve Out Your First Rough Mold.


Get out your X-Acto set, and try to carve the valley in a piece of scrap wood. Remember, Razors are sharp - Very sharp, and unless you wish to bleed all over the place before taking a trip to the hospital for stitches, remember the rules.
Carve slowly.
Carve away from you.
Wear hand and eye protection.
Never use your X-Acto to gouge. The blade may snap.
Once you have a valley you are happy with, cut a piece of aluminium, and clamp it to the block of wood. Using the back end of your larger paint brush, slowly work metal down into the valley, then use the back end of the smaller brush to work it even further.
I suspect you wont be happy with the result. That's okay - just carve it out further. Try to remember your working dimensions, else your valley may become too large. While carving, keep in mind that the valley continues to the top of the one inch square, and it will circle around the back. Refer to your scale drawing for reference.
Once you finally get a valley that is more or less okay, move on to the next step.
Step 3: Work Out the Kinks.


Using the tools you have - (in my case the two paint brushes and a meat thermometer), work the valley smooth. Enlarge it where it needs to be enlarged, and work out any problematic bumps and folds. If the bumps are too small, or too set in place, you can work them using the point and edge of the meat thermometer. Just be careful to not tear through the metal. If you do, make another using your wooden mold.
Once you are happy with the valley, cut it out to the proper 1in X 1.25 inch size. Don't worry if the edge is wrinkled. Just flip the blank over on a smooth surface, and smooth the wrinkles out using the meat thermometer. Once smooth, check the measurements again. they may be slightly off. Straighten them out.
Remember - you are working with metal.
Edges can be sharp and stabby. Work slowly and carefully. Discard of any shavings you might leave behind. A metal splinter is less than pleasant.
Next - on to the second mold.
Step 4: Second Mold - Strengthen Your Master.


Now that you have a perfect valley, its time to make it usable. In its current state it is too soft, and will easily deform.
We can fix that with some hot glue, and a few minutes of time.
Take some of your aluminum, and use it to form a box that will fit around your master valley. I found that using the ruler to fold the metal around is a quick and easy way to make the box. Carefully place the valley with the indentation facing up into the bottom of your metal box, and place the assembly on a heat resistant surface.
Slowly pump some hot glue into the valley, until it reaches a depth of about a half an inch.
DO NOT TOUCH THE BOX UNTIL IT COOLS
This much hot glue will stay hot for a while, and you can get pretty seriously burnt. Once cooled, unwrap your box using the pliers and safety gloves.
What you should have is a nice glue filled stamp of your valley. The glue should have reinforced it enough for the next step.
Step 5: Final Mold.


Now that the valley stamp is made, it will be used to create your working mold.
Take some Shapelock, and heat it up. My suggestion is to do it in double boiler fashion. It takes longer, but it is far easier to control your temperature. I like to use the cap from a jar candle to put the Shapelock in. The cap has no problem with hot water, and the entire unit can be removed from the water to your work area with a pair of tongs once its ready. Use the meat thermometer to keep an eye on temperatures, and once the Shapelock is ready, use the tongs to move it to your workspace, then use the tongs to pull the Shapelock out of the cap. Put on a safety glove to hold the cap first. and pull on the Shapelock with the tongs until it pops out.
Roll it out on a smooth surface, flipping it over and over until its smooth on both sides, about a half inch thick, and at least 2 inches tall and four inches wide. Carefully press your valley stamp into the center of the Shapelock, just to the surface of the metal. In other words, the only impression you want in the Shapelock is the valley, not the 1 inch by 1.25 inch perimeter. Pop out the mold, then use the ends of the paintbrushes to ensure that the valley contours are smooth and shiny. Also, take the time to make sure that the impression didn't distort. If its not right, rework the Shapelock again, and reheat it if necessary. When its done, let it cool off.
Step 6: Fourteen Tiles.


Now that all the prepwork is over, its time to actually make the necklace !
Cut a piece of aluminium to a 2in X 2in square. Place it over your mold, and using the back of the large paintbrush, work the foil into the mold as far as it will go. Then switch to the smaller diameter brush and work it further. Next, use the side of the brush to crease the top edge of the valley, by rubbing from the edge of the valley out to the edge of the foil. Once its done, pop it out, and trim the piece to the correct size. Start by cutting along the right hand side of the valley, extending out about a quarter inch. Cut across the bottom one inch, and then up the left side. Measure to 1.25 inches and cut across the top. Place the valley upside down on a smooth surface, and use the meat thermometer to smooth out the perimeter of the valley. Using your scissors, round all four corners. Just a couple tiny snips will do. Next, get your ruler. Hold the ruler with your right hand, as well as the right edge of the valley piece. Align the piece so that the edge of the ruler runs from the lower right corner of the valley piece to the valley itself at a 45 degree angle. Using your left thumb, bevel the bottom edge of the valley a few degrees, then turn the valley piece so that the right hand side of the valley is now on top of the ruler. Hold the piece there with your right thumb and push the valley piece back slightly to bevel that edge. Grab the flat area to the left of the valley between your thumb and forefinger and roll it slightly, as if you are pulling a bill off of a wad of cash.
Repeat 13 more times.
By the time your done, you'll be able to whip out a valley link in about five minutes, start to finish.
Step 7: Drill and Edge Roll.


Find the smallest drill bit you can for your rotary tool, and use it to drill a hole in the top left and right corners of a valley blank. Flip the piece upside-down on a piece of scrap wood first. Once you finish one, take one of your jump rings and make sure it will fit into the opening. If not either enlarge the hole, or use thinner wire. If you are using the Walmart jump ring package ( $2.00 in the craft section) the largest size ring is perfect.
Once you have your holes made, wrap your edge. Fold a quarter inch of the top of the square over the edge of your ruler, so its nice and straight. Then roll the folded edge around the meat thermometer. Repeat for each square.
Step 8: Link Them Together.


Since you have hand made your valley pieces, some of them will be bigger than others. So, decide the order in which to link them so that the difference in size gradually happens from the center to the edges (from the front to back) making it far less noticeable. place the largest in the middle, and work left and right at the same time. then link them together in order using your jump rings.
Remember to open your rings by twisting them left and right, not by pulling the ends away from each other. As each link is joined close it up with your pliers.
Step 9: The Last Link Dies.


Well, sort of..
If you refer to the photos of Planetary Valleys, you'll notice that the back link is cut straight through the valley, and a clasp is added.
Using your rotary tool with a cutting disc, do the same. Cut it straight through. Again, wear eye protection, in case sparks or fragments fly, and wear protective gloves as the link you are cutting will get hot. Make sure the cut edges are smooth, and that you can put the link back together again.
Switching back to your drill bit, drill an opening on the wider valley half for the clasp to fit through from the back. Turn it so that the clasp opening faces the narrower half, and drill the second hole where it needs to be to close. Turn the necklace over, and then drop some hot glue on the ring where the clasp would normally connect to a chain.
Make sure your necklace closes properly.
Step 10: Wax On, Wax Off.


Apply spray wax to the front of the links as directed, and use a buffing/polishing wheel on your rotary tool to shine it up ! Work it into all the crevices, and try to be careful to not deform your work along the way. You may need to put a couple of wax layers on.
Once you finish, check for any unintentional bends in your links and correct them.
And that's about it !
Step 11: Notes, Gallery of Fail, and Final Thoughts.

Now that I've hacked my way though the necklace, a few observations.
- The necklace as described is just about sixteen inches long. If its too short, add extra squares in pairs until it works for you.
- Other metals such as nickel look more 'silver' than aluminium. If you are confident in your work, there is no reason to not use another more expensive metal. Or go SteamPunk and do it in brass. Don't be afraid to improvise.
- You could also try a thicker metal, but it will be harder to work.
- This costume jewelry necklace weighs about 10% of what the original does. I would imagine that would be a plus.
Also pictured is this project's Gallery of Fail - You can see the evolution of the design of the valley pieces from the first to the tenth version. Success came at Version 11.
*The Gallery of Fail reminds me of Ripley 1 through 7 from the movie Alien Resurrection. These pieces need to be killed with fire. :)
Anyway - I feel I've learned quite a bit about making a Jewelry piece, and I will probably make something else in the future. I have a bunch of 30 Gauge aluminium left ;) -It's pretty fun, just remember to take your time, and be safe.
Thanks to my wife, who I managed to convince to model the necklace for me on the cover photo.
Finally, I want to thank Kay Dee Collection and Costumes who gave me permission to use their research photos of the original Planetary Valleys necklace for this project. The source material is located at :
http://kay-dee.net/costumes/leia_cermonial/necklace/index.htm#photos
Enjoy !

First Prize in the
Jewelry Contest

Participated in the
Craft Contest

Participated in the
Epilog Challenge V


