

Introduction: First Person View RC Car


More by the author:


About: We're a pre-engineering academy in Tustin High School, a public high school in Orange County, CA
In this tutorial you will learn how to modify an RC Car to enhance the experience of driving it. You will build a cockpit, housing controller, using VR camera and goggles, and modifying RC car and controller. Simulate the real-life feeling of being the driver of your own race car by just sitting down.
Step 1: Components

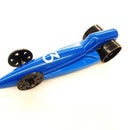
- Redcat racing RC car
- Fatshark VR goggles with camera
- Redcat racing controller
- Steering wheel
- Seat
- MDF plywood
- 20k ohm potentiometers (2)
- Metal pole
- Fischertechnik gears
- Screws
- Electrical wire
- Housing for the controller
- Batteries
Step 2: Tools


- Measuring Tape
- Vernier Caliper
- Battery Charger
- Soldering Iron
- Multimeter
- Laptop
- Solidworks
- Power Drill
- Plyers
- Filers
- Sharpie or some kind of marking tool
- Center punch
- Saw
- Wire cutters
- Tape
- 3-D printer
Step 3: Cockpit


- Obtain the piece of wood and mark the wood according to the cuts needed. (the size of the wood is relative to the size of the wood is relative to the size cockpit the use is constructing)
- Use measuring tape to measure how long the wood should be cut
- Cut the side panels of the board
- Cut the front and back boards of the cockpit
- Cut the flooring for the cockpit
- Cut boards to attach to the bottom of the floor
- Cut the platform board and the support platform boards
- Use a power drill with the relative drill bit size
- Use 3/4" screws to bolt into the wood
Step 4: Housing Controller


- Measure the dimensions of the individual parts
- 3-D modeled the controller mechanism to hold the controller and batteries
- Modeled the steering mechanism that would translate to the potentiometer
- Modeled the lower bottom of the box and the roof of the box
- 3-D print the parts
- Polish the parts to make it smooth
- Attach the hinges onto the housing
Step 5: VR Camera and Goggles


- Charge batteries of camera and goggles
- Turn on the camera
- Turn on goggles
- Find the correct signal that connects the camera to the goggles
Step 6: RC Car and Controller

- Charge batteries of RC car and controller
- Take out the controlling components of the controller
- Separate the accelerating and steering potentiometers
- Unsolder the wires of the original potentiometers
- Switch the original potentiometers with 25k ohm potentiometers
- Resolder the electrical wires to the new potentiometers
- Reattach the two potentiometers to its respective translating mechanisms (1 for the steering wheel and 1 for the accelerating trigger)
- Attach the steering wheel to pole and attach respective mechanisms to the pole
Step 7: Camera Mount


We made a Camera mount using a 3D modeling program called SolidWorks. This camera mount was designed to be able to incorporate the camera, transmitter, and the arduino nano board.
Step 8: The Process


- Attach the housing component on the platform
- Turn on RC car
- Get inside the cockpit
- Turn on VR camera
- Turn on controller
- Put on VR goggles
- Have fun!

Runner Up in the
Make it Move Contest


