

Introduction: Fix That Exhaust Leak; Make NEW Exhaust Gaskets at TechShop!


Finding Land Rover parts *can* be an enjoyable experience...in an alternate universe; in this one, its a PITA...so, lets just make them ourselves.
I have made aluminum and copper exhaust gaskets with very effective results in the past. Back then it was a pretty manual process (i.e. Time Consuming); but, I was broke, so it worked. Now, I have TechShop Menlo Park...this steps up my game.
These gaskets are called "exhaust flange gaskets" and they seal the primary pipe to the exhaust manifold on a Land Rover Discovery 1 (1989-1998). I bet your car or truck has something similar to them.
Lets get started!
Step 1: Tools & Materials


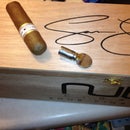
This is a really simple process; all you need are the following:
Metal Bandsaw
Rotary Punch (Rotex)
Flat File
Round File
Scribe (anything narrow and sharp will work, like a nail)
The old gasket (or whats left of it)
Metal (aluminum or copper of the appropriate size)
Step 2: Scribe

SCRIBE:
Lay your old gasket on top of the new material (I use untempered, pure aluminum when possible).
Pressing firmly on your old gasket, scribe an outline of it onto the material.
Step 3: Punch (POW!)

PUNCH:
Using the rotary punch, select the appropriate sized punch dies for your application (don't forget to match the top and bottom!), punch out the holes.
Note:If you need to punch a hole larger than the die set on the rotary punch, you can use the largest punch to remove the material until the desired size is obtained (I needed to make the holes slightly larger than one die but smaller than the next, so it took a few extra operations for me).
Step 4: CUT!


CUT:
Using the bandsaw, cut your outline... do not try to follow the path exactly (its metal, not foam :-), instead, make multiple slices to obtain cut pathways that will deliver your desired outline.
Step 5: FILE


FILE:
Clean the edges with a file; I recommend a half-round or a rats-tail file for the inner curved parts.
You may need to use a hammer to flatten the material a bit, depending upon the shape and type of material you are working with.
There you have it! :-)


