

Introduction: Fixing Skateboard Delamination


The dreaded skateboard delamination (delam for short).
Any skateboarder - parent of a skateboarder - or board builder, knows all about the joys of delamination.
Delam is when the layers of veneer that make up a decks construction, start to come apart from each other and form a gap, or crack, along the edge of the board. This can be caused by exposure to water, repeated motions that cause stress on certain areas of a board's construction, or by a poor quality glue line from the manufacturer. Whatever is causing your delam to happen, there is almost always a way to fix it!
**if you are experiencing delamination in between layers of a brand new board, contact the manufacturer. Often times they will help replace the board or issue a refund. If you rode your brand new board in a rain storm... don't expect to get hooked up!
Tools:
Clamps ( a variety of clamps will work for this procedure)
Flat Head Screwdriver
Utility Knife
Paint Brush (if using a brush on protective coating)
Materials:
Waterproof Glue
Rough (60-100 grit) Sandpaper
Outdoor Protective Coating (brush on/spray)
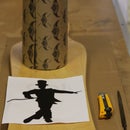
Step 1: Find & Open Delam Layers


On this particular board there are a few different areas of delamination. We are going to simultaneously show each step of the process on both the tail and side of the board.
So the first step is to find the areas of delamination and further open them up with a sharp utility knife. To do this, simply run the knife in between the layers a few times. This will expose the entire gap that is going to be filled and re-clamped with glue. It may seem like you are making the problem worse, but a clean gap will help the glue reach all of the affected areas.
Step 2: Re-Glue Layers


Now that you have exposed the problem areas you can start to fill them with glue before clamping.
Wedge the tip of a flat head screwdriver into the delamed layers. Once the tip is in between the layers, you can also rotate it slightly to further open the gap and allow more glue to run in between the layers.
Pour and rub glue into the open gap. Depending how deep the delamination goes, you can let the glue drip down into the gap while it is pried open. You can also blow on it a bit or push it down with a thin piece of material (wood, paper,etc) to help speed up the process.
Once the glue has sufficiently filled the opening, you can squeeze the surrounding layers with your hands to help further spread the glue in the board. Any excess glue will come out during the clamping process, so do not worry about using too much.
Step 3: Clamp the Veneers


Now that you have glue in between the veneer layers, you can start to clamp up the deck and apply pressure to the affected areas.
You can use almost any kind of clamping system to bring the layers back tight to each other. Even if the delamination is on an area of the board that is bent, because the veneers have already been bent into shape during the pressing process, they should easily press back into the existing shape.
For the long, straight area on the tail of the skateboard we are going to use some wood blocks to help evenly clamp along the full length of the delam.
For the delam at the base of the kick tail, we are going to use just one quick grip clamp strategically placed at the base of the bend.
We have also shown an example of how to use the basic spring clamps and/or metal document clips to help squeeze together layers of veneer along a straight edge of the board.
Once you have the the board sufficiently glued and clamped, you can leave it to dry for a minimum of 2 hours. If you are trying to clamp an area of wood that is bent, we would suggest letting it dry for up to 8 hours to help the glue fully set while under pressure.
Step 4: Sand & Refinish


Once the glue has fully cured, you can remove the clamps and inspect the veneers. If you notice any gaps in the delaminated area, or the layers start to re-seperate when you remove the clamps, you can redo the first steps to try and get a better seal.
If it all looks good, you can start to prep the veneers for a new protective coating that will help prevent future delam. To do this, sand back any excess glue that has dried on the outside edge of your board. This can be done with a hand sanding block or any powered sanding device. You want to sand the edge back to a nice smooth finish so it will accept the protective coating evenly.
*We think this is a step that is very important and commonly overlooked when people try to fix delam in their boards. If you don't reseal the previously damaged area of your board, it will more susceptible to future water damage.
Once the area has been sanded and cleaned of any glue or dirt, you can apply your protective coating to the exposed edge of your skateboard. You can use any finish as long as it is rated for outdoor use and has waterproof properties. Follow the directions on the can and after a few coats it should be good to go!


