

Introduction: Floating Axe Shelf


In this Instructable I will show you how to create a floating shelf using Carpenter's axes as support. This is an awesome project if you are just getting into woodworking, or have limited tools, and the materials are very inexpensive as well. I had bought the carpenter's axes for a dollar each at a garage sale over the summer, the board was reclaimed from when we resided our barn, and the only thing I had to buy was the angle iron. It was an incredibly inexpensive project to make as far as materials go, and I wanted to make this a project that nearly anyone should be able to do, so decided to use all hand tools except for a drill. This was the first time I had ever made and installed a shelf and I am absolutely thrilled with the outcome! I love the look of the reclaimed boards and axes, and this is the first step in me overhauling my room into a modern rustic design!
Materials:
2 carpenter's axes
Wooden boards (for shelf)
Angle Iron (3/4 in. x 1/8 in. x 48 in.)
Hardware (include details)
Tools:
Power drill
Hand saw
Chisel
Hand plane
Hacksaw with Metal cutting blades
*Additional power tools may help to speed up this process, however they really aren't necessary.
Step 1: Cleaning and Preparing the Hatchets


The axes were both quite rusty when I bought them over the summer, so I wanted to clean them up before I integrated them into my shelf. I wanted to keep with the theme of no power tools so they were sanded entirely by hand with sandpaper and sanding sponges. I removed all of the surface rust, but I left some oxidation in the pitting because I really liked the effect it gave. The rust left in the pitting shows the age if the axes, and with the rest of the surface all shined up they look really great. This step took me around 3+ hours to sand both axes, and this can alternately be done with a wire wheel on a bench grinder, with an orbital sander, or with a belt sander, but the effect the hand sanding gave compared to a wire wheel looks fantastic in my opinion.
After they were all cleaned up I coated the axe heads in B'laster Heavy-Duty Corrosion Stop, to prevent any more rusting, but you can also use any other oil such as WD40 or even Ballistol (which is a high end oil commonly used to protect exposed metal on guns).
Step 2: Cutting the Boards to Size


The boards for the shelving are made from reclaimed wood from our barn, which I believe to be cedar. I wanted the shelf to be 24 inches long, so I cut the board into 2-foot lengths. Depending on your axe handles, one of your boards may have to be a fraction of an inch bigger to account for any potential tapering. I also needed the top shelf to be much shorter in width than the bottom shelf, so that I could maintain the look that the axes are holding it into the wall. Again, I used all hand tools, so the boards were cut to length by a handsaw, and then I used a chisel and a hand plane to bring the boards to the proper width. The boards still had some paint on the back for when it was part of our barn, so I also used the hand plane to clean up the underside. The dimensions of your shelves rely heavily on the type and size of the hatchets you have, so most likely you will need to come up with your own unique measurements.
Step 3: Making the Brackets
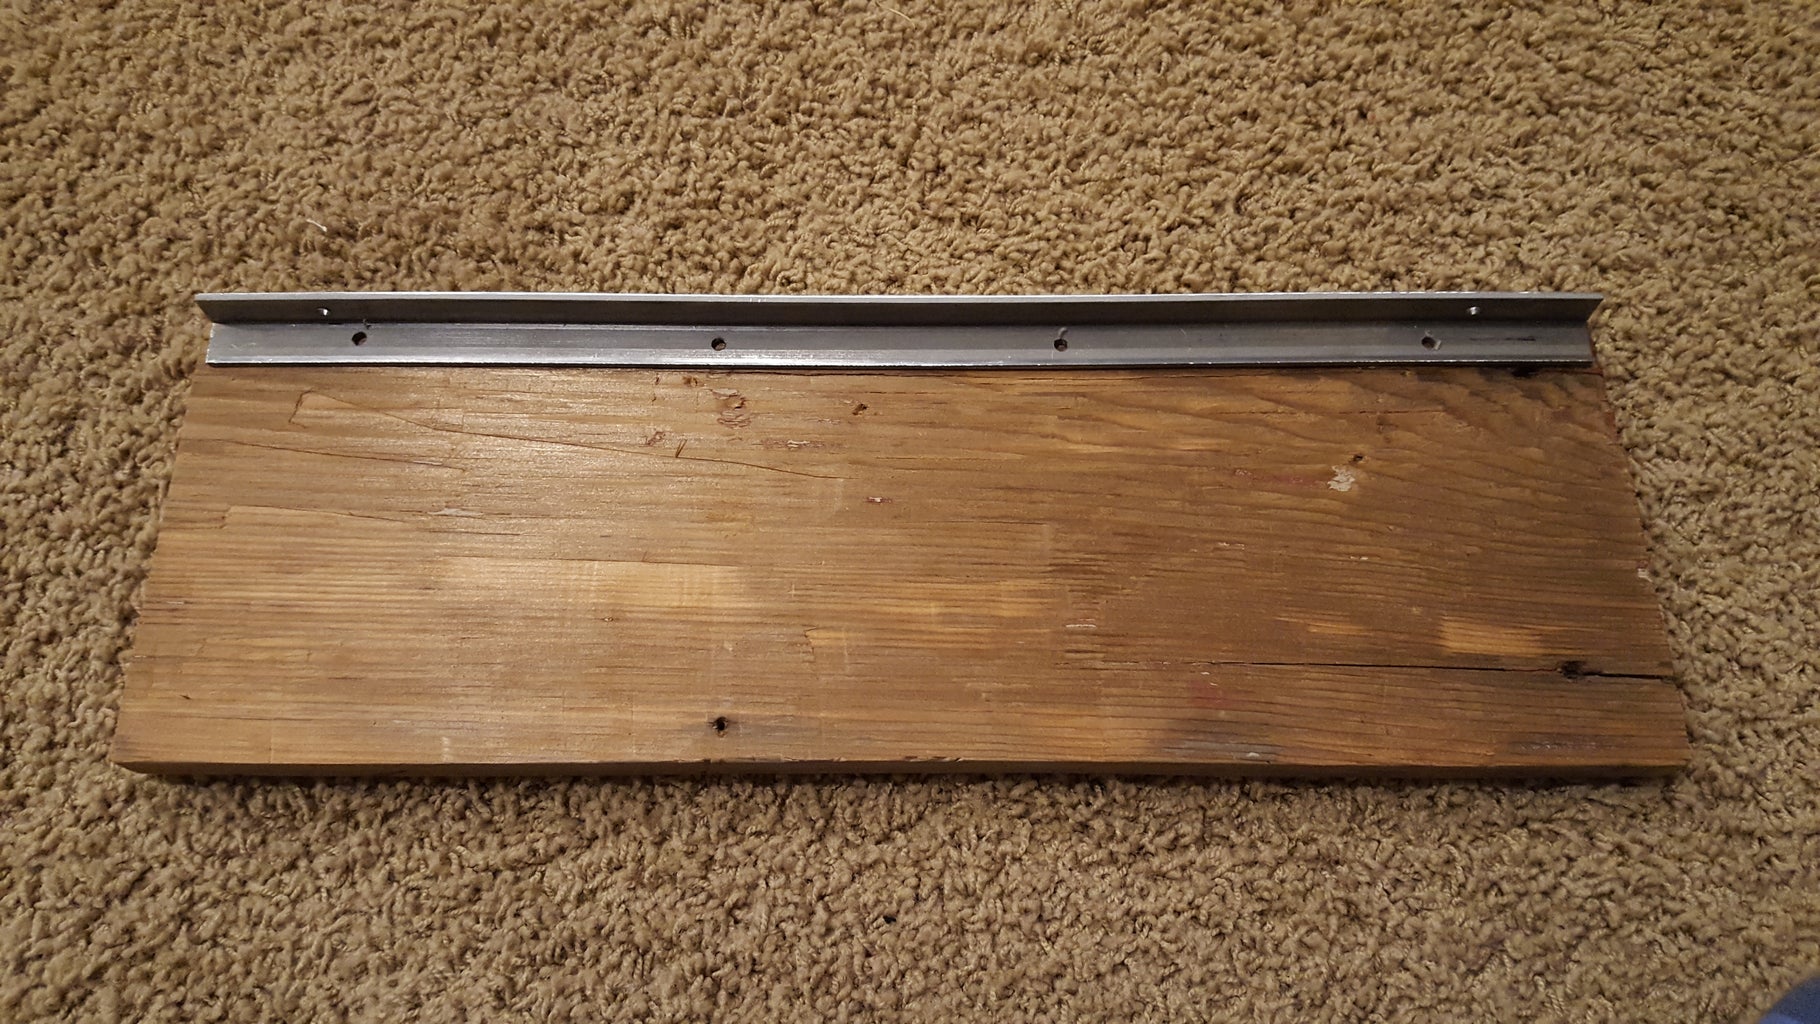

I wanted to make the shelves appear as floating in order to really sell the effect that they are being held into the wall by the axes, so I used angle iron to make some custom brackets. I used 3/4 in. x 1/8 in. x 48 in. Plain Steel Angle from Home Depot (although any angle iron should work). I cut it to length using a hacksaw with a metal blade just shorter than the length of the shelves. I used the only power tool of this project in this step to drill holes into each side of the bracket.
To mount the bracket to the wall I drilled two holes 16” apart to match the distance of the studs in my wall, and on the other side I drilled 4 holes 5" apart to fasten the bracket onto the floating shelves.
Step 4: Installing the Shelf


To install the shelf I first laid out where I wanted it to be, then made sure it was level and pre drilled holes into the studs in my wall. I then mounted the bracket to the shelf using #8 x 3/4 in. Wafer Head Phillips screws, then fastened the bracket and shelf to the wall using #10 x 2 in Flat Head Phillips wood screws. Make sure that the screws for the shelves are short enough that they won't poke out the top surface.
This step is also highly dependent on the size of your axes and dimensions of your shelves, so there isn’t all that much to be said about it. Just note that sheetrock is not strong enough to hold up your shelf so you will definitely want to mount it to a stud, and if you are trying to install it into a plaster or concrete wall there are special hardware anchors designed just for this type of application.
Step 5: Attaching the Hatchets


The first step for attaching the hatchets onto the shelf was determining where I wanted them to be, then marking the location and pre drilling a hole through the handle of both hatchets. You will not be able to drive a nail through the handles without drilling a hole first because they are made from incredibly hard straight grain American hickory. I then lined up the axe to the shelf and drove a nail through the handle and the shelf. I did this for both axes and for both levels of shelving, and it turned out great! I was attempting to use limited hand tools to complete this so I just used a hammer and nails, but alternatively you could use a brad-nailer or something like a Passlode to attach the hatchets to the shelves, but just be cautious with trying to drive a nail through the hard handles.
Step 6: Final Thoughts


I am thrilled with the way this project turned out, and I am really happy with it for being my first shelf. This is a great beginner project for anyone looking to get into woodworking or wanting to build their first shelf, because it requires very limited tools, and very inexpensive or all reclaimed materials. The only power tool really necessary is a drill, so nearly anyone should be able to do it regardless of how many tools you have available to you.
I encourage you to look at what you already have and try to turn those items into something creative and useful. I want to try to prove that up cycling can look beautiful, and can yield a product better than you may be able to buy (not to mention well within your price range as well)! Again, I really want to reiterate that this project can be done entirely with some simple hand tools, and that just because you may not have the right tools, please don’t think that a project is impossible to do or out of your skill range. Personally this was the first time I have ever made a shelf, but I learned quickly and I think the final product came out wonderful!
If you like this, please vote for me in the contests this is submitted into, and also check out my other Instructables!
Thank you!
Brandon (16)

Participated in the
Shelving Contest 2016

Participated in the
Epilog Contest 8

Participated in the
Trash to Treasure Contest 2017


