

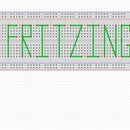
Introduction: Fritzing: a Coding Story


For those of you who don't know what Fritzing is, it is a program that lets you design circuits digitally. It is very useful when starting a new project because you can plan out what your circuit will look like before you make it. All the components in the program are to scale so the size of the circuit you make will be that size in real life.
There's a lot of cool options for this program. You can edit and make your own parts if you wanna take the time to do so. You can program certain boards such as arduino boards. You can also create and print your own PCB for yo to use.
Focusing on the creating your own digital boards there are some handy tricks that can come in handy when doing so. One of the handiest tricks I've learned is the ability to edit the code of a board. There are a lot bonuses to being able to edit the boards code. Let's go take a look at what we can do.
Step 1: Starting Out


First we will need a test subject to edit code with. To start lets first edit a part. Upload all the SVG images needed for your part and then be sure to save your part. Export your part to a folder of your choosing. Once that is all done go to your folder and then rename the file. Change the .fzpz file format to .zip format.
Now go inside and you'll see 4 different files. three are .svg files and one is .fzp file. Copy the the .fzp file and put it some where else. This is the code file we will be editing.
Download and Install Notepad++. We will be using this to edit the code. The code for these projects are in the XML language. This language is simple to understand so it won't be too difficult to edit.
Note: Don't delete the zip file and then put everything else in a new folder. If you do it wont work properly and the program will reject this board. just move the files you need to edit from the zip folder and then back into the same zip folder when you're done and convert it back.
Step 2: Sections of Code


First thing you'll want to do is change the code language. Go to the drop down window of language and select XML. In the part code there are a couple different parts. The beginning of the code lists the title and label and the tags of the part you are editing. You can change these how ever you want to fit the part you are making. The same thing goes for the properties section. This section contains all the minor details about the board that aren't fully necessary for you to fill out. This section is helpful to other people who are using the board you make.
The views section has the file names of the .SVG files in the zip file you were in. You don't want to change these names unless you have changed the names of the files themselves.
The connector section contains all the pins you have created. this section also has the name of the pin as it relates to the .svg image of your board. When you edit a part in the Fritzing program it has a special way of connecting the code to the image file. Instead of change the svgId name in the code it will change the name of the graphic in the svg image. It will change the name to "connector#pin" where # is the number of the connector. We can manipulate this later.
The final section is the buses. The buses create the internal connection of the board. I noticed when I was making a board that the Fritzing program can't handle creating a lot of internal connections otherwise it will slow down a lot. We can use this to by pass that process.
Step 3: Connectors


If you want to manually add it will become easier this way. you can just copy a connector and just change the numbers of that section to the next number in the sequence. This is very good if you have to add a lot of pins. I had to create a board that was over 1000 pins. When in the Fritzing program it can only add 999 pins at a time. The cool thing about editing the code is that you can bypass this and create as many connectors as you need.
With-in the connector you can do some cool things. If you create a schematic view that reduces the amount of pins that are essentially the same you can't select multiple pins to be the same image in the program. If you go into the code though you can. Just find find the connectors you want to have the same graphic and change the svgId of the connectors to the same "connector#pin" in the schematic view.
Note: if you want want to copy a large section of connectors and change them fairly quickly you can. The way I did so was I copied the 100-199 connectors then did a cntrl+F which will allow you to find certain sections. I then went to replace and highlighted the section I wanted to change and searched for "10" and replaced it with "20". This will take the 100-109 connectors and change them to 200-209. I did this for the whole section increasing by one until I was done. You'll have to be careful. Make sure you have the "in section" box checked otherwise it will find what you're looking for in the entire document and change all of them.
Step 4: SVG Image Editing


When you're making your SVG image for your board you can make the process faster by changing the name of each graphic as you make it. The graphics you know that will be the connectors you can change the title of the graphic to "connector#pin". So when you upload the svg image to your board it will automatically set the connector to that image with out you having to select a graphic.
You can also go back and edit the svg images in the zip file you made. Just do the same by clicking on the image you want to change and rename it. I used Inkscape for this part. If you go to the Object drop down tab and click object properties which will allow you to change the ID of the object you've selected.
Step 5: Buses


The buses of the xml file are used to create the internal connections of the board. If you wanted to make all the boards GND connectors relate to each other you can set the internal connections of each pin to connect to each other. If you have a large amount of connectors you want to set it may be best to do so through the code. To do so all you have to do is create a <bus id="bus 1"> section and put the names of all the connectors you want in there in the correct format. <nodeMember connectorId="connector1"/> just like that. do this for each of the connectors and then save your document.
Note: You can do the same technique for the connectors. Use the cntrl+F to find the numbers you want to edit and then replace them with new ones. Just be careful note to change all the numbers in your code.
Step 6: Final Steps


Once you've made all the edits necessary save your code. Go back to your file location and cop the file and paste it back into the zip file. replace the previous code with the edited version. Then go back and rename the file from.zip to .fzpz. Open the Fritzing program and import the file again. If there are no errors in the code it will load and you can open your board. Check to see if all the pins are connected correctly. Hopefully everything worked great and all the buses are together as they should be. You may need to go back re-edit the code to get it working properly. You will have to close Fritzing every time you want to re-upload the board. make sure to not save the bin the part you made were added to other wise you will have to rename your part before you can upload it again.
Step 7: In Conclusion
I hope this makes sense and can be understood well enough. If you have any questions at all please feel free to ask. If you have any idea of how to improve this Intructable let me know! I'm also looking for other ways you can edit parts. So if you have any more please tell me so I can try them. If I like them I may add it to this Instructable. Thanks for reading! Good luck on your part editing!


