

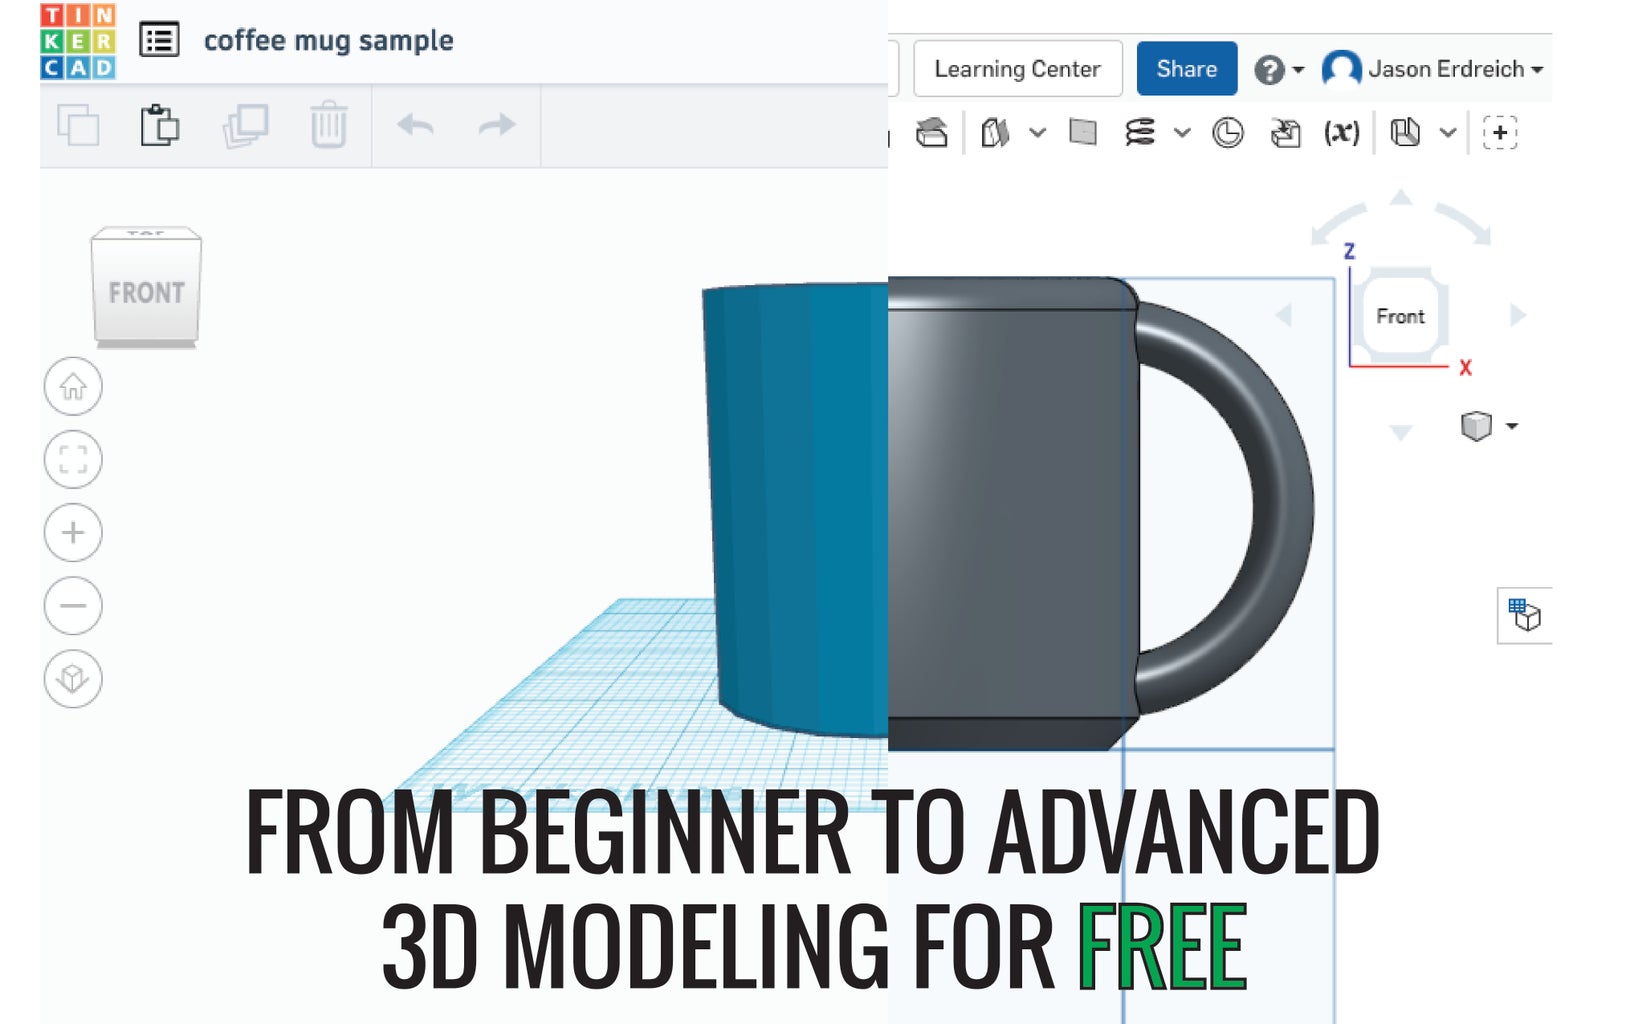
Introduction: From Beginner to Advanced 3D Modeling for Free


Are you looking to design a 3D model on a computer? Are you planning on producing your model using a CNC machine like a 3D printer, laser engraver, or mill? Are you a beginner looking to get started? Are you an intermediate user looking to expand? Well if any of the previous is true then Instructable may be for you.
I am a passionate hobbyist who has a degree in k-12 technology and engineering education. I teach many different courses, some of which have to do with design, technical drawing, and rapid prototyping. After teaching 3D modeling to students ranging from 2nd grade through college I have come to realize that there are countless programs out there to use and even more tutorials on how to use them.
In my classroom, I mainly use two for 3D modeling and I will be highlighting them in this Instructable. I have also created my own tutorial video library that is streamlined, age appropriate, and most importantly short and sweet. My videos range from 30 seconds to 2 minutes are are designed to teach you a specific task. This is so you do not need to watch a 20 minute video (or read a 30 step article) to complete one thing that you are trying to do. Watch all of my videos (over 30) and you will master these programs.
Best of all, the software I am highlighting is completely free and compatible on windows, mac, linux, chrome books, and just about anything else you want to use.
Step 1: Step 1: Choosing the Right Software


There are loads of different programs out there that can be used to create a 3D model. Some good, some less good, mostly just based on personal preference. Software that is used to design things are typically referred to as Computer Aided Design software or CAD for short. For 3D modeling there are really two types of CAD programs; Solid modeling or Surface Modeling.
Solid modeling programs are based on dimensions, shapes, fills, and objects. They are typically used for creating parts that can be produced on a 3D printer, CNC mill, or other machine. Solid modeling programs typically have you start from a basic geometric shape or 2-dimensional sketch in order to create your part. By combining sketches and shapes you can create just about anything. Some popular examples are Tinkercad, Autodesk Inventor, AutoCAD, Solid Works, PTC Creo, and OnShape.
Surface modeling programs are based on meshes and nodes or points and lines that make shells of 3D objects. Surface modeling programs typically focus on visual appearance and are often used to create renderings or animations. These programs typically differ from typical CAD because the tools within the software often reflect hand tools an artist would use to create a sculpture. Popular examples are Meshmixer, SketchUp, Blender, Sculptris, 3DS Max, and Maya.
There are also some programs that are hybrids of the two, Tinkercad borders this line and Autodesk Fusion 360 is the most popular example. While surface programs are primarily used for onscreen applications, almost any CAD software will let you export your designs for machining production. Be warned that models exported from surface programs are usually larger and more complex files by nature. This may lead to issues in production on a 3D printer down the road.
Step 2: Step 2: Free CAD for Beginners of All Ages
The concept of learning 3D modeling can often be challenging. Learning how to create a 3D object on a 2D computer screen requires spatial reasoning skills in combination with hand-eye coordination that take some adjustments to get used to. Regardless of age, I recommend all first-time users to try Tinkercad by Autodesk.
Tinkercad is completely free to use and allows you to log in using Autodesk, Google, Facebook, Yahoo, or Microsoft. It is also web-based and compatible with Mac, Windows, and Chromebooks. Unlike other solid modeling CAD solutions, Tinkercad has you create 3D objects out of geometric shapes that are pre-made which is both good and bad. This is good because its simple and fun. In many ways it reflects playing with lego bricks or play-doh, something that is usually intuitive to all ages. it is also bad because it does not prepare you to move onto more complex solutions down the road when Tinkercad no longer meets your needs.
To get started with Tinkercad, I recommend you play around with the basic shapes. Look around your home, try to make an abstract version of something around you (coffee mug, table, chair, etc). Once you have the basics with moving objects around, changing the size of things, and lifting things into the air, start playing with making objects of actual proportions by using the ruler tool. Try to create a pencil holder thats realistic in size, or a phone stand. I've attached my current collection of Tinkercad tutorial videos to this Instructable, as well as longer videos that show sample projects from start to finish rather than short videos that show how to complete one specific task.
As I mentioned earlier, Tinkercad may at some point be limiting for you. It is excellent to get started, great to make simple models, but typically challenging to make larger or more complex things. Don't get me wrong, people out there make some incredible models in Tinkercad (browse the Tinkercad gallery and prepare to be amazed) and you can even make your own shapes using the shape generator or upload vector files. But if you're trying to make parts that need to be specific dimensions or fit together in an assembly, Tinkercad is probably not the most effective software solution.
Step 3: Tinkercad Tutorial Videos
Step 4: Step 3: Intermediate to Advanced CAD for Free

As I mentioned earlier, there are countless CAD solutions out there. I would consider Inventor, Fusion 360, Solid Works, CREO, and Onshape all to be in the intermediate to advanced range. Many of these are free, most are free for educators and students. After using all of them as a hobbyist and even more importantly after teaching most of them to students ranging from 11 and older, I find myself preferring Onshape above the rest.
I was trained on Inventor, Solidworks, Creo, and even Pro-Engineer to really date myself back when I was in high school and college. This was before more modern programs existed like Fusion 360, Onshape, or even Tinkercad. I prefer Onshape for a few reasons, here's why:
- Completely Free. Actually free. For anyone, anytime, anywhere. Yes there are premium account options but they are really not needed to be successful with the program. The premium features are also available to teachers and students for free.
- Web based. Don't get me wrong, I truly hope Onshape develops an offline version of their software for convenience. However, I am forced to teach students using nothing but chromebooks and it is incredibly convenient that this powerful of a CAD solution is compatible on all devices (tablets too!)
- Collaboration. Have you ever used google docs? More than one user can be signed into a single document and editing it simultaneously, its fantastically productive. You can do that exact thing in Onshape. Onshape takes sharing your models to a whole new level, allowing multiple users to be working simultaneously which is excellent for collaboration, assistance, or group work.
- Versatility. Onshape can create solid models, surface models, technical drawings, assemblies, animations, and renders.
- Capability. I have yet to find a model that could not be created in Onshape. In my classroom, we use Onshape for 3D printing, laser cutting, and CNC milling applications.
- Simplicity. Onshape is not nearly as user friendly as Tinkercad, but as far as full CAD programs go I believe its one of the easiest to get used to. It reminds me of Solidworks, the industry standard, but its more focused on creating a sketch or a model. It makes navigating simpler than Fusion 360 and its faster than Inventor.
- Free. Did I mention that all of this is free? And works on chromebooks.
To get yourself started, make a free account and then make a new document. Onshape works in a very repetitive way as do most CAD solutions. When you first open a new document, the toolbar will have 3D modeling tools and there will be work planes in the middle of the doc. These plans are like a canvas for a painter. You can't paint in mid air, you paint onto a canvas. It doesn't really matter which you pick to work on, it only determines the view point of your object. Typically start with the top view. After clicking on the top view (highlights in yellow), press the sketch button, your toolbar will change to 2D drawing tools allowing you to sketch a shape. This is the big difference between Tinkercad and Onshape. In Tinkercad, you start with geometric shapes that are already 3D. In Onshape you draw a 2D shape of whatever you want, then make it a 3D model.
After drawing a basic shape, press the green check to confirm your sketch. Then select a 3D modeling tool from the toolbar (start with the extrude tool) and click on your shape. TADA, you made a 3D model using an advanced CAD program. Don't get me wrong, Onshape is complex as are all full-bodied CAD solutions, but you can use it to design just about anything.
My students typically have a hard time transitioning from Tinkercad to Onshape regardless of age. I have made an extensive video library of short tutorials on how to complete specific tasks in Onshape which I have uploaded to this Instructable.
Step 5:
Step 6: Next Steps
For whatever it is that you are trying to create, practice makes perfect. No tutorial or video will show you every step needed to make something that is one of a kind. Nor will they show you every troubleshooting technique for when something doesn't work. I hope my videos will come in handy to you as you venture into the world of 3D modeling. Check my Instructable and my youtube channel for regular updates and new project videos. I will admit I have not been active recently but Its my ambition to get back in the game and create new videos and guides. I also hope to add hands on videos with projects and machinery as well.
If you are looking to create a model and do not have a 3D printer, look for a local maker space or public library that may have one. There are also web printing services like Shapeways or Ponoko that print models for reasonable prices.

Participated in the
Pro Tips Challenge


