Introduction: From Firewood to Wood Blanks
Here's a little secret: Milling your own lumber is easy. Ridiculously easy. This method works best for small pieces of lumber like firewood and can be easily adapted to a variety of workshop tools. I happened to use a mitersaw, sawzall, hammer and wedge. Honestly, you could do it with the hammer, wedge and a chisel or plane. Seriously, go as simple or as high tech as you'd like, the choice is up to you.
A word of caution:
Like all the best things in life, woodworking carries a certain amount of risk. Make sure you know how to use your equipment, wear the proper safety gear, and focus on what you're doing. If you're not sure about something, stop and ask someone who knows what they're doing.
Working with round logs carries an extra risk. When the blade begins cutting, the wood may shift suddenly and violently. You'll see in the photos, as the pieces got smaller I used a clamp and sacrificial board to hold the piece to be cut. This is a good idea, if the wood shifts into the blade while it's being cut, the worst case is I'm out a clamp, saw blade and a pair of underwear. These can be replaced. Your fingers are another story.
Step 1: Necessary Equipment
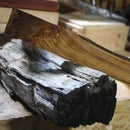
A log with a reasonable diameter. Look for logs with interesting external features like the one above. If it looks odd on the outside, there's a good chance the wood grain on the inside will be very interesting. I'm using a piece of maple left over from a cut down tree.
A sawzall with a long enough blade to cut through the widest point of the log
A sledge hammer
A wedge or two
All necessary safety equipment. Eye and ear protection is a must. The mad scientist look is an option
Step 2: Sizing Things Up
The first thing we need to do is to cut this log down to more manageable pieces. This is the drawback to this method, we're size limited on the final product. The biggest piece you could theoretically turn out is probably a 6 inch cube. This makes it ideal though for creating things like knife scales, pen blanks, duck call blanks and turning blanks.
Use the sawzall to roughly cut the log down to size, in my case I cut off the pieces around the large knot. Turn the log upright and cut a small channel into the end grain a little larger than whatever the final size you want. This is a starter channel for your wedge. You could use the sawzall for this step, but the wedge is faster. It's your call.
You can see in the photos, this piece of maple has begun to spalt. Spalting is any coloration in wood caused by fungus. In maple, it tends to show as black streaks. It leads to some gorgeous patterns and is somewhat desirable. The downside is that it's a fungus, which means it's best to not breath it in. I'd recommend a respirator from here on out.
A few quick strikes with the hammer and we're left with some rough pieces to be milled.
Step 3: Final Sized
For this step I used a mitersaw, but a tablesaw, bandsaw or again a plane or chisel will also work. The idea here is to start flattening the pieces and making them square to each other. The previous steps' work allows the piece to sit flat on the saw, making it much less dangerous to cut.
There's no secret to making something square. Pick one side, set it firmly against the saw's fence, secure it if needed and cut. Rotate the piece so the freshly cut side is against the fence and cut. Rinse and repeat until all four sides have been cut. Turn the piece so one of your fresh cut faces is facing down onto the saw bed and against the fence. Cut the two remaining sides.
It might take a few passes with the saw to get the piece how you'd like. You can see in the above photos that I've only completed one cut and it's still fairly rough. Pay attention as well to the grain to see how best to cut it. This takes some practice, but don't worry, it was just firewood to begin with!
Step 4: The Beauty Within
At this point, the wood will begin showing you everything about itself. The unique grain and variations in color come through. You no longer have a piece of firewood, you have a nascent piece of art ready for your next project. Whatever that may be.
Step 5:

Participated in the
Summer Fun Contest 2016

Participated in the
Wood Contest 2016


