

Introduction: From Garbage to Rideable: a BMX Tale


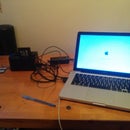


So I found this thing in the garbage
It looks alright, but it is rusty, beaten-up, and pieces are broken. It was found where it belonged...
Step 1: Inspection


Although I had done my inspection already and had already started on the revamp, I decided that I would make my first Instructable at the same time!
So what do we have: - Handle bar grips that are old worn, and don't fit nicely. - No brakes on the back or front. (I will realistically only be using the back breaks for the trail in the forest near my house where I want to use this new find.) - A worn seat that will do for then. (After having riden the bike for 2 hours and scratched up my left leg due to protruding plastic, the seat has to go too!) - One broken pedal, and another broken pedal. Both broken in different ways. -No tread on the tires, but they hold air so for now this is good. Let's get to fixing it!
Step 2: Removing the Handle Bar Grips


So to remove the old handle bar grips:
- Take a flat head screwdriver;
- Jam it in between the grip and the bar;
- Pry the grip from the bar a little;
- Pour in some dish soap;
- Play around with the screwdriver to let the soap go all over the place;
- Take the screwdriver out, and twist and pull the grips off. To put the new handle bar grips on:
- Put some soap inside the grip;
- Use your finger to spread it around inside;
- Prop it onto the handle bar.
IMPORTANT: if you are going to put on some brakes, you need to place the brake handle on beforehand. Otherwise you won't be able to unless you first take off the grip.
Step 3: Installing the Brakes


When I picked up the bike, I already knew I wouldn't want front brakes so the following installation was pretty easy.
- Brush off dirt from brake pegs;
- Place brake levers on brake pegs;
- Put brake handle/lever on handle bar (before putting the handle bar grips on... No I didn't make that mistake this time, but I have in the past.)
- *** Measure the brake cable casing length (Measure twice, cut thrice!);
- Place the brake cable casing on the bike in the appropriate holsters along the frame;
- Measure the brake cable length required;
- Tighten the brake cable and adjust its length to your preferred tightness.
*** Make sure you check the next step to see what needs to be done for this whole thing.
Step 4: Cutting the Brake Cable Casing to Size


A BMX is a very small bike. A small bike requires less brake cable length, and therefore less cable casing as well. This step will go through what needs to be done to cut the cable casing down to size.
You will need (First picture):
- A saw;
- A hole punching device or a philips screwdriver;
- A brake cable casing and brake cable.
The cable and the casing on the BMX that I put is black. The one in the picture is one I have for another bike, but you should understand the process regardless.
To get down to business you will first need to measure what length of casing you will need. I eyeballed it by putting one end in the brake lever and running the casing along the frame before moving the handlebar around in order to see if the cable was long enough when fully turned. You will also need to cut the cable itself off at the end that would go into the brake side of the mechanism in order for the cable to flow through the casing once cut down to size.
IMPORTANT: the cable itself needs to be longer than the casing seeing as it has to come out the other end and go through the brake mechanism.
This is when I cut the cable casing down to size with the saw.
IMPORTANT: When you cut the casing you will be applying pressure onto the casing and it will press down the walls a little bit and make the edges jagged. Both of which aren't good for the brake cable. (Third picture)
That is why you come in with your hole punch or philips screwdriver to widen the end and allow the brake cable to flow through freely (Fourth picture).
Now, the cable may have frayed a little bit when you cut your cable originally (Fifth picture), but not to worry. By twisting the cable against the direction in which the cable strands are pointing, the cable will go through the casing and come out the other side.
Last, but not least! When comes time to put the cable through the casing when you are about to install this all on the bike, and everything is in place, put some oil into the casing, by applying some directly to the cable before flowing it through the casing all the way to the other end. This will ensure that the cable will move around nicely and not get caught or pinched in a dry spot when you really need it that one time you are playing chicken with a tree!
Step 5: Here Is the Recycled Beast Now!

Right after finishing all of this, I took this beauty on a test run.
And boy, does it ever make every unhealthy bike noise ever!
The bearings all over need some TLC, some grease and some tightening, but that will come another day...
This instructable will probably be amended with some new steps for the details of what I did to the bike, but all in all this is the just of it.
This is my first instructable so I would love to know what else should be put into it!
I have some ideas that will come at a later date... Any suggestions, however, would be greatly appreciated!

Participated in the
Outside Contest


