

Introduction: GPS Car Tracker With SMS Notification and Thingspeak Data Upload, Arduino Based, Home Automation


I made this GPS tracker last year and since it works well I publish it now on Instructable. It is connected to the accessories plug in my trunk.
The GPS tracker uploads the car position, speed, direction and the measured temperature via a mobile data (GPRS) connection to a Thingspeak-channel. This data is read by my Openhab home automation to display this data. I use Thingspeak to get my data locally in my Openhab Home Automation via the MQTT broker of Thingspeak. Maybe there are other ways, please let me know in the comments
If you phone the tracker, it will send you a SMS with the location and status, containing a Google Maps link to the coordinates.
This project was inspired by some other projects, which I mention here and futher on.
I recently saw this Instructable of a car tracker which uses a similar approach for the SMS.
In the following steps I will show you the
- Principle and the code
- Hardware
- Assembly
- Home automation integration
- Furthe improvements
Supplies
Step 1: The Principle and the Code


In the attached flows the working principle of the GPS tracker is shown. The code is published on my Github page.
I will comment on some parts of the code.
Serial communication.
The Arduino communicates with both the GPS-receiver and the A6 module via a serial connection.
I found out that the serial communication between A6 module and the Arduino only was fully stable when I used the hardware serial of the Arduino pro mini. For the communication between the Arduino and the GPS receiver I used AltSoftSerial. Please note that the AltSoftSerial library uses predefined RX and TX pins.
During the devellopment I experimented with an Arduino Mega, which has 4 Hardware Serial connections, you can easily use one for debugging purposes.
AT commands
See this links for information about the very important AT commands: Electrodragon, M2Msupport.net, Andreas Spiess.
I you use another GSM/GPRS module, like a SIM800 or SIM900 you probably need other AT commands to setup a data connection and POST data to a site as Thingspeak.
SMS
The GSM module reads the phone number of the caller (AT+CLIP) and sends the SMS with the location (Google Maps link) and status to the caller.
Temperature
If the temperature in the GPS tracker is too high, it will send an alarm SMS.
Step 2: Hardware


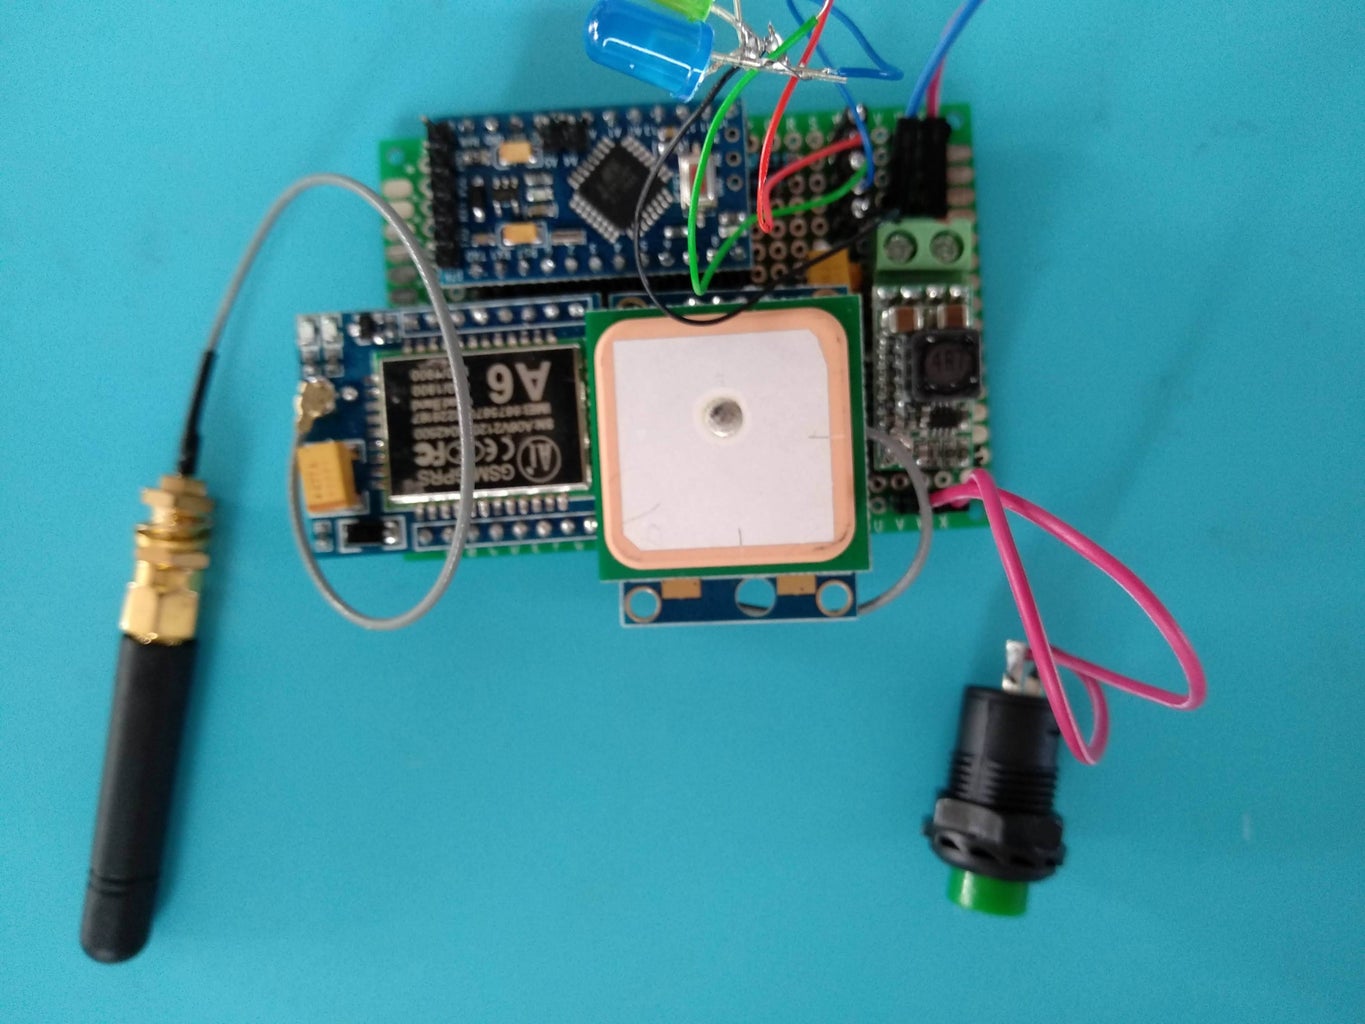

I connected all components via female headers to a perf board for easy debugging and repairing. See the pictures and the comments.
The buck converter gets 12V from the car and outputs 5V volt (via the on/off switch) for the Arduino Pro Mini, the A6 module and the GPS receiver (which I thought was only 3.3V tolerant, but 5V works fine).
The A6 module needs a sufficient power supply. When transmitting via the GSM network it gives some power spikes, therefor I added a 1000uF tantalum capacitor.
The temperature is measured via a 10K NTC thermistor.
Step 3: Assembly


After all is connected and tested, the components are mounted to the female headers and the switches and LEDs are glued in the enclosure.
Step 4: Home Automation Integration


Thingspeak
I use a free account on Thingspeak. Unfortunately, they did reduce the amount of channels for a free account, but it still works great and this project only needs one channel and several fields. For the uploading you need the Write API key, for the reading via MQTT, you need the Read API key. See this site for documentation on how to use the Thingspeak MQTT.
I read the data in Node Red. See the picture of the attached flow in which I join the lat and lon values to one string. I use a delay to get the lat and lon values in the correct order.
Step 5: Further Improvements

On the future I plan to:
- Connect the tracker to my battery, so the module is always on. However, I must garantee that it does not drain the battery to often.
- Maybe some geofencing in my home automation, so I get an alert if the car is out of the defined range.
- Check if the caller is known, to prevent sending SMS messages to unknown callers.
- If you have a nice idea, please let me know in the comments

Participated in the
Arduino Contest 2020


