

Introduction: GamePad Using Android Mobile Sensors and Arduino


Today, I will introduce to you how to use your Android mobile or tablet to play computer games using the sensors of the mobile and buttons.
Actually, I always dreamed to play some mobile games as Asphalt, using a much bigger screen than the mobile or tablet screen.
The idea of playing games using the motion of the body based on sensors of the mobile phone is awesome!!!. The project is so easy and doesn't require any experience android programming, it's only a 2 steps project.
Step 1: Components

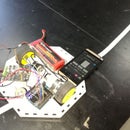
1- Arduino Leonardo (25$)
(or any Arduino support the keyboard library on Arduino IDE).
2- 1Sheeld (60$)
3- Android Smart Phone/ Tablet.
(Note: These images taken from 1Sheeld website)
Step 2: Android Application

Basically, All you have to do here is to download 1Sheeld application from play store. This Application gets rid of a hell of a headache for developing the Android Application.
Step 3: Arduino Sketch

Back to our project, all we need from the mobile phone is its rotation to change direction and pressing one of 2 buttons to check whether forward or backward. To get the orientation of the mobile you can use either the gyro sensor or the gravity sensor. Yet, I used the gravity since I found it more stable in the readings or you can use as well the Orientation shield in the application which is based on gyro. We will use the Keyboard Library of Arduino to take the action as if it is the real keyboard, so that's the reason we need Arduino Leonardo or any one support this library.
From the Keyboard Library, you have got that:
KEY_UP_ARROW 0xDA 218
KEY_DOWN_ARROW 0xD9 217
KEY_LEFT_ARROW 0xD8 216
KEY_RIGHT_ARROW 0xD7 215
Here you can find the code.
#include <OneSheeld.h>

void setup()
{
  OneSheeld.begin();
  Serial.begin(9600);
  Keyboard.begin();
}


void loop()
{
  if (GamePad.isUpPressed())
  {Keyboard.press(0xDA);}
  else
  {Keyboard.release(0xDA);}

 if(GamePad.isDownPressed())
  {Keyboard.press(0xD9);}
  else
  {Keyboard.release(0xD9);}


 if (GravitySensor.getY() < -1)
  {Keyboard.press(0xD8);}
  else{Keyboard.release(0xD8);}

 if (GravitySensor.getY() > 1)
  {Keyboard.press(0xD7);}
  else
  {Keyboard.release(0xD7);}

}
Step 4: Attachments

After Uploading the sketch to the Arduino. Attach the 1Sheeld over the Arduino and connect both to the computer.
Step 5: Have Fun


Now, open your Mobile Application, you have to pair the 1Sheeld with the mobile using Bluetooth. Then choose the Gravity shield and the Game pad shield from the application and then click next.
Now you can move the car using the upper and lower bottoms and by rotating the mobile you can change direction of the car left or right.


