

Introduction: Gluten Free Mushroom and Zucchini Muffins


These gluten free mushroom and zucchini muffins are full of goodness and great for a quick breakfast or snack.
I've been playing around with gluten free cooking for a good while now and its much easier and tastier than people think.
With this recipe I used a variety of mushrooms because I have a great mushroom shop near me Far West Fungi so I used tree oyster mushrooms, abalone and simple brown mushrooms but any mushrooms you like is fine. I also didn't measure the mushrooms or zucchini as I think this is always a matter of preference or what you have in the fridge without having to go to the store, I also like to cook in a spontaneous way so I judge on how it feels to govern if I should add a bit here and there.
Step 1: Choose Your Mushrooms and Ingredients


Ingredients
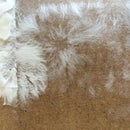
Mushrooms of your choice - when chopped I had about 4 handfuls. I used tree oyster mushrooms, abalone and brown mushrooms and left the morels for another experiment. (The morels in the picture were just too beautiful not to show)
A generous knob of butter for frying mushrooms
Zucchini - I used 2
Small corn tortilla wraps (check these are actually gluten free - it can easily sneak in unexpectedly)
Cheddar cheese
Feta cheese
Quinoa flour - 2 cups
Salt and Pepper
Pumpkin seeds
Garlic - if you fancy it, this time I didn't put any in but it would definitely work too
Equipment
Mixing bowl
Grater
Cupcake tray
Mixing spoon
2 circle cutters, one large, one small
Chef's knife
Paper towels
Step 2: Prepare the Case


The shells of the muffins are great to keep it all together and makes it easy to take them out of the tray without needed greasing or cupcake paper. They add a crispy texture that goes well with the moist inside texture.
I used a large circular cutter to remove the middle section of the tortilla which I put to the side for later use. Cut the middle out, with the remaining circle cut this in half to make 2 outer shells, place each half around the inside of the cupcake tray. With the circle you cut out of the middle, use the small cutter to make the base. Depending on your cutter sizes you may need to crease it a bit so it fits, but overlapping in general is fine.
The amount of sides you make to the amount of bottoms doesn't add up so you can use some off cuts to fill in any missing bottoms you have.
Once they are prepared, pop them in the oven at 180 degrees Celsius for about 15 minutes so they go crunchy.
Step 3: Chop and Sautee the Mushrooms


Chop the mushrooms finely using a knife, alternatively you can use a blender to chop them finely. How finely you chop depends on how much mushroom pieces you want in the texture.
Add a generous knob of butter to a frying pan, I used a heavy bottomed pan but non-stick frying pan will be fine too. Add the mushrooms once the butter has melted and season with salt and pepper.
Step 4: Grate and Drain Zucchini

Grate the zucchini into a bowl. Using either paper towels or a muslin cloth squeeze as much moisture as possible from the zucchini (you could save this for stock or part of a vegetable juice). When using the paper towels you may find it breaks up once it gets wet which can be fiddly to get rid of. A muslin cloth is great but if you don't have to hand, paper towels work well too.
Step 5: Cheese, Flour and Eggs


Grate the cheddar cheese (quantity is your preference - I used 8oz)
Add 2 cups of quinoa flour
Crack in 6 eggs
Add the sautéed mushrooms
Mix well with a wooden spoon
Step 6: Fill Up Cases and Bake


Fill the cases with the mixture.
Sprinkle pumpkin seeds and crumble feta on top.
Bake them in the oven at 180 degrees Celsius for 25 minutes or until you can pull a knife through without it sticking to the knife.
Enjoy!


