

Introduction: Go From Failed 3D Prints to Success in a Couple of Easy Steps


I recently started a project to build a RC Space Cruiser
Yamato. I found a great starting point on Thingiverse. I started with the Sketchup model of the Yamato provided by the poster. The print rendered ok to me in Simplify 3D but about half way through the print things started going wrong. There were gaps between the layers and whole sections that did not print. My immediate thought was that there was something wrong with my printer settings. However, after I really looked at the print, I realized it was the model that was flawed.
Step 1: Meshmixer Plus MS Repair Tool


So, I started doing some Googling and came across this gem:
The video by Josef Pruse of Prusa 3D printing fame and breaks down simple ways of repairing models. His first step is to use a free 3D analysis and repair tool located at: https://tools3d.azurewebsites.net/. The tool requires you to create an account or use an existing Microsoft login. It then allows you to upload a 3D file, analyzes it and provides a repaired file in .3m format for you to download. In my case it took a minute or two, but subsequent submissions have been quick.
In some cases that may completely solve your problem. To make sure you can use Autodesk Meshmixer
to check. Meshmixer is a free 3D modeling tool with auto repair functions you can download from: http://www.meshmixer.com/.
With Meshmixer open you can import either the .3m file you just repaired or the raw .stl file. In the bottom left of the toolbar click Analysis, then select Inspector from the top of the list. This will bring up the view seen below. Each of the dots represents and error with the file. The errors each corresponded with an area that the failed to print. Ideally the process is upload. stl to MS for repair, check in output in Meshmixer and then export to .stl for print.
In my case my model had so many problems I had to modify.
The MS tool initially gave me a repaired model, but it would not import to Meshmixer. I ended up importing the. stl to Meshmixer and fixing all the errors I could before destroying the model.
I then exported to .stl. Not before getting an error message about non-manifold objects. Go ahead and click continue to export it to. stl. Non-manifold edges are edges in your model that do not intersect correctly and probably overlap. They must be removed for a clean 3D print.
Step 2: Meshlab


While figuring this out I also found a lot of links to Meshlab. Meshlab has tools to deal with harder to fix problems like my model had.
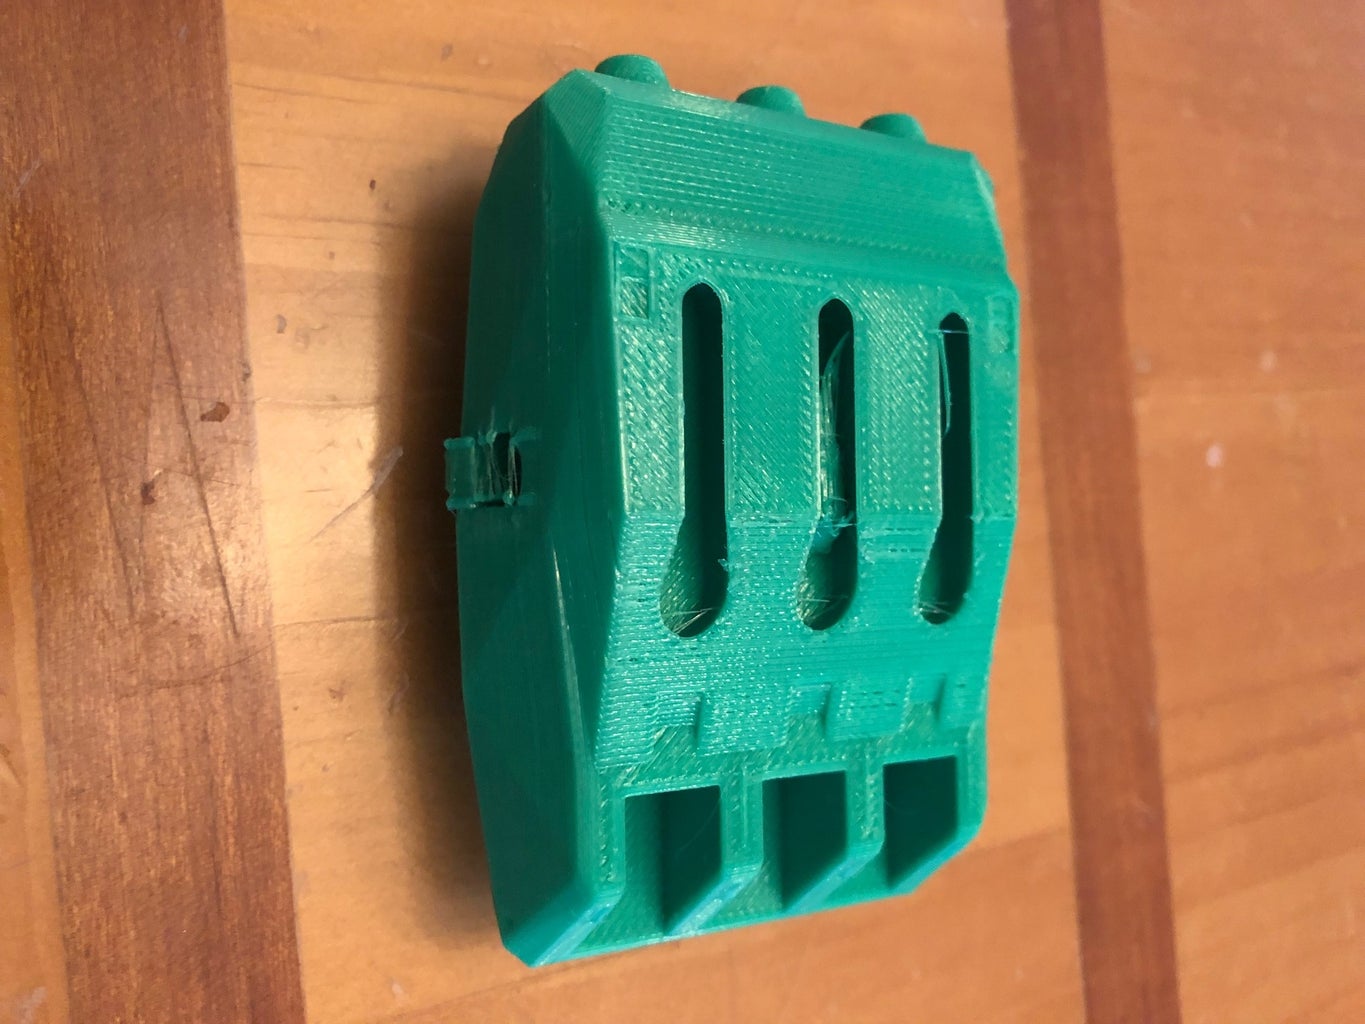
After cleaning up the .stl as best I could I uploaded it again to the MS tool for repair. This time the exported the .3m file imported fin to Meshmixer and showed no errors. The image below is the print after the repairs. Much better.
Additionally, while researching a lot of articles pointed to Meshlab another free modeling tool with automated repair tools. Meshlab has tools for dealing with difficult models like mine with non-manifold edges.
This video provides a great overview of how to use it https://www.youtube.com/watch?v=IreaoCfQ8mE.
At the end of the day I was ecstatic to figure out that a lot of my printing problems were not the printer but the models. Hope this helps. Happy 3D printing!


