

Introduction: 3D Printed - Grocery List Refrigerator Magnets

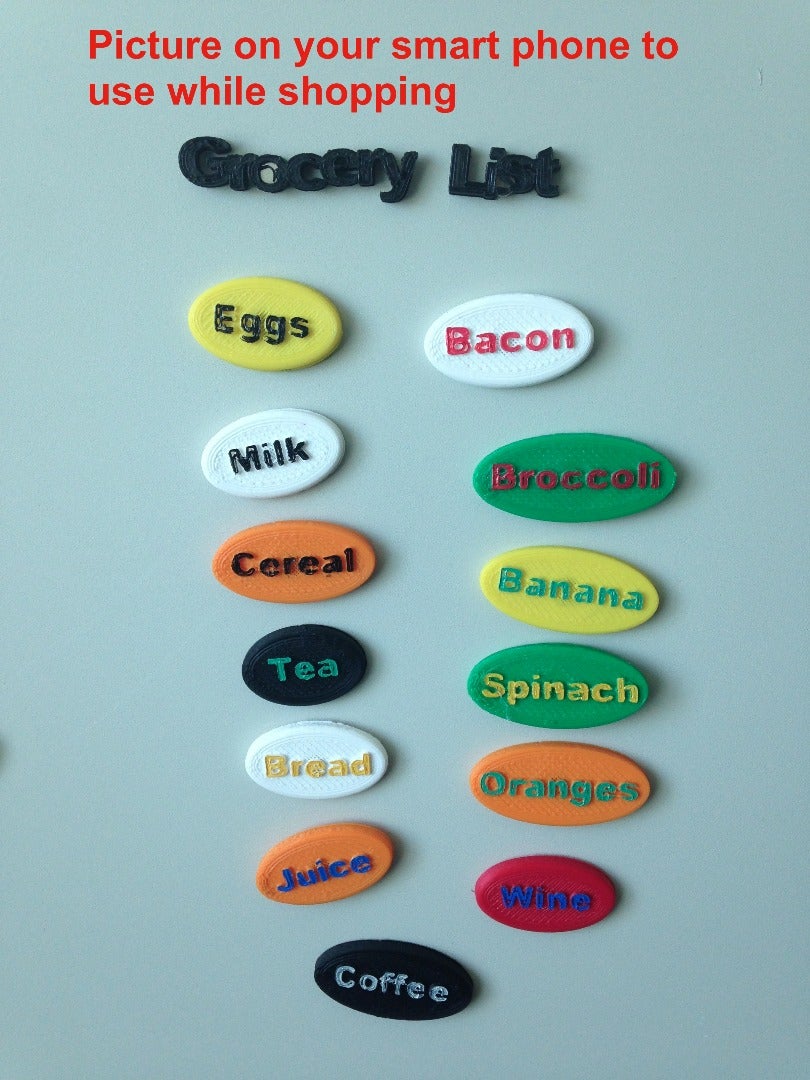


Putting together the weekly grocery list is has never some much fun!! just move the magnet under Grocery List section as shown in the picture above and take a picture using your smart phone, instead of writing/typing out a lengthy list in on a Sticky or in a To Do list App.
3D printing each of the Magnets part takes about 6-8 mins, and then use super glue add a Neodymium magnet.
Attached are STL files for items that I need mostly at home.But if you plan to print this via 3D Hubs and you find your frequently used item missing in the picture above, leave a comment below and I will try an upload the STL file for the item.
In addition, the steps to design one have been detailed in from Step 10 -18.
Step 1: Things You'll Need

Here are the thing you'll need
- 3D printer, I am using a Printrbot simple metal
- Printing Filament , in my case I am using MakerBot and Hatchbox 1.75mm PLA
- Neodymium magnets which you can get at any Art and Craft store like Michaels.
- Super glue to stick the magnet to the 3D printed parts
- Paint Markes to color the alphabets on the 3D printed parts
Step 2: 3D Print Magnet STL File Attached
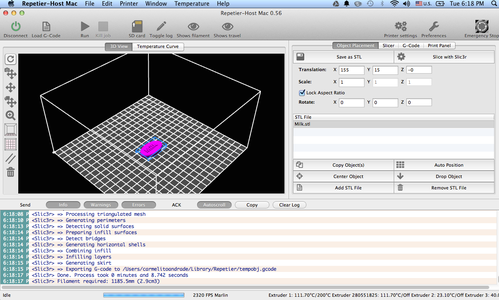


Download the 3D printing software that your printer supports, in my case I am using the Printrbot Simple Metal which use Repetier-Host as a software to
Slice the STL files attached,which basically means cutting the part into various layers
And send commands to the 3D printer while printing
In my case I am using Makerbot's 1.75mm White PLA filament.
Download the milk.stl files attached and
- slicing should take about a 6-9 seconds based on your slicing settings
- and printing should take about 6- 8 mins depending on your slice setting
Attachments

Step 3: Adding Neodymium Magnets to the 3D Printed Part

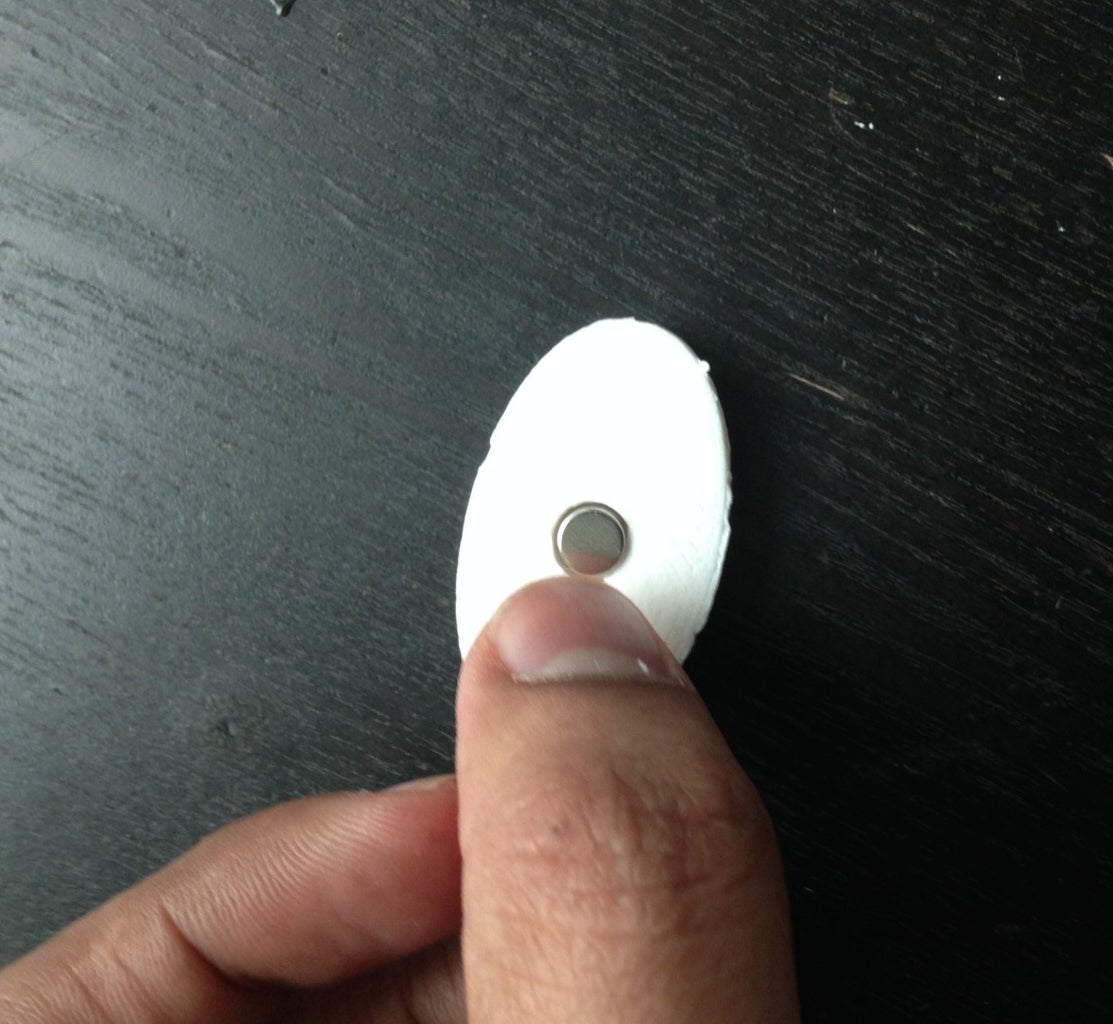
Add Super glue to the bottom of the 3D printed part.
And then drop in the Neodymium Magnets.
Leave it to dry for at-least a hour.
Step 4: Painting the Magnets

This is an Optional step, if you can get your hands on a paint marker , paint the alphabets on top of the magnets so that it is easily visible in the photograph when your at grocery store.
Step 5: 3D Print the Grocery List Item Sign


Download the GroceryV2.stl files attached and
- slicing should take about a 8-9 seconds based on your slicing settings
- and printing should take about 12- 15 mins depending on your slice setting
Download the List.stl files attached
- slicing should take about a 6-9 seconds
- and printing should take about 6- 8 mins depending on your slice setting
Here, I am using Hatchbox 1.75mm black PLA Filament.


Step 6: Adding Neodymium Magnets

Add Super glue to the bottom of the 3D printed parts as shown in the picture above.
And then drop in the Neodymium Magnets.
Leave it to dry for at-least a hour.
Step 7: Here Are Some More Designs for the Herbivore

Here are a few stl files attached for a few essential grocery items
- Broccoli
- Bread
- Cereal
- Apples
- Banana
- Grapes
- Butter
- Milk
- Oranges
- Spinach


Step 8: Designs for the Carnivore

If your a carnivore, here are few more stl files that you can use to 3D print
- Eggs
- Fish
- Bacon
- Meat


Step 9: Beverage Magnet Designs

And here a few of my favorite beverages
- Tea
- Coffee
- Wine
- Beer
- Juice


Step 10: Designing Your Own Magnet Using 123D App


Now to design your own Grocery Item magnet using 123D App by Autodesk follow the steps below.
Download 123D design from the link below, and install it on your computer
http://www.123dapp.com/design
Open 123D design once installed , and in the Menu section select save --> Save to my Computer
Save the file on your Hardisk to a folder, I choose to name mine MilkMagnet.123dx, basically as part of the steps we are going to design the Milk magnet shown in the picture above.
Step 11: Create the Text - Using the Text Tool

Click on the "T" as shown in the screenshot above
And click to specify the point to draw the text, here just click on the grid
Enter your text which in this case is "Milk"
and select the font , that is "Arial Black"
Step 12: Using the Sketch Eclipse Tool


From the Sketch tool set select the Eclipse as shown in the picture above
Click on the edge of the "i" as shown in the second screen shot which is going to be the center of your eclipse.
once done click to select the edges , here chose the horizontal edge to be about 20 mm and the vertical to be about 12mm.
Step 13: Extrude the Text to 5.5mm


Now to extrude the Milk alphabets in the z axis click and select the Milk alphabet.
You should now see multiple options as shown in the first screen shot above, select the "Extrude Text" option.
Type in 5.5 to extrude by 5.5 mm.
Step 14: Extrude the Eclipse to 4.5mm


Now extrude the Eclipse, select the eclipse and it should show you a list of option
Select extrude , and type in 4.5 as shown in the picture above.
Since the text "Milk" was extruded in the previous step, this will remove the extrusion by 4.5 mm.
Select the eclipse again and extrude by 4.5 mm one more time to create the solid
Step 15: Use the Fillet Tool to Smooth Out the Edges


To Smooth out the edges of the extruded eclipse,select the Fillet option as shown in the first screen shot above.
Select the top edge and then type in 2mm.
Step 16: Draw a Circle at the Bottom of 8mm Dia Meter


Now using the Pan tool on the far right hand side, move to the center of the grid
Press and hold the right click of your mouse and scroll to the bottom of the extruded part
Select Circle from the sketch tool box and draw a circle of 8mm.While drawing choose the center of the circle to be the center of the eclipse.
Here we choose 8mm as diameter, because the Neodymium magnets have a 6.3mm diameter.
Step 17: Extrude the Circle to -ve 4.2mm


Click on the circle and select the extrude option
Type in -ve 4.2 to extrude inside the part.
Here we are selecting 4.2 as the Neodymium magnets have a thickness of 3mm and keeping in mind we need some space for super glue.
Step 18: Export the File to a STL File for 3D Printing


Congratulations your design is now ready !
Now export your file to an STL file using Menu ->Export -> STL, and give the file a name and save it to your hardisk.
Now to print the file,fire up your printer and drop the file into 3D printing software which in my case Repetier-Host as shown in the forth screenshot above.

Participated in the
Mind for Design

Participated in the
3D Printing Contest


