

Introduction: HOW TO: Light Painting Photography
REFER TO INTRODUCTION BELOW
Step 1: Introduction


This is a tutorial on how to create a light painting within a photograph as well as, the photoshop edits that were specific to this photo. This can be done in many ways, however the way that I will be explaining this is very simple and creative.
Step 2: Materials


1. DSLR Camera (VIA Kenrockwell)
2. Flashlights (iPhone flashlights work as well) (VIA Amazon)
3. Colourful Tissue Paper (VIA Studiodiy)
4. Location: Any Dark Room (VIA Expressionschallenge)
Step 3: Camera Settings


1. On top of your camera you will find a circle like shifter/dial where there are many settings labels such as "P" "M" "Av" "Tv" and Auto. To capture this kind of photo rotate the circle until it gets to the "M" setting, otherwise known as manual. The manual setting gives you complete control of your camera and how you want it to be shot.
2. Also on top of your camera (It may be located near the screen of your camera depending on what model camera you have) There will be a button labeled "ISO". This meeting controls shutter speed and the amount of light within the photo. For this photo, you would set the ISO to 100 that way the light in the photo can be captured. When you click the ISO button, a screen will pop up with the numbers 100-800, use the arrow buttons on your camera to change the ISO setting to 100.
3.Now that you've changed the ISO, you will now change the shutter speed (otherwise known as the amount of time you want the photo to be exposed for) . On top of your camera, there will be a little spinner like object that has the texture of a gear. Once you find that you will notice that when you turn it left/right, the shutter speed on the screen of your camera will change. You want to make the shutter speed as low as possible so, you will turn it to the left. Depending the amount of light you want to capture (and patience you have), you will want the shutter speed to be between 10"-30". this means that it will take between 10-30 seconds for the photo to be captured. I found that 30 seconds was a little too long for this kind of photography, so I went with 10 seconds or 10".
4. FINALLY...the last camera setting to adjust, the depth of field. This basically means how blurry you want your background to and how much you want your object in focus to be focused. for this photograph, you want the whole photo to be in focus that way, the light is clear. so, in order to adjust this you will look at where the screen is located on your camera, go to the right of where your screen is and then find the "Av" button. when this is pressed you will also rotate the gear like object at the top of your camera at the same time to adjust this setting. The appropriate # for this kind of photograph is "F9.0". Once you've rotated your gear enough to the point where "F9.0" has shown up on your camera screen, your camera is now ready to take the photo!
****VERY IMPORTANT**** ALSO, make sure the flash is down on your camera (I'm referring to the flap that you will close down for your flash) Make sure it is down otherwise your photo will also include things in the background of your dark room that you will not want captured.
PICTURES VIA:
- Leesburg.macaronikid
- Photoshop-designs
- slrphotographyguide
- momandcamera
- images.bit-tech
Step 4: Taking the Actual Photo


1. Get someone other than yourself to be the subject of the photo that way you can be the one to take the photo.
TIP: You can take your photo with the camera on a tripod or you can take it in your hands but you have to be super still
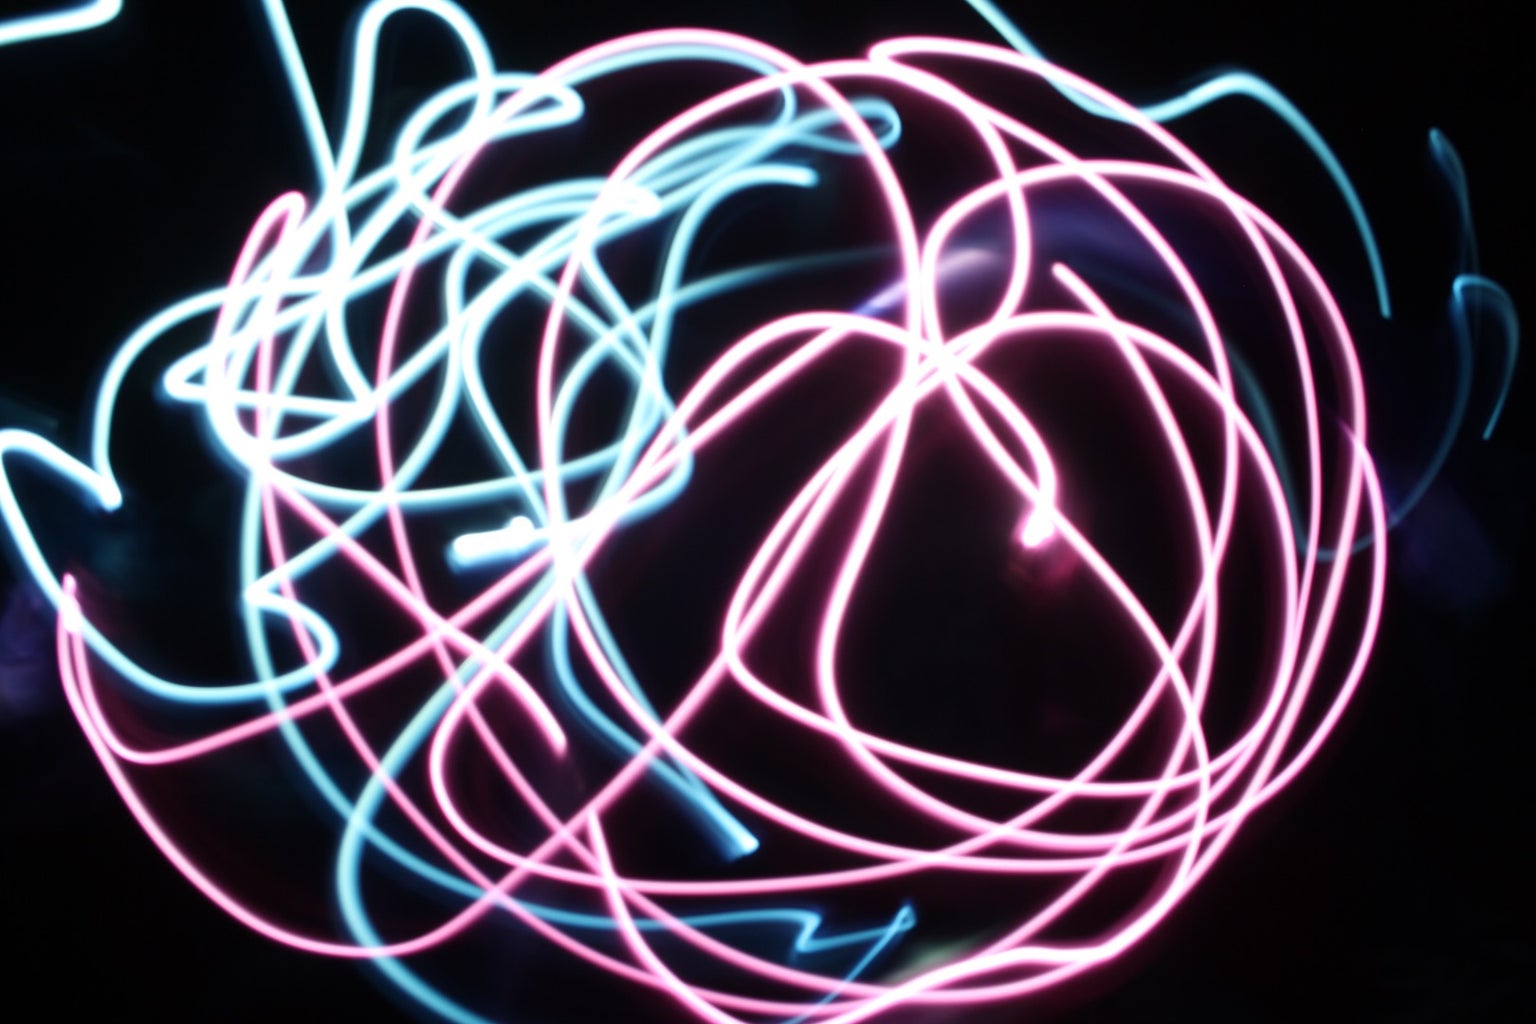
2. Give your subject of choice an iPhone flashlight or just a regular flashlight and tell them to make random shapes when you take the photo.
TIP: Make sure that for one photo, if you want a specific shape then you have to make sure that for the entire time that the photo is being taken that the person is doing the same shape over and over again otherwise the photo will turn into complete chaos of lights.
3. If you want to make your lights colourful, the a piece of thin material or tissue paper and wrap it over the the light(s) that you are using
4. There you go! now you are ready to take your picture! Hope you have fun taking your photos!!!


