

Introduction: Hack Broken Earbuds Into a Bluetooth Receiver


About a year ago, I bought a pair of bluetooth earbuds. I got them for a very cheap price (somewhere around $10-15), and used them successfully throughout the summer. Unfortunately, one day the left earpiece popped out and broke, leaving two wires poking out of the black plastic case. They worked perfectly fine except for the one broken piece, and I was out of an otherwise perfectly fine pair of bluetooth earbuds.
So, I decided to take them apart and see if I could make anything useful out of it! This instructable details what I did and how to make a bluetooth receiver out of some cheap broken bluetooth headphones!
Step 1: The Plan

After having these sit around in a drawer for a couple months, I decided to take them apart to see how they worked and if I could salvage anything.
Opening the case revealed that one of the earbuds had a charging port and battery, and the other had the control electronics.
My idea at that point was to scrap the earbuds, which are just tiny speakers, and solder on a 3.5mm audio jack so I could connect my speakers to them. This would turn my broken earbuds into a working Bluetooth receiver, something which I wanted to purchase anyway (to connect a speaker in the room with my phone).
Step 2: Taking It Apart

After prying the plastic housing away, I cut the wires connecting the two halves together and examined the circuitry hidden within. Interestingly enough, the wires coming from the micro-USB charging port go all the way across the headphone wire to the control board, and then other wires go all the way back to the battery. This actually makes sense, because the control circuitry needs to monitor the lipo battery voltage; it is important to not over-charge a lithium battery, and the board controls flow of charge to ensure that this does not happen.
Step 3: Re-purposing an Enclosure

After taking the board apart I found an enclosure to put everything in; I didn’t want bare electronics sliding around on my desk. I settled on an empty headphone case, the ones Apple earbuds come in. I still had mine, untouched since I got my new phone and otherwise just taking up space in my drawer. I haven’t heard of anyone reusing this case; it’s just packaging that almost everyone throws away after getting their headphones. The final component was the 3.5mm headphone jack. I found a pair of earbuds in the trash at work and grabbed it knowing I could use the audio jack for this project.
I planned out where the micro USB charging port would go, and drilled out a hole for the headphone jack wire. I used a dremel to cut the proper shape for the USB port, which you can see cut out in later pictures.
Step 4: Hack It!


Next, I stripped the wires from both the headphone cord and the Bluetooth earbud’s circuitry. If you’ve ever stripped wires from earbuds or headphones,you know how annoying this is. I find these wires really annoying because they’re so hard to work with. They are very thin and coated with a nonconductive enameling, so you need to be very careful; a simple pair of wire strippers won’t get you anywhere with these wires.
After removing the outer plastic sheathing with wire strippers or careful cutting with flush cutters, you’ll find many thin wires and possibly some electrical shielding. (Braided copper wire or a thin foil). Sometimes there will be a wire wrapped in additional braiding. After separating out each wire, the insulation needs to be removed. I’ve been told that using sandpaper is a good method, but I didn’t have any sandpaper at the time. The enameling can also be burned off with a lighter and scraped away. This method leaves a charred looking piece of wire, but if done carefully can work well for the time and effort spent. I used the burning method to strip these wires.
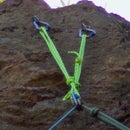
Next, I checked with my multimeter to see which wire corresponded to which channel, by referring to a diagram like the one posted above. I figured out which wire went to what, and soldered the ground together, and the left and right earbuds to their proper locations. I had to refer to a chart for how to wire up the 3.5mm jack, and tested it with the speaker on my desk to make sure that I was wiring up the correct channels together. You don’t want to mix left and right, or make a worse mistake that would cause everything to work.
Now all the electronics are complete! It's a good idea to test everything now, to make sure it works before permanently putting anything in an enclosure.
Step 5: Putting It All Together

After putting everything in the case, there was plenty of room to spare which I was fine with; it’s still a low profile case that has the nice look of apple’s design once the lid is on. I used hot glue to keep everything stuck, and lined up the micro usb port with its hole I cut and the microphone to a small hole I drilled in the case (I don’t plan on using it, but may as well put it in). And finally, I was done!
Step 6: Final Thoughts

I now have a bluetooth adapter made completely out of repurposed headphone parts that would have been thrown out otherwise. You could say that I spend $0 for this project, because everything I had already and would be trash otherwise. This project only took me a single night’s work after getting all my materials together, and I’m proud that I was able to make something useful with my old stuff. Now I can stream my music over bluetooth and listen to it through my speakers.
I hope you enjoyed my project, and perhaps have inspired you to make something useful out of the things that you normally throw away in your life.
Tell me if you've re-used or hacked an old or broken piece of tech in the comments below!
PS - you can also find this project at my website, https://tedfmyers.com/2016/02/02/0-bluetooth-adapt...

Participated in the
Makerspace Contest


