

Introduction: Hack Any Phone!


Inspired by R10n & his "Mission: Impossible - Pendeli" Geocache, (http://www.geocaching.com/geocache/GC2NQ9A_mission-impossible-pendeli), we decided to create our own version:
Any good old analog phone will do, the bigger the better. Using an Arduino & a wave shield, you can make the phone behave any way you want & even fool someone into thinking they have reached an actual number and they are listening to a voice-mail.
This project can be done in a few hours and for very few dollars.
Step 1: Gather the Materials

We enjoy going to yard sales & estate sales and have found numerous telephones for $2 - $4. Even found one for $1.
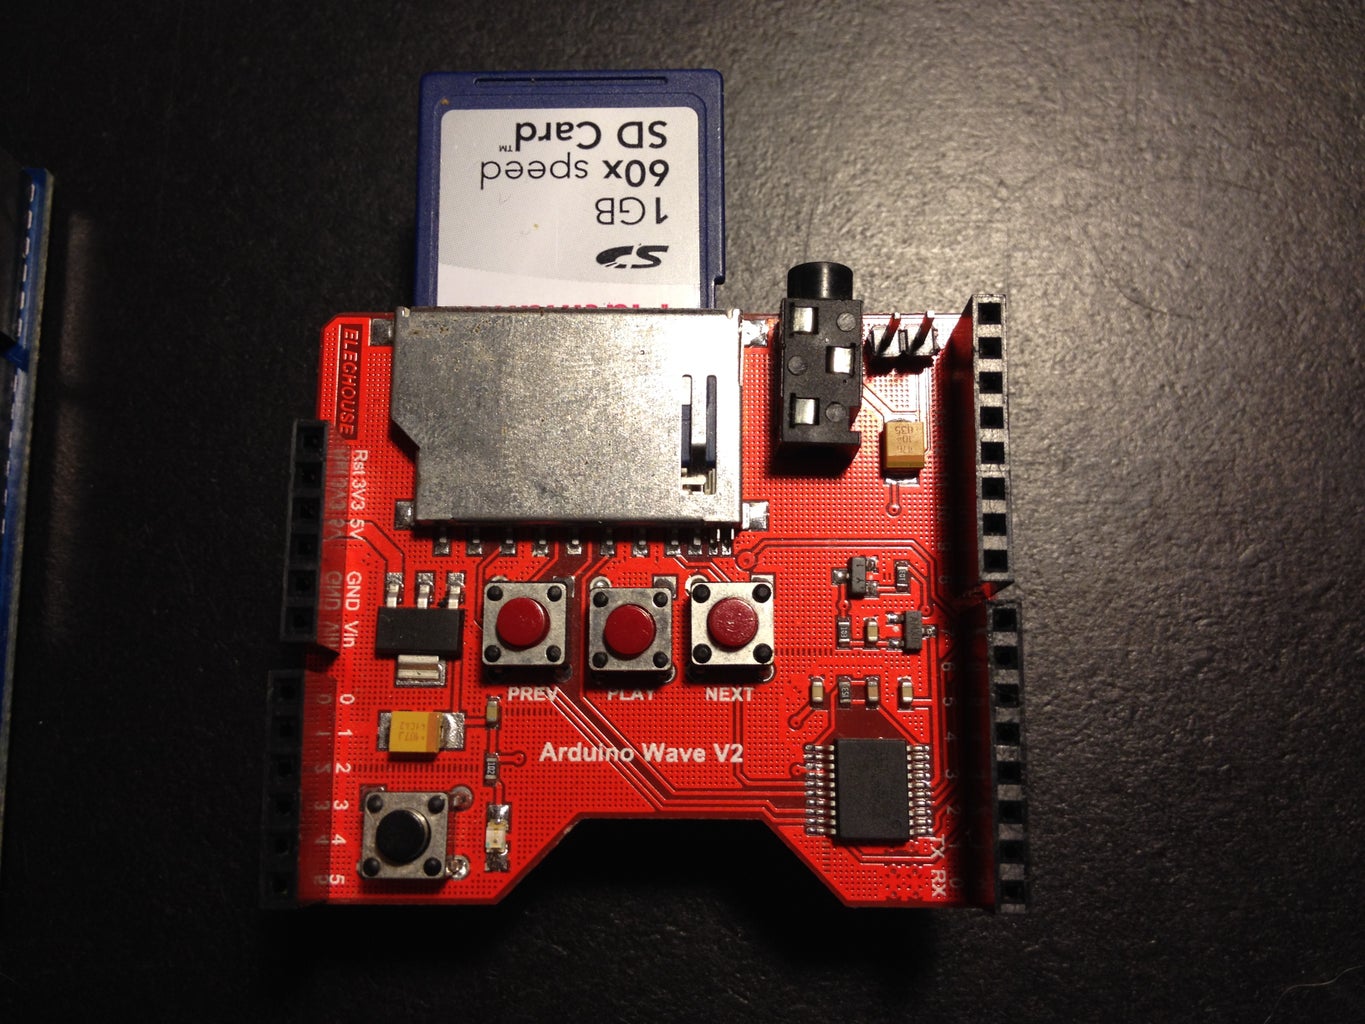
We used 1 Arduino Uno & 1 Wave Shield for the first phone. With a 9 Volt battery, you have power for a very very long time.
The phone original keyboard was defective (didn't want to spend too much time to find replacement keys/fixing it) so we had to substitute it with a Membrane keypad in this case.
Step 2: The Hack...


Opening this type of phone could not be easier: 2 Philips screws underneath is all that keeps the top in place.
This exploit is made possible by simply cutting from the phone PCB the white & green wires that go to the handset speaker and connecting them to the speaker output of the Wave Shield.
Then, you cut one wire (I used Black) of the 9 Volt battery connector (somewhere in the middle) and solder each end to each side of the handset release connection (how the phone knows if he is off-hook or hangup). This will prevent any power to be used when the phone is NOT in use.
Like I said, in this case, it was easier & quicker for this application to simply add a membrane keyboard than fixing the original AT&T keypad.
Step 3: The Code:

After figuring out exactly what we wanted each button to say, recording a few MP3 files was quick, easy (& fun!).
Code is rather simple so this is also a quick task once the proper libraries are downloaded.
/*
Keypad Control a WTV020-SD-16P module to play voices from an Arduino board.
Created by Diego J. Arevalo, August 6th, 2012.
Released into the public domain.
Modified by S&T Geotronics 8/21/2013
*/
#include <Wtv020sd16p.h>
#include <Keypad.h>
int resetPin = 3; //2; // The pin number of the reset pin.
int clockPin = 9; //3; // The pin number of the clock pin.
int dataPin = 8; //4; // The pin number of the data pin.
int busyPin = 5; // The pin number of the busy pin.
/*
Create an instance of the Wtv020sd16p class.
1st parameter: Reset pin number.
2nd parameter: Clock pin number.
3rd parameter: Data pin number.
4th parameter: Busy pin number.
*/
Wtv020sd16p wtv020sd16p(resetPin,clockPin,dataPin,busyPin);
const byte ROWS = 4; //four rows
const byte COLS = 3; //three columns
char keys[ROWS][COLS] = {
{'1','2','3'},
{'4','5','6'},
{'7','8','9'},
{'*','0','#'}
};
byte rowPins[ROWS] = {12, 11, 10, 7}; //connect to the row pinouts of the keypad
byte colPins[COLS] = {6, 4, 2}; //connect to the column pinouts of the keypad
Keypad keypad = Keypad( makeKeymap(keys), rowPins, colPins, ROWS, COLS );
void setup() {
//Initializes the module.
wtv020sd16p.reset();
Serial.begin(9600);
}
void loop(){
char key = keypad.getKey();
if (key != NO_KEY){
Serial.println(key);
int keynum = key-48;
switch (keynum) {
case 1:
wtv020sd16p.asyncPlayVoice(1);
delay(10000);
break;
case 2:
wtv020sd16p.asyncPlayVoice(1010);
delay(15000);
break;
case 3:
wtv020sd16p.asyncPlayVoice(1030);
delay(3000);
break;
case 4:
wtv020sd16p.asyncPlayVoice(100);
delay(3000);
break;
case 5:
wtv020sd16p.asyncPlayVoice(50);
delay(3000);
break;
case 6:
wtv020sd16p.asyncPlayVoice(1040);
delay(3000);
break;
case 7:
wtv020sd16p.asyncPlayVoice(1060);
delay(3000);
break;
case 8:
wtv020sd16p.asyncPlayVoice(1070);
delay(3000);
break;
case 9:
wtv020sd16p.asyncPlayVoice(1020);
delay(10000);
break;
case 0:
wtv020sd16p.asyncPlayVoice(2);
delay(10000);
break;
// default:
// optional
}
}
}
Step 4: The Future...


There are numerous possibilities & variations possible for this project going forward:
Each phone being different, it will come with its own challenges & user experience. Above are a couple cheap phones found at Estate sales (for future hacks)...
Tons of various sound files can make for infinite possibilities.
Smaller & cheaper Arduino & Sound shields can make for more compact usage. Above are comparisons between a Full Arduino Uno with Wave Shield and an Arduino Nano, an Arduino Pro-Mini (both are full featured replacements for the Uno) & a mini Wave Shield.
Thank You for reading & Please Vote for us!

Participated in the
Hardware Hacking


