

Introduction: Hanging Paper Ornament


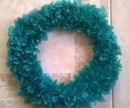

This was supposed to be the most perfectly executed 3D hanging paper snowflake, but as you can see, sometimes we just miss the mark. None the less if you follow the instructions and avoid the mistakes I made you'll have a snowflake that looks nothing like my deformed one. This is what you'll need:
- a4 sized sheet of paper thick enough that it can support itself but not so thick that you can't make it curve
-glue (any white glue liquid or solid works just as good)
-ruler
-pencil
-scissors
Once you have those we can get started.
Step 1: Making a Perfect Square
With your sheet of paper laying flat on a clean surface in landscape, grab the top left triangular corner pulling it downwards diagonally to the right until the triangular corner is in contact the bottom of the paper, and the lower left triangular corner of the paper is evenly divided into two. From here you should crease the paper resulting in a triangular flap. Cut along the side of the triangle facing the right hand side of the paper. you should now have a rectangle and a triangular folded piece of paper. (The folded triangular piece should open up to a perfect square.)
Step 2: Marking and Cutting the Pattern
Using the folded triangular piece of paper, the ruler and the pencil, mark 4 tiny guidelines 3 centimeters apart on the folded edge of the paper starting at each end, working towards the center of the folded edge of the triangle. Using those guidelines, draw very faint lines parallel to the sides of the triangle going towards the top of the triangle stopping the first line about 2 centimeters away from the triangle's top and making each line going towards the center shorter than the first but equal to line length on the other side of the triangle. Now using the scissors, cut along each line starting from the folded edge of the triangle up until the line stops.
Step 3: Making the Ornament
Unfold the triangle to reveal the perfect square with several parallel cuts forming a sort of arrow directional pattern. Slowly rotate your square so that it now becomes a diamond with both directional patterns are pointing to the right and left at the same time. Releasing the smallest of cut flaps in the centre of the square, gently roll the one on the left over to the right on top of the one on the right which will be rolled to the left, being sure not to create any creases, while ensuring that when both tips lie on top of each other, they form a hollow circular chamber. Once achieved, go ahead and glue both tips together, gluing the left on top of the right tip. Now flip the ornament over so the glued end is facing away from you and gently release the next two flaps, immediately following the two in the centre going outwards. Now repeat the same steps as done with the two centre flaps, rolling the one on the left to the right and rolling the one on the right to the left before gluing both tips together; left on top of the right. Now go ahead and flip the ornament and repeat this process flipping and gluing the flaps on the opposite side of the one before it until all the flaps are glued. Now, provided you did not use as thin a paper as I did, you should have a beautiful wall ornament.

Participated in the
Spectacular Failures Contest


