

Introduction: Hiking Stick to Selfie Stick and Back Again!


One simple modification is all you need to instantly transform a hiking stick into a monopod!
Capture the moment perfectly with one simple alteration.
The Problem
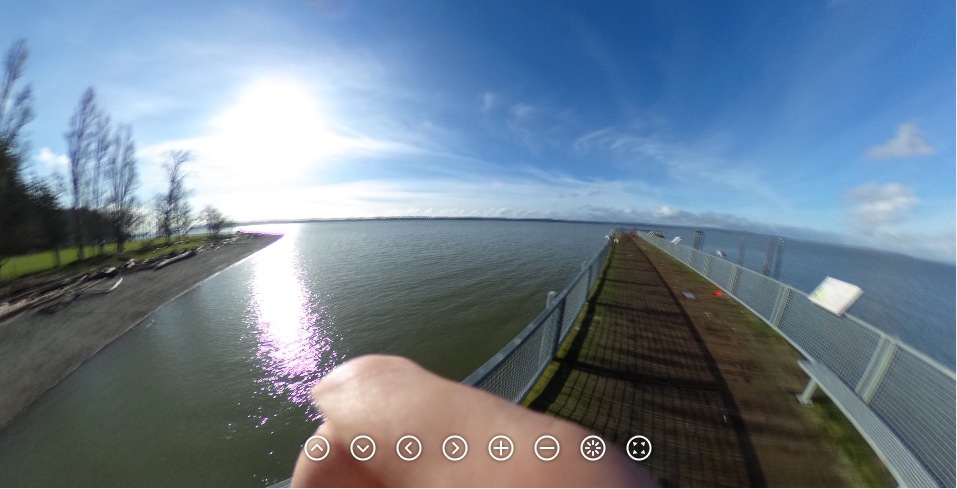
Recently I got a 360° camera (the RICOH THETA S) to help capture my outdoor trekking. With the first picture, I noticed a very distracting problem at the bottom of the photo, my hand!
Note that while this tutorial is focused on the benefits of this hack with a 360° camera, obviously, you will be able to use your handy new monopod/walking stick with any device that accepts a standard tripod mounting bolt.
My Solution
I'm pragmatic and don't like the idea of lugging around a stick that does nothing more than attach to a device. So I experimented with altering my hiking stick so I could change it into a selfie stick when needed, then back into a hiking stick again. As you can see from the image below it works great. By changing my walking stick into a monopod, now I can capture more of the moment and less of my fingers!
The following steps outline how you can easily do this yourself!
Step 1: What You'll Need


To make this instructable you'll need a few items and tools.
Items
- The hiking stick of your choice. I used my anti-shock hiking poles.
- A standard tripod bolt. I used a threaded adapter I had on hand, but any 1/4 inch diameter bolt with 20 threads per inch should work just as well.
- The device(s) you want to attach to your monopod when it's done! I used my Ricoh Theta S 360° camera.
Tools
- Pliers to pull out the existing metal tip of the hiking stick. (Vise-grip locking pliers recommended).
- A Metal File to reduce the size of the bolt as needed. (I used a bench grinder to speed up the process).
- Electric Drill and Drill Bit to increase the hole size in the hiking stick tip as needed.
It's a good idea to test the fit of the bolt you've chosen with your device(s) before you get started.
Step 2: Modifying the Hiking Stick


Ultimately we want to modify the hiking stick so we can quickly use it as a selfie stick/monopod when we need it.
My first thought was to replace the compass at the top of the handle. But I didn't want to loose my cool compass and have a bolt that just sticks out on top when I'm not using it.
So I took at look at the other end and noticed that I could replace the metal tip with a standard tripod bolt. Then when I wanted to switch from hiking to pictures all I'd need to to is remove the rubber tip! When I'm done taking photos I can replace the rubber tip and keep on trekking.
The goal of this step is to pull out the metal tip so we can replace it with a mounting bolt.
Use a pair of pliers to extract the metal tip from the end of your hiking stick. I tried to use regular pliers at first but ended up having to use vice-grip locking pliers to get a solid grip.
Step 3: Modifying the Mounting Bolt


Now that you have the metal tip removed from the hiking stick you know the size the bolt needs to be to fit firmly inside it.
WARNING: Use appropriate personal protection and be safe. I strongly suggest holding the bolt with pliers and modify it's size before installing it because the heat from friction could melt the plastic of your hiking pole!
Depending on the bolt you've chosen you may need to use a drill bit to widen the hole in the tip of the hiking stick. In my case since I was using an adapter bolt that was 1/4" to 3/8" I did need to do that. When you're done, you should have a bolt that will thread tightly into the tip of your hiking stick.
Step 4: Putting It Together!


Assembly is a simple as threading the mounting bolt into place. I left the sides of my adaptor bolt square so I'd have something to grip with the pliers as I threaded the bolt into the tip of the hiking pole.
That's it, high five you're done!
Now get out there, take some selfies!


