

Introduction: How to Setup Eclipse for Android App Development

Developing Android applications can be a fun and exciting experience. To get started creating Android applications, you need a proper development environment. This will allow you to use all the tools needed to create an app and ensure you work efficiently. I will show you how to setup a working environment using the Android SDK, Eclipse IDE, and ADT Plugin.
This Instructable assumes you have knowledge of what Android is and have a basic understanding of programming, although programming is not required.
First I will explain how to get and setup the Android SDK provided by Google. Then I will address the use of the Eclipse IDE for development. Finally, I will focus on the ADT (Android Development Tool) Plugin that integrates the Android SDK with Eclipse.
Approximate time required: 20 mins.
Requirements: Computer with 300 mb of free space.
Step 1: Obtain the Android SDK

- We need to obtain the Android Software Development Kit. To do that we must first visit the SDK download site below.
- http://developer.android.com/sdk/index.html
- Scroll to the bottom of the webpage and select the 'Download the SDK Tools' button.
- This will open a file to be saved somewhere.
Step 2: Install the Android SDK

- Open the file we just downloaded.
- This will open an executable which will ask you about the installation process.
- When you get to the install location screen, make sure you choose a location you remember (we will need it later).
Step 3: Open Android SDK Manager

We'll select the most recent version along with the extra SDK tools so you can build applications for any Android version.
- Open the folder that we installed the SDK into.
- You'll see a executable called 'SDK Manager'. Open it.
- You'll see a window where you can select different versions of Android to develop for.
Step 4: Install Android Version and Extras for SDK

- Select the 'Tools' and 'Android 4.4.2 (API 19)' check boxes.
- If you would like to have extra Android tools you can choose them from the 'Extras' selection.
- You will then be prompted to accept the Android conditions and then the SDK will install. Then installation may take a while depending on your internet connection. The Android SDK is now completely installed.
Step 5: Obtain Eclipse IDE
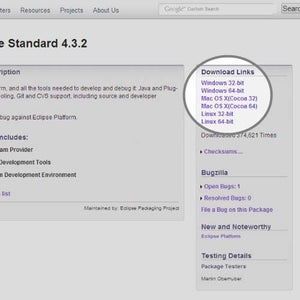
Eclipse is the tool we'll be using to develop in. It is the most popular Android development environment and has officially supported tools from Google.
- Download Eclipse from the website below.
- http://www.eclipse.org/downloads/packages/eclipse-...
- Find the link for your operating system and 32/64 bit version.
- Save the compressed download file.
Step 6: Run Eclipse for First Time

Eclipse does not require installation. It's a folder with all the necessary files and settings. You can run it directly from the Eclipse folder. It's recommended you put it in a safe place with other applications.
- Extract the downloaded Eclipse file into a safe place where you can keep the program.
- Open the extracted folder and open the 'eclipse' executable.
You should see a screen similar to the one attached if all went well.
Step 7: Add ADT Plugin Repository

The ADT (Android Development Tool) Plugin was made specifically for Eclipse to increase productivity and integration with your Android work environment. To use it, we first add the Eclipse plugin repository so it knows where to find it along with updates.
- In the Eclipse application menu, go to 'Help' and then 'Install New Software'.
- Click on the 'Add...' button and you'll see a window appear.
- Give the repository a name like 'ADT Repo'.
- Give it the location http://dl-ssl.google.com/android/eclipse/.
- Click 'OK' button.
Step 8: Install ADT Plugin

Now that we have the plugin repo setup we need to install the plugin from it.
- On the 'Install Software' screen, select the repo you just created from the 'Work with' selector.
- Select the 'Developer Tools' option from the listed below options.
- Click 'Next' and accept the agreements.
- Click 'Finish' and let it install. It might take a while depending on your internet speed.
Step 9: Access ADT Plugin Preferences

You'll most likely have to restart Eclipse after you install the ADT Plugin so do that before you continue.
- Mac/Linux: After Eclipse has restarted, click 'Eclipse' in the application menu.
- Windows: After Eclipse has restarted, click 'Window' in the application menu.
- Then select 'Preferences'.
- In the Preferences window, select the Android tab on the left side and it's corresponding drop down menu.
This is the ADT Preferences screen. It will allow you to change setting, remove the SDK and make editor preferences for your development.
Step 10: Setup ADT Plugin

- Click 'Browse' on the right side of the screen.
- Search for the folder in which you installed the Android SDK into and select it.
- Hit the 'Apply' button on the Preferences screen.
- You should see the Android version you installed early to show up if all went well.
- If not, try reselecting the folder. (Make sure the folder contains the folders 'build-tools','platform','extras' and etc.
- Hit the 'OK' button and restart Eclipse.
Step 11: Access ADT Android Virtual Device Manager

To test your application we need to add an Android Virtual Device if you don't have a personal device.
In the application menu, select 'Window' and then 'Android Virtual Device Manager'
Here you can create new 'Devices'.
Step 12: Add ADT Virtual Device
- Click the 'New...' button on the right side.
- Give your device a name in 'AVD Name'.
- You want to check mark 'Use Host GPU'
- The other options are up to you and can be played with to figure out what works best.
- When done, hit 'OK'.
Step 13: Conclusion
You have now setup an environment ready to develop Android applications. We installed the Android SDK, Eclipse, and the ADT Plugin.
To create your first application, visit https://developer.android.com/training/basics/firs...


