

Introduction: How to Create a FIX Point


The Fix Point is a mobile repair point where volunteers (fixers) help to repair broken products that people from the neighbourhood bring along. Visitors watch along with the fixer so they can learn from the fixing. By organizing a Fix Point you can show people how easy it is to make your own things and we hope they further develop the knowledge they gained.
We decided to create a fix point after a lot of research into making and the Open Source way of working. We want to spread the word of open source to the offline world. Open Source is enabling people to further their own interests while contributing those interests back to a common good. In the open source principle, the freedom of building upon and expanding the knowledge of another person is the most important part which makes open source so valuable. Where we first saw capitalism and technology serve the people, this is now turned upside down in the way we live. We want to make the people conscious of this fact and let them give the power and maintain control on their own life and surroundings.
Inspired by makerspaces, Fablabs and Repair cafes we organized the fix point. By organizing this fix point we wanted to make te world more sustainable. We also want to learn the visitors a bit more about how to become a maker by showing the whole process from non-makers transforming into new makers.
Step 1: Setup the Workspace


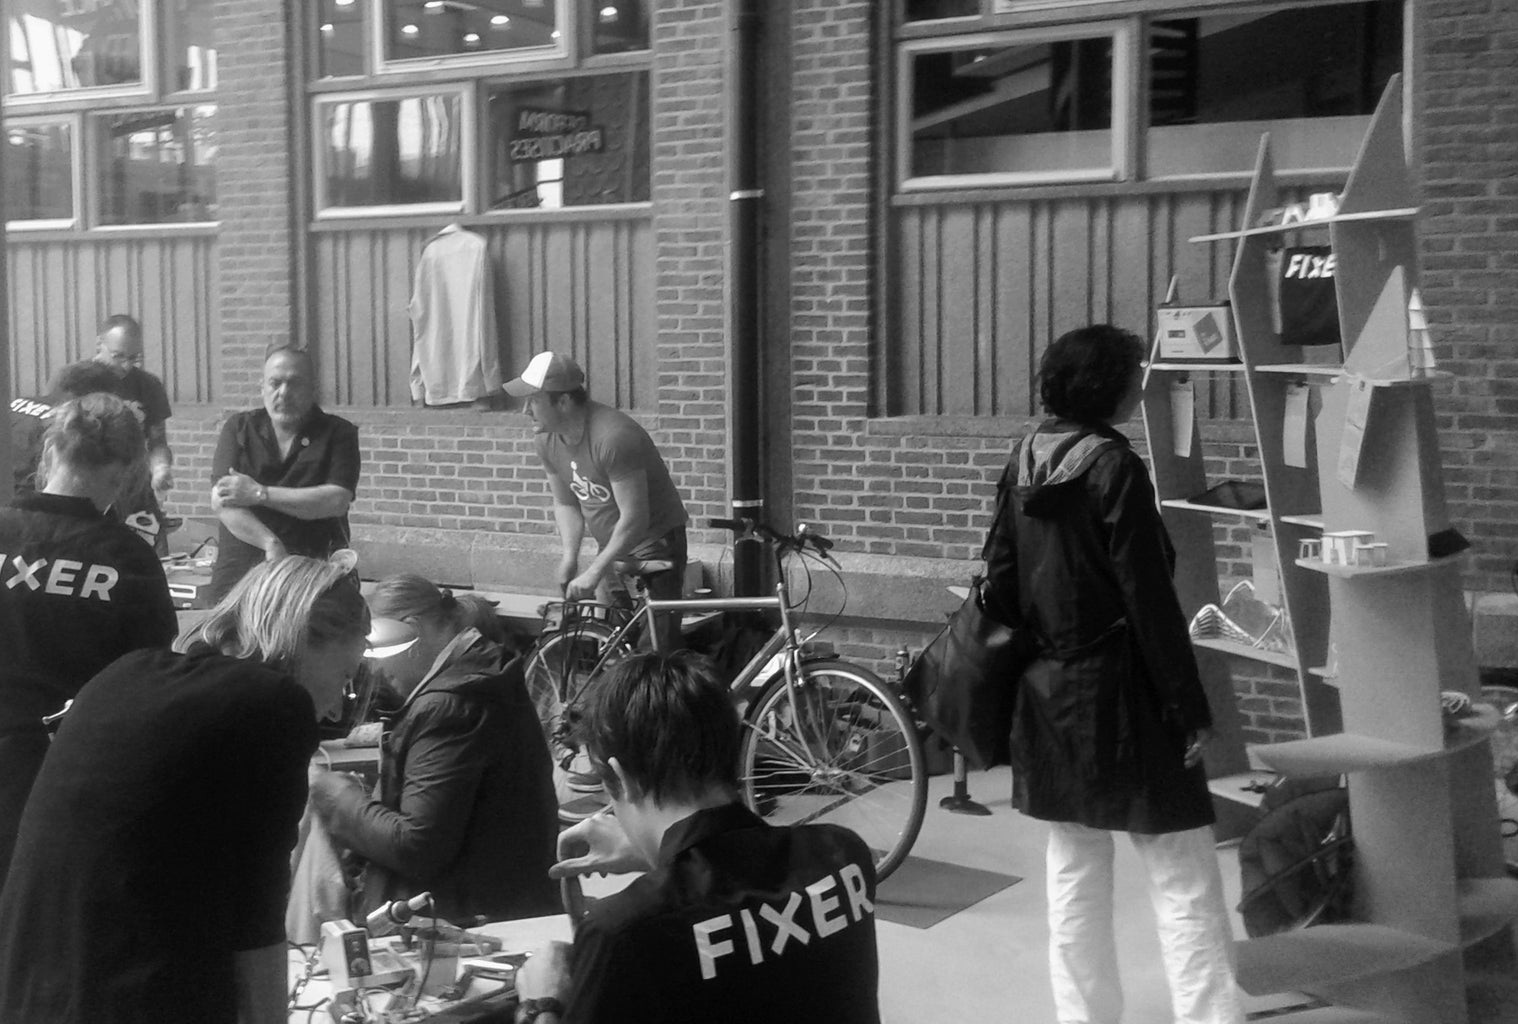
We wanted to make the workspace easy to assemble and as comfortabel as possible for the Fixers.
We made all the stools ourself with the help of a lasercutter. These stools exist out of 5 pieces. We remixed the design of another Instructables user Canuckinjapan. On top of the stool you can place a soft pillow to make the comfortable.
The tables where the fixers are working on, exist out of 4 pieces of MDF. We made these tables by using a jig saw. To give every fixer enough space, we created 3 tables. 1 for the bike fixer. 1 for the clothing fixer and 1 for the household goods fixer. Every fixer had acces to power and light. You can ask the fixers if they want to bring their own tools. If they bring their own tools you have to mark them so everyone can keep track of their own tools.
Tools
Bicycle station
- Bike repair kit
Clothing station
- Sewing Machine
- Needle set
Household station
- Duct Tape
- Heat shrink
- Electric tape
- Soldering station
General
3x Extension cords
3x desk light


Step 2: Wall


We created an 3D model and imported this into 123D MAKE. In this application you can transform your 3d model in sliceforms. We exported from 123D MAKE an PDF and printed this on a lot of paper sheets. Eventually we sticked the paper poster on the 12 mm MDF and used a jig saw to cut out the 10 pieces for the Fix Wall. In this wall we demonstrate the 3 steps of making.
Step 3: Promotion


For the promotion of the fix point, we spread the word by hanging posters, talking to the media and a sticker campaign. The poster is designed in collaboration with Tom Elswijk; A friend which is very familiar with illustration. We made the sticker standing out by making it orange with the words FIXME on it.
For promotion you can write a press release. We met Magriet Hogeweg who studied journalism and wrote together with us our press release. In this press release you can include a description of the project, date, place and time. You can always send the poster together with the press release. You can send the press release to different media outlets.
These are the media outlets where you can focus on:
- Newspapers
- Local websites
- Social Media
- Blogs
Step 4: The Fixers


We started to search for spots were we could find volunteers. We placed a call on a website to ask around for volunteers. Also we visited a few Reapair Cafe's and aked the fixers who were working their to join our fix point.
We made clothing which show they are Fixers. Besides the clothing we also made 6mm MDF buttons so you can see which fixer an fix a certain type of goods.
Attachments
Step 5: The Day Itself


1. Welcome and fill in the Fix Form
When people are coming in we ask them if the want to fill in the form we are giving them. If they want to we also provided them with a cup of coffee, tea or water. The most important is to make the people feel welcome to the fix point.
2. Ask the fixer and introduce them to each other
After they filled in the form, we ask the specialized fixer if he want to take a look at the broken product. As the fix host you can introduce them to each other and let them shake hands.
3. Provide the people with a snack
Now they are ready to fix the product. During the fixing you can provide them with a small snack like your self baked cookies or a piece of fruit. Always give them some unprocessed and nutritious food with less sugar and fat. This way the fixers and the visitors stay focused for the time being.
4. Take back the fix form
After the people fixed the broken product together, the fixer can fill in the last piece of the fix form and give it back to the visitor. This visitor can give it back to the host and thank him or her for the advice. They can do this by donating some money in the special gift box.
5. Thank the visitor and inform the people about the the next fix point
Attachments
Step 6: Aftermath

After you have hosted the fix point you can send every fixer a thank you email with a few of the photos/videos of the happening. In this email, you can also ask them if they want to help the next time you are organizing a fix point.
Example email:
Hi ....,
Thanks for your help! It was a great day.
Thanks to your help the fix point was a succes.
it would be very nice if you will be there at the next fix point (date).
Would you also like that?
Cheers!
(your name)
You can also send an email to the visitors who filled in their email address on the fix form. In this email you can thank them for visiting and invite them for the next fix point.
The most important is to make the fix point local, recurring and visible.


