

Introduction: How to Create a Hanging Indent on Google Docs (iPad)
Many have had issues with figuring out how to create a hanging indent on the iPad with the obscure way in which you do it. These steps will take you through the process of how to do it in order to get that work cited page done on your essay.
Step 1:
Download the Google Docs app onto your iPad if you don’t already have it and then open the app.
Step 2:

In the document where you are placing the citation, place your cursor in the spot where you are intending to put it.
Step 3:

Add your citation that you have previously found and copy and paste it into your Google Doc.
Step 4:

Highlight the citation you have placed.
Step 5:

Tap the “A” in the top right corner of the app.
Step 6:
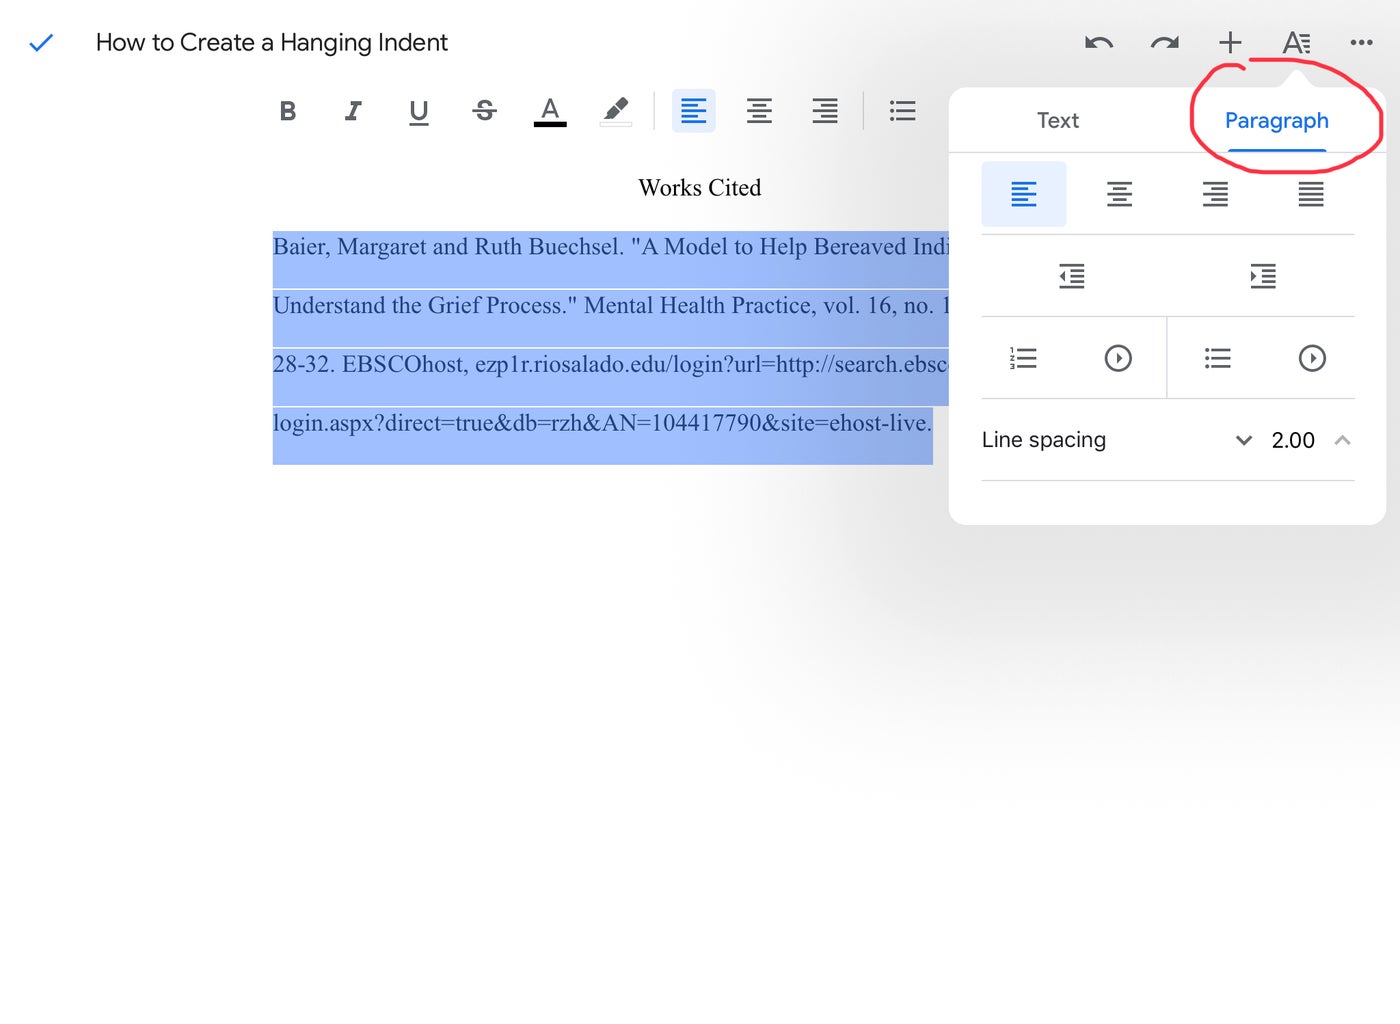
Once the options pop up, you’re going to want to press the “paragraphs” option.
Step 7:
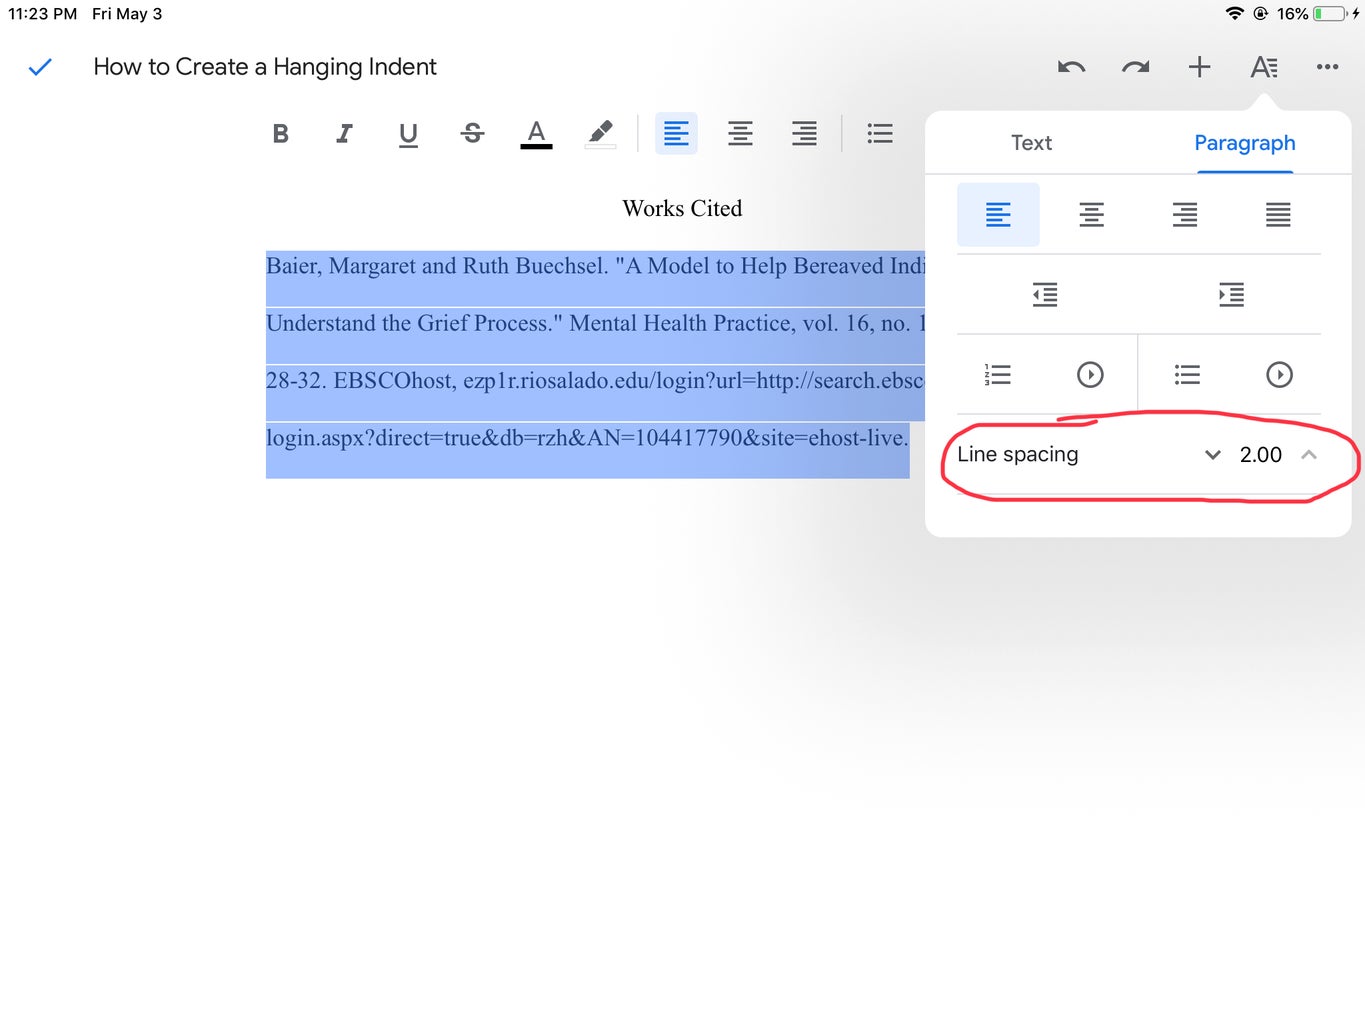
If your line spacing says 1.5, which is the default, you’ll want to tap the up arrow until it reads 2.0 for your citation to be double spaced.
Step 8:
To get out of this option menu, simply tap the center of the screen.
Step 9:
Tap after the last letter in the first line of your citation and the press the “return” button on your keyboard. This should automatically take your cursor to the front of the second line of your citation.
Step 10:
Tap the “A” once again in the top right corner of the screen.
Step 11:
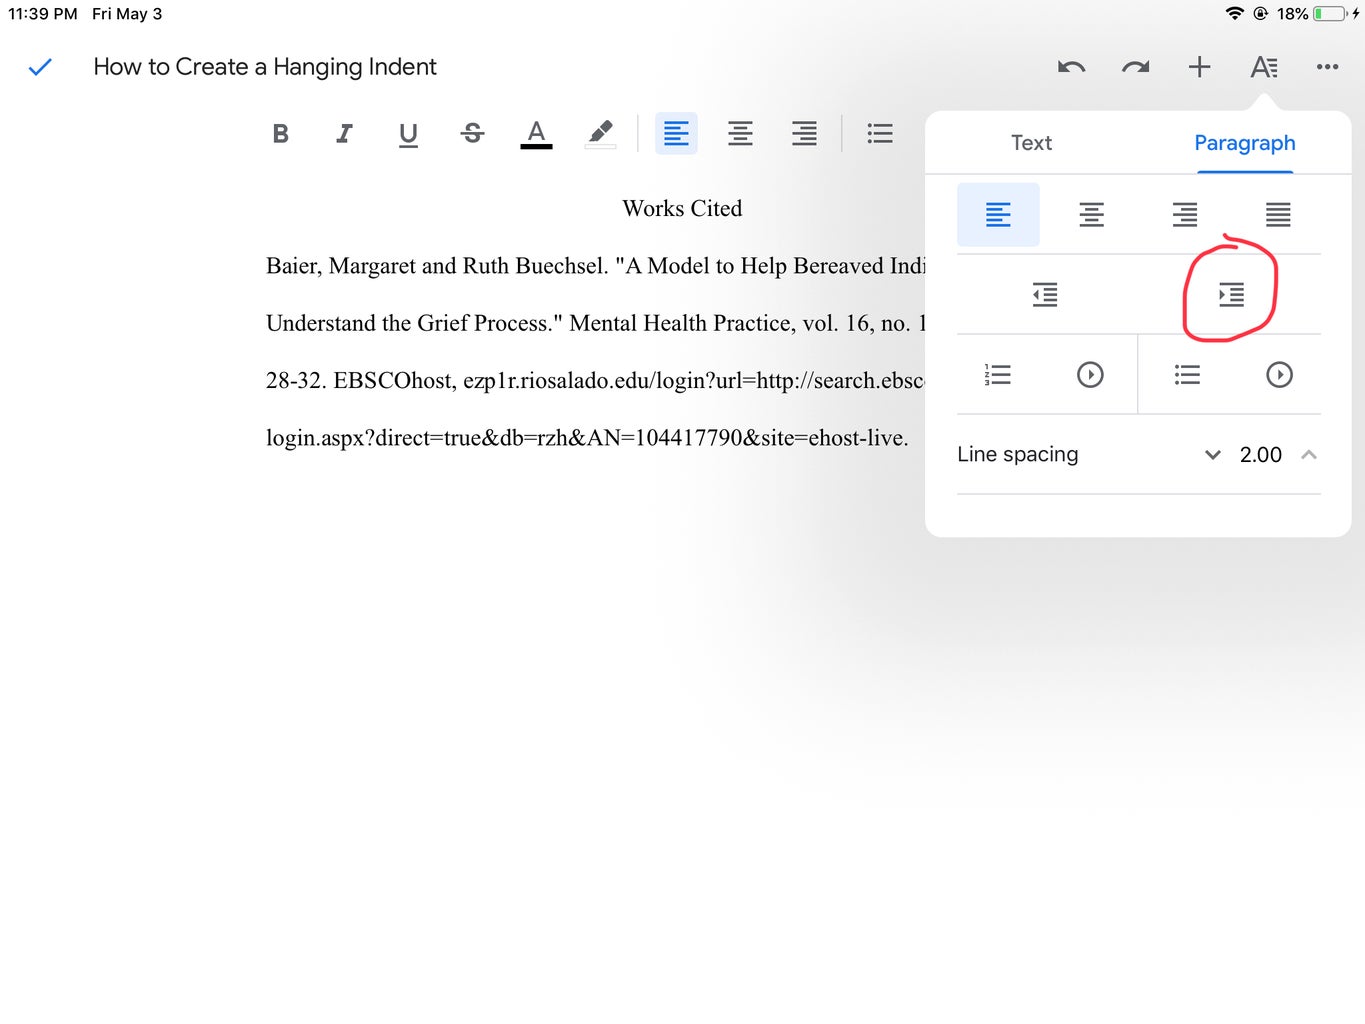
In the paragraph options, you will now press the right indent button.
Step 12:

You will now have a double-spaces hanging indented citation. Once again, to close the paragraph options tap the center of the screen.


