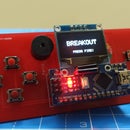
Introduction: How to Make PCB Using Marker
A printed circuit board (PCB) mechanically supports and electrically connects electronic components using conductive tracks, pads and other features etched from copper sheets laminated onto a non-conductive substrate. Components – capacitors, resistors or active devices – are generally soldered on the PCB.
For more projects subscribe my youtube channel [ Subscribe ]
Visit my website for electronics projects and tutorials
Now I am going to instruct how to make a PCB using permanent marker.
Get Started..
Step 1: Components Required
Step 2: Cleaning Copper Clad
Scrub the copper clad with scrubber until it becomes shines.
Draw the layout of the circuit on the copper clad .
Step 3: Etching the PCB
Add sufficient amount of ferric chloride powder to the water and stir it well to make ferric chloride solution for PCB etching.
Place the copper clad in the solution such that layout facing upward and wait for few minutes until etching is completed.
Step 4: Cleaning Marker Traces
After the etching is completed , place the PCB in water and clean it .
Clean the permanent marker traces by using nail polish remover or petrol.
Step 5: Drilling the PCB
Place the PCB on support for raising some height from the table surface, Use PCB hand drill or electrical pcb drill to make holes into the PCB.
Step 6: PCB Making Video
For more projects subscribe my youtube channel [Subscribe]
Feel free to comment.
My recent projects

Participated in the
Circuits Contest 2016


