

Introduction: How to Make a 6 Piece Burr Puzzle With Hand Tools


This puzzle is very easy to make. There are 6 identical pieces, and there are a couple ways to make the cuts for the notches. If you want to make a lot of these puzzles very quickly, you could set up a jig on the bandsaw or table saw.
What's that? You say you don't have a bandsaw or a table saw? Well you're in luck, because I'm going to show you how to do it by hand.
Embedded videos don't always work on mobile devices, so use this link if you can't play it.
Here's what you need:
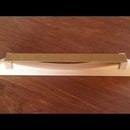
- Square stock (I'm using 1/2" x 1/2")
- Combination Square and/or Speed Square
- Hand Saw (I'm using a Japanese style pull saw)
- Chisel
- Sandpaper
You'll also need some way to hold the work. You'll see the cradle I made in the pictures, and I recommend duplicating it. You could use a vise, but you'll either be working at an uncomfortable angle or risk crushing the corners of your stock.
This is a great project for building up your hand tool skills. The nature of this kind of burr puzzle is such that if your cuts are a little sloppy, it's actually a good thing. If your cuts are too precise, the puzzle will be too tight to work properly. A little loose is better, so it's a good opportunity to practice sawing and chiseling.
Step 1: Make a Template


1/4" plywood or hardboard would probably be better for making the template, especially if you're going to make a lot of these puzzles. I just used what I had at the time - a gift card.
The cuts are laid out at a 55 degree angle. I don't have a protractor, so I used a speed square and a bevel gauge. Since I couldn't reference the correct edge of the square with the gauge, I set my angle at 35 degrees (the complimentary angle).
First I measured 1/2" from the edge of the gift card and drew a line. Then I marked a center line on the card and measured out from there.
There is a small space between the notches - right in the center. This space is very important. If you make the angles toward the center come to a sharp point, the puzzle won't fit together. For this puzzle, I left a little less than 1/16" between the angles (1mm actually). That distance should be proportional to the size of the stock - for a bigger puzzle, leave a bigger space.
I measured half a millimeter on either side of the center line and marked the angles from those points, all the way across to the other edge. I connected the opposite angles from there, and then I measured half the overall length of the piece on either side of the center line.
The length of the pieces is 3.5 x the thickness of the stock, which must be square. In this case I'm using 1/2" stock, so my length is 3.5 x 0.5 = 1.75 (1 3/4") You can scale this project to any size you like.
Once I had my layout on the card, I cut it out and glued it to a scrap piece.
Step 2: Layout the Stock

Use the template (or a bevel gauge) to layout the cuts. I also marked a line through the center of the notch, to make a relief cut with the saw. This makes chiseling a lot easier. Don't cut all the way down to the corners with the saw, because the kerf will have a flat bottom. You want the notches to have a nice square profile to receive their mating pieces. If you're going to use a saw instead of a chisel to cut the notches, the relief cut is obviously unnecessary.
Step 3: Make the Cradle (optional)


If you can figure out another way to hold your work, go for it. I made this step optional because I thought you might be able to come up with an easier way. If so, let me know in the comment section how you did it.
I made this cradle out of scrap. As you can see, I just ripped the edge of one board at 45 degrees and joined it to another. I then attached this cradle to a longer "base" that I could hold down with clamps. The whole assembly is glued and nailed together. I cut out a section in the middle so that my chisel wouldn't dig in to the sides of the cradle. These cuts are at random angles (I'm not taking this cradle to the fair, after all), and I cut out the center with a coping saw.
Step 4: Make the Cuts


I started out making small, progressively deeper cuts going in the same direction until I got close to my pencil line. Then I flipped the stock end for end and worked the other way. If your chisels are good and sharp, you'll get to your depth in 3 or 4 cuts. If not, sharpen up. I feel obligated to say: Please be careful, and keep your free hand in a safe place while doing this. One slip and you're off to the ER. Been there, done that. Got the scars to prove it.
Once you're close, check your fit with a scrap piece. The 55 degree angle on the face of the stock makes the notch a 90 degree angle when viewed from the corner. Once you're satisfied, separate your pieces.
Step 5: Sand and Finish


Too much sanding is a bad thing. The more you sand the looser the puzzle will get. The pieces are too small to sand with power tools anyway. I used a half sheet of 120 grit on a flat surface. If you hold the sandpaper with one hand (or tape it down), you can just rub the pieces against it. You could use a rasp or self adhesive sandpaper on a paint stick for the notches, but again - take it easy or the puzzle will end up too loose.
I like an oil finish for projects like this, but you can certainly use whatever finish you like.
Step 6: Solve the Puzzle
Come on! You've got to at least make an effort to solve it after all that work!
The solution is at the end of the video, but I hope you'll give it a try before you watch.


